
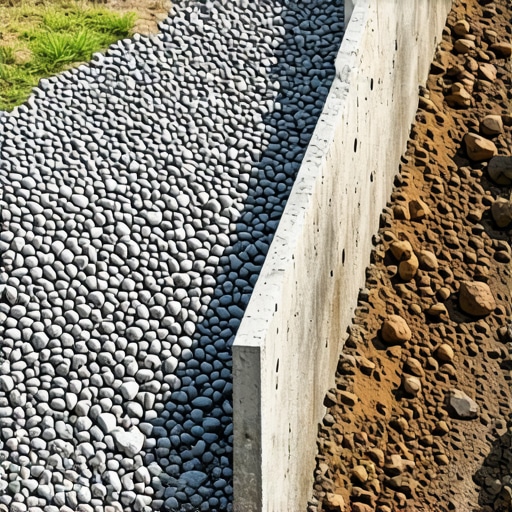
The Day the Mountain Moved: A Forensic Look at Wall Failure
I stood on a hillside in the pouring rain last November, looking at a $85,000 natural stone retaining wall that had literally folded in half. The owner was frantic, pointing at the cracked limestone and blaming the stone’s quality. But as I jammed my inspection probe into the heavy, saturated clay behind the structure, the truth was immediate and damning. The contractor had saved a few hundred bucks by backfilling with native soil instead of clean, 3/4-inch crushed gravel. That wall didn’t fail because the stone was weak; it failed because it was being asked to hold back a liquid mountain. When soil saturates, it loses its internal friction and transforms into a heavy, hydraulic piston. Without a proper drainage chimney of gravel, that pressure has nowhere to go but through your masonry. This is the reality of masonry rescue after disaster: usually, the disaster was built right into the blueprints.
“Water penetration is the single greatest threat to masonry durability, and hydrostatic pressure is the primary driver of structural displacement in earth-retaining systems.” – BIA Technical Note 7
The Physics of Hydrostatic Pressure: Why Dirt Kills Stone
To understand why gravel is non-negotiable, you have to understand the ‘weight’ of water. A cubic foot of dry soil might weigh 100 pounds. Add water to that same cubic foot until it is saturated, and you’ve nearly doubled the load. But it’s worse than just weight. In the North, where we deal with the brutal freeze-thaw cycle, that trapped water expands by 9% when it turns to ice. If that expansion happens inside your wall’s joints or behind its face, you get brick spalling prevention issues where the very face of your masonry literally explodes off. This isn’t just about ‘wet dirt’; it’s about the physics of pore-water pressure. Clean gravel creates ‘void space’—air pockets where water can fall vertically to the footer drain rather than pushing horizontally against the stones. When you ‘butter’ your joints but ignore your backfill, you are essentially building a dam, not a wall.
The Anatomy of a Surviving Wall
Every wall I’ve ever had to perform a brick infill panel repair on had the same flaw: a lack of ‘tooth’ between the masonry and the drainage layer. A proper build requires a 12-inch minimum chimney of gravel wrapped in a geotextile fabric. This fabric acts as a filter, preventing the ‘fines’—the tiny particles of silt and clay—from migrating into the gravel and clogging your drainage. I’ve seen self-leveling masonry lifts used to try and save tilting walls, but if the gravel isn’t there, you’re just putting a leash on a rhino. You also need to consider the footer. If you’re doing a brick veneer installation on a retaining structure, that veneer needs a ledge that allows for moisture to weep out. Without those weep holes, the ‘mud’ (mortar) stays perpetually damp, leading to efflorescence and eventual structural rot.
“The stability of a gravity wall is dependent upon the mass of the units and the integrity of the drainage zone behind them to mitigate lateral earth pressure.” – ASTM C1372 Standard Specification
Historic Brickwork Repointing and the Breathability Myth
In historic brickwork repointing, we talk a lot about ‘breathability.’ The same logic applies to retaining walls. If you use a high-strength Portland cement to point an old wall, you trap moisture. In the context of a retaining wall, if you use a ‘slicker’ to create a tight, hard joint but have no gravel behind it, the water will find its way out by dissolving the lime in your mortar. This leads to honeycombing—where the mortar looks like a sponge from the inside out. We see this often in chimney sweep and repair as well; moisture from the inside needs a way out, or the brick ‘rings’ will fail. If you’re dealing with a historic structure, you must use Type N or O lime-based mortars that allow for thermal expansion without cracking the units themselves.
Modern Innovations and the Hardscape Truth
Some guys today are trying to get fancy with metallic masonry finishes or green roofing masonry integration on top of walls to manage runoff. These are great for aesthetics, but they don’t change the underlying geotechnical requirement for compaction. If you don’t use a plate compactor on your gravel lifts every six inches, the wall will settle unevenly. This creates a ‘cold joint’—a point of weakness where the wall can shear. I’ve seen ‘handyman specials’ where they didn’t even use a tuckpointing machine services to properly pack the joints, leaving gaps where water could enter from the front. Do it once, or do it twice. If you skimp on the aggregate, you might as well start saving for the demolition now. Whether you’re doing a brick veneer installation or a massive dry-stack boulder wall, the gravel is the only thing standing between your investment and a pile of rubble. It’s the silent partner in every masonry job that lasts a century.
How to Install a Proper Retaining Wall Drainage System
1. Excavation and Footer
Dig a trench below the frost line. Install a 6-inch base of compacted 3/4-inch minus gravel. Ensure the base is level to prevent ‘stair-step’ cracking later.
2. Laying the Perforated Pipe
Place a 4-inch perforated drain pipe at the base of the wall, sloped at 1/8 inch per foot toward a daylight exit or storm drain.
3. The Gravel Chimney
As you lay each course of masonry, backfill at least 12 inches of clean 3/4-inch crushed stone (no fines) directly behind the wall units.
4. Geotextile Separation
Place a non-woven geotextile fabric between the gravel drainage zone and the native soil to prevent silt from clogging the drainage path.
5. Final Cap and Compaction
Finish with a solid cap stone and a layer of impermeable clay or a decorative finish to direct surface water away from the backfill zone.