
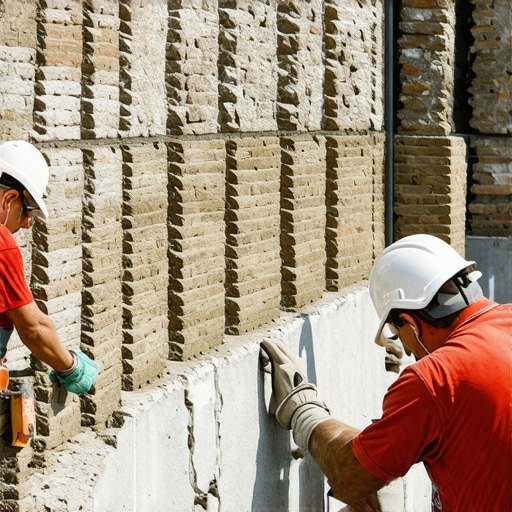
The Anatomy of the Curve: Why Radius Walls Are a Mason’s Ultimate Test
There is a specific kind of dread that settles in the gut of a novice mason when they first stand before a radius wall. Unlike a standard straight-run facade, a curved wall is a living lesson in geometry and physics. My father, a man whose hands felt more like 40-grit sandpaper than skin, used to say that a straight wall is just a job, but a radius wall is an argument with the earth itself. He once took me to a 1920s estate where the garden wall was bowing like a ship’s hull. He didn’t just look at the cracks; he knelt and sighted along the soldier course. If the joints don’t radiate from a singular center point, the structural integrity is a fantasy. He taught me that the secret isn’t in the brick, but in the ‘fan’ of the mud.
When we talk about historic tuckpointing on a radius, we are dealing with varying joint widths. On a curved wall, the outer edge of the head joint is naturally wider than the inner edge. Most modern hacks try to ‘level’ this out with thick layers of Portland cement, which is the fastest way to kill a historic building. The physics of curved masonry requires a deep understanding of historic mortar analysis. If the mortar is harder than the brick, the stress of thermal expansion in a curve—where the masonry is literally pushing against its own geometry—will cause the faces of the bricks to pop off in a process called spalling.
“Water penetration is the single greatest threat to masonry durability, and in curved structures, the concentration of stress at the joints accelerates this degradation.” – BIA Technical Note 7
The Physics of the Radial Joint and Hydrostatic Pressure
In a radius wall, especially those found in stone facade restoration or curved retaining walls, the management of moisture is complex. Water doesn’t just run down; it follows the curve, often pooling in the micro-recesses of the mortar joints. This is why retaining wall weep hole cleaning is not optional. If the weep holes are clogged, the hydrostatic pressure behind a curved wall creates a localized force that can blow out even the most beautiful brick infill panel repair. We see this often in older city infrastructures where the ‘lick-and-stick’ contractors of the 1990s covered original drainage points with non-breathable veneers.
For a true forensic masonry assessment, we now use AI masonry assessment tools to map these stress points. These systems can detect hairline fractures in a radius that the human eye might miss, identifying where the wall is beginning to pivot out of its original plumb. Once identified, the masonry repair services must begin with the delicate removal of the failing mortar. You don’t use a 4-inch grinder like a meat cleaver here. You use small, hand-held pneumatic chisels to ensure you aren’t ‘widening the fan’ of the joint and ruining the radius profile.
The Chemistry of the ‘Mud’: Fiber-Reinforced Mortars and Lime Putty
Let’s talk about the mud. For historic work, we lean heavily on historic mortar analysis to replicate the original lime-based mixtures. Modern Portland cement is too rigid; it lacks the ‘autogenous healing’ properties of lime. When a lime-based mortar develops a hairline crack, moisture reacts with the unhydrated lime to form new crystals, effectively ‘healing’ the crack. In curved walls, which are constantly subjected to shifting lateral loads, this flexibility is the difference between a wall that lasts 100 years and one that fails in five.
However, in some high-stress stone facade restoration projects, we introduce fiber-reinforced mortars. These aren’t your grandfather’s mixes, but they have their place. The micro-fibers act like a skeletal system within the mortar, providing tensile strength that helps the mud resist the pulling forces inherent in a convex curve. This is particularly useful in self-leveling masonry lifts where we are stabilizing a foundation that has settled unevenly along a curved footprint.
“Mortar should always be weaker than the masonry units it binds, acting as a sacrificial element to protect the structural integrity of the stone or brick.” – ASTM C270 Standards
The Process: Buttering the Joint and Striking the Curve
When you are buttering a brick for a radius wall, the application must be asymmetrical. You are building a wedge. We use a hawk and a narrow slicker to pack the mortar deep into the joint. If you leave a void in the center—what we call ‘hollow-pointing’—you are creating a reservoir for the freeze-thaw cycle to do its dirty work. In northern climates, that trapped water expands by 9% when it freezes, acting like a slow-motion grenade inside the wall.
After the mortar has reached the ‘thumbprint hard’ stage, we strike the joint. For a radius, a concave joint is usually best because it sheds water most effectively and compacts the mud against the brick ‘tooth’ for a better seal. Following the strike, facade cleaning is the final step, but it must be done with low-pressure water and non-acidic cleaners. Too many ‘restoration’ experts blast the wall with high-pressure steam, which opens up the pores of the brick and invites the very moisture we just spent weeks trying to lock out.
The Modern Forensic Approach to Old World Curves
Whether we are performing a brick infill panel repair on a curved lintel or a full-scale historic tuckpointing project on a Victorian turret, the goal is always the same: respect the original mason’s intent while using modern forensics to prevent past mistakes. The ‘Old World’ craftsmen didn’t have AI, but they had an intuitive sense of the suction of a brick and the carbonation of the lime. Our job is to marry that intuition with the hard data of fiber-reinforced mortars and precise masonry repair services. If you treat a curved wall like a straight one, you’ve already lost. You have to listen to the stone, understand the pressure of the curve, and never, ever skimp on the drainage. Do it once, do it right, and that wall will be there long after your slicker has rusted away to nothing.