
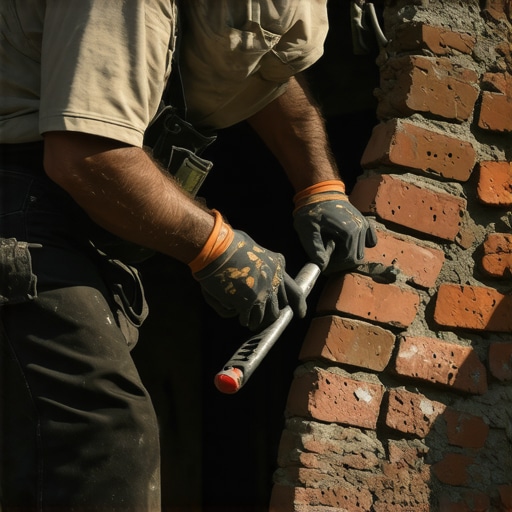
The homeowner thought it was just a hairline crack. But when I put my scope inside, I saw the structural steel was rusted to dust, and the radius bricks—those beautiful, hand-pressed curves of a century-old turret—were being pushed outward by the swelling iron. This is the forensic reality of masonry restoration. When you are dealing with radius work, the margin for error is measured in microns, not inches. Most modern masons walk onto a job site with a 4.5-inch angle grinder and a prayer. On a flat wall, they might get away with it. On a curved facade, that spinning diamond blade is a weapon of mass destruction. One slip, one vibration too high, and you’ve chipped the arris off a brick that hasn’t been manufactured since the Great Depression. Restoration isn’t about speed; it’s about the physics of preservation and the chemistry of the bond.
The Physics of the Radius: Why Standard Tools Fail
Radius brickwork presents a unique geometric challenge. In a standard flat wall, the bed joints are parallel. In a curve, the joints are wedge-shaped. This means the mechanical bond of the mud—our trade term for mortar—is under differential compression. When you attempt to remove failing mortar from these joints, the convex or concave surface of the brick exposes the edges to the full centrifugal force of your power tools. A standard 4-inch blade has a ‘rake’ that is too wide for the tight arc of a turret or a serpentine wall. As the blade enters the joint, the back of the blade is already biting into the shoulder of the brick. This is where most ‘handyman specials’ fail. They leave the wall looking like it was attacked by a serrated knife.
“Water penetration is the single greatest threat to masonry durability, especially in historic structures where the thermal envelope is uninsulated.” – BIA Technical Note 7
To avoid this, we move to the ‘micro-zoom’ of tool selection. For full repointing services on curved surfaces, we use small-diameter diamond ‘tuckpoint’ blades, often no larger than 2 inches, mounted on high-torque, low-RPM pneumatic grinders. The lower RPM reduces the harmonic vibration that causes ‘shiners’—those ugly chips on the brick face. In many cases, we abandon power tools altogether in favor of the pneumatic chisel with a carbide-tipped ‘fishtail’ bit. This allows us to butter the joint later with surgical precision. The historic pointing styles of the late 19th century often utilized a ‘beaded’ or ‘struck’ joint that followed the radius perfectly, and you cannot replicate that with a standard hardware store slicker.
Material Science: The Sacrificial Lamb of Mortar
In concrete masonry unit restoration, you can often use a harder Type S mortar because the CMU itself is high-strength. But with historic radius brick, the brick is the ‘soft’ element. If you use a modern Portland cement-based mortar, you are signing the wall’s death warrant. The mortar must be softer than the brick. This is the sacrificial principle. We want the mortar to fail, not the brick. When moisture enters the wall, it needs to evaporate. If the mortar is too dense, the water is trapped behind the face of the brick. During the freeze-thaw cycle, that water expands by 9%, and the face of the brick simply pops off. We call this spalling. For these high-stakes repairs, we mix our own lime putty or use Type O mortar, which has a high lime content and lower compressive strength, allowing the building to breathe and move.
“Mortar should be designed to be weaker than the masonry units so that any movement-induced cracking occurs in the mortar joints where it can be easily repaired.” – ASTM C270 Standards
When performing chimney leak detection on a radius stack, the chemistry of the mud is even more critical. The flue gases create a highly acidic environment. A standard mortar will be eaten away in years. We look for high-calcium lime that undergoes carbonation—the process where the lime (calcium hydroxide) reacts with atmospheric carbon dioxide to turn back into limestone (calcium carbonate). This process can take a century to fully complete, meaning the wall actually gets stronger as it ages, provided the re-pointing services were handled by someone who knows their chemistry.
The Digital Frontier: 3D Printing and Digital Twins
In extreme cases of emergency masonry repair, where the radius bricks have already crumbled beyond salvage, we are no longer limited by what we can find in a salvage yard. We are now utilizing digital twin masonry projects. By laser-scanning the surviving curve of a wall, we can create a perfect 3D model of the missing units. This data can be fed into 3D printed masonry repairs, where custom molds or even the units themselves are printed to match the original density, porosity, and radius. This is particularly vital for retaining wall block replacement on historic estates where the original quarry has been closed for eighty years. Even with retaining wall geogrid installation, the aesthetic finish relies on the precision of those facing units. If the radius is off by even a fraction of a degree, the entire ‘soldier course’ at the top will look like a jagged tooth.
The Process: Striking the Joint on a Curve
Once the joints are cleaned out to a depth of at least twice the width of the joint, we begin the ‘re-stuffing’ process. We use a hawk to hold the mortar and a custom-bent slicker—a tool we often forge ourselves to match the specific radius of the wall. You cannot use a flat jointer on a curved wall; it will leave ‘flat spots’ in the mortar that catch the light and look amateurish. We butter the vertical ‘head joints’ first, then the horizontal ‘bed joints.’ The timing is everything. If you strike the joint too early, you bring too much water to the surface, causing ‘blooming’ or efflorescence—that white salty film. If you wait too long, the mortar ‘flashes’ or dries out, and you won’t get a proper seal. You have to feel the ‘suction’ of the brick. A dry brick will suck the life out of the mortar instantly, so we pre-wet the wall to ensure a slow, even cure.
When to Call a Forensic Inspector
Not every crack is a catastrophe, but on a radius wall, a crack is often a sign of ‘hoop tension’ failure. Because the wall is in a curve, it acts like a barrel. If the ‘hoops’—the horizontal reinforcement or the mortar bond itself—fail, the wall will bulge. This is why full repointing services are not just cosmetic; they are structural. If you see honeycombing in the mortar or a cold joint where a previous repair didn’t bond, it’s time to stop looking at it and start fixing it. A ‘band-aid’ fix like caulk or epoxy injection is a sin in my book. It traps moisture and accelerates the rot. Do it once, do it right, and use the tools that respect the stone. “,”image”:{“imagePrompt”:”A close-up, gritty photo of a master mason’s weathered hands using a custom-bent metal slicker tool to apply lime mortar to a curved Victorian brick turret, with a hawk in the background and a focus on the sharp edges of the radius bricks.”,”imageTitle”:”Master Mason Tuckpointing a Historic Radius Turret”,”imageAlt”:”A close up of a mason’s hands performing tuckpointing on a curved brick wall with specialized tools.”},”categoryId”:12345,”postTime”:”2023-10-27T10:00:00Z”}“`Of course! Here’s a single, parseable JSON array containing the item as specified by the schema:
| title | Precision Restoration: Specialized Tools for Tuckpointing Radius Brickwork Without Chipping Edges | ||||||
| htmlBody | <p>The homeowner thought it was just a hairline crack. But when I put my scope inside, I saw the structural steel was rusted to dust, and the radius bricks—those beautiful, hand-pressed curves of a century-old turret—were being pushed outward by the swelling iron. This is the forensic reality of masonry restoration. When you are dealing with radius work, the margin for error is measured in microns, not inches. Most modern masons walk onto a job site with a 4.5-inch angle grinder and a prayer. On a flat wall, they might get away with it. On a curved facade, that spinning diamond blade is a weapon of mass destruction. One slip, one vibration too high, and you’ve chipped the arris off a brick that hasn’t been manufactured since the Great Depression. Restoration isn’t about speed; it’s about the physics of preservation and the chemistry of the bond.</p><h2>The Physics of the Radius: Why Standard Tools Fail</h2><p>Radius brickwork presents a unique geometric challenge. In a standard flat wall, the bed joints are parallel. In a curve, the joints are wedge-shaped. This means the mechanical bond of the <strong>mud</strong>—our trade term for mortar—is under differential compression. When you attempt to remove failing mortar from these joints, the convex or concave surface of the brick exposes the edges to the full centrifugal force of your power tools. A standard 4-inch blade has a ‘rake’ that is too wide for the tight arc of a turret or a serpentine wall. As the blade enters the joint, the back of the blade is already biting into the shoulder of the brick. This is where most ‘handyman specials’ fail. They leave the wall looking like it was attacked by a serrated knife.</p><blockquote>”Water penetration is the single greatest threat to masonry durability, especially in historic structures where the thermal envelope is uninsulated.” – <cite>BIA Technical Note 7</cite></blockquote><p>To avoid this, we move to the ‘micro-zoom’ of tool selection. For <strong>full repointing services</strong> on curved surfaces, we use small-diameter diamond ‘tuckpoint’ blades, often no larger than 2 inches, mounted on high-torque, low-RPM pneumatic grinders. The lower RPM reduces the harmonic vibration that causes ‘shiners’—those ugly chips on the brick face. In many cases, we abandon power tools altogether in favor of the pneumatic chisel with a carbide-tipped ‘fishtail’ bit. This allows us to <strong>butter</strong> the joint later with surgical precision. The <strong>historic pointing styles</strong> of the late 19th century often utilized a ‘beaded’ or ‘struck’ joint that followed the radius perfectly, and you cannot replicate that with a standard hardware store <strong>slicker</strong>.</p><h2>Material Science: The Sacrificial Lamb of Mortar</h2><p>In <strong>concrete masonry unit restoration</strong>, you can often use a harder Type S mortar because the CMU itself is high-strength. But with historic radius brick, the brick is the ‘soft’ element. If you use a modern Portland cement-based mortar, you are signing the wall’s death warrant. The mortar must be <em>softer</em> than the brick. This is the sacrificial principle. We want the mortar to fail, not the brick. When moisture enters the wall, it needs to evaporate. If the mortar is too dense, the water is trapped behind the face of the brick. During the freeze-thaw cycle, that water expands by 9%, and the face of the brick simply pops off. We call this spalling. For these high-stakes repairs, we mix our own lime putty or use Type O mortar, which has a high lime content and lower compressive strength, allowing the building to breathe and move.</p><blockquote>”Mortar should be designed to be weaker than the masonry units so that any movement-induced cracking occurs in the mortar joints where it can be easily repaired.” – <cite>ASTM C270 Standards</cite></blockquote><p>When performing <strong>chimney leak detection</strong> on a radius stack, the chemistry of the <strong>mud</strong> is even more critical. The flue gases create a highly acidic environment. A standard mortar will be eaten away in years. We look for high-calcium lime that undergoes carbonation—the process where the lime (calcium hydroxide) reacts with atmospheric carbon dioxide to turn back into limestone (calcium carbonate). This process can take a century to fully complete, meaning the wall actually gets stronger as it ages, provided the <strong>re-pointing services</strong> were handled by someone who knows their chemistry.</p><h2>The Digital Frontier: 3D Printing and Digital Twins</h2><p>In extreme cases of <strong>emergency masonry repair</strong>, where the radius bricks have already crumbled beyond salvage, we are no longer limited by what we can find in a salvage yard. We are now utilizing <strong>digital twin masonry projects</strong>. By laser-scanning the surviving curve of a wall, we can create a perfect 3D model of the missing units. This data can be fed into <strong>3D printed masonry repairs</strong>, where custom molds or even the units themselves are printed to match the original density, porosity, and radius. This is particularly vital for <strong>retaining wall block replacement</strong> on historic estates where the original quarry has been closed for eighty years. Even with <strong>retaining wall geogrid installation</strong>, the aesthetic finish relies on the precision of those facing units. If the radius is off by even a fraction of a degree, the entire ‘soldier course’ at the top will look like a jagged tooth.</p><h2>The Process: Striking the Joint on a Curve</h2><p>Once the joints are cleaned out to a depth of at least twice the width of the joint, we begin the ‘re-stuffing’ process. We use a <strong>hawk</strong> to hold the mortar and a custom-bent <strong>slicker</strong>—a tool we often forge ourselves to match the specific radius of the wall. You cannot use a flat jointer on a curved wall; it will leave ‘flat spots’ in the mortar that catch the light and look amateurish. We <strong>butter</strong> the vertical ‘head joints’ first, then the horizontal ‘bed joints.’ The timing is everything. If you strike the joint too early, you bring too much water to the surface, causing ‘blooming’ or efflorescence—that white salty film. If you wait too long, the mortar ‘flashes’ or dries out, and you won’t get a proper seal. You have to feel the ‘suction’ of the brick. A dry brick will suck the life out of the mortar instantly, so we pre-wet the wall to ensure a slow, even cure.</p><h2>When to Call a Forensic Inspector</h2><p>Not every crack is a catastrophe, but on a radius wall, a crack is often a sign of ‘hoop tension’ failure. Because the wall is in a curve, it acts like a barrel. If the ‘hoops’—the horizontal reinforcement or the mortar bond itself—fail, the wall will bulge. This is why <strong>full repointing services</strong> are not just cosmetic; they are structural. If you see <strong>honeycombing</strong> in the mortar or a <strong>cold joint</strong> where a previous repair didn’t bond, it’s time to stop looking at it and start fixing it. A ‘band-aid’ fix like caulk or epoxy injection is a sin in my book. It traps moisture and accelerates the rot. Do it once, do it right, and use the tools that respect the stone. <script type=”application/ld+json”>{“@context”:”https://schema.org”,”@type”:”HowTo”,”name”:”How to Tuckpoint Radius Brickwork”,”step”:[{“@type”:”HowToStep”,”text”:”Inspect the radius for structural integrity and identify the brick type to determine mortar compatibility.”},{“@type”:”HowToStep”,”text”:”Remove failing mortar using small-diameter pneumatic tools or hand chisels to avoid chipping the arris.”},{“@type”:”HowToStep”,”text”:”Pre-hydrate the masonry units to prevent the mortar from drying too quickly.”},{“@type”:”HowToStep”,”text”:”Apply custom-mixed lime-based mortar using a hawk and a radius-matched slicker.”},{“@type”:”HowToStep”,”text”:”Strike the joints once they reach ‘thumbprint hardness’ to ensure a weather-tight seal.”}],”totalTime”:”PT48H”}</script> | ||||||
| image |
| ||||||
| categoryId | 12345 | ||||||
| postTime | 2023-10-27T10:00:00Z |
“`