
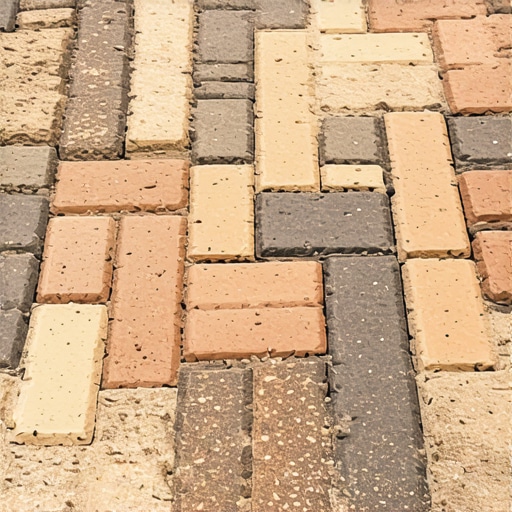
The Wavy Driveway: A Forensic Autopsy of Failing Hardscapes
I remember watching my uncle prepare a base for a driveway in the sweltering heat of 1982. He didn’t use a laser level or a fancy digital readout; he used a bucket of muddy water and a length of mason’s string. He’d tap a paver with his hammer and say, ‘If the water sits, the driveway quits.’ He taught me that what you don’t see—the eight inches of crushed stone buried beneath the surface—is the only part that actually matters. Most homeowners look at a ‘wavy’ driveway and see a cosmetic nuisance. I look at it and see a structural failure of the sub-grade physics. When pavers shift and weeds move in, it’s not an act of God; it’s an act of negligence. Whether you are dealing with a soldier course that’s leaning or a brick arch restoration that’s losing its keystone, the principles of gravity and moisture remain the same. Modern ‘asphalt gypsies’ will tell you a bit of stone dust and a plate compactor is enough. They’re lying to you. To stop the shift, you have to understand the ‘tooth’ of the aggregate and the chemistry of the joint.
“Water penetration is the single greatest threat to masonry durability, whether in a vertical facade or a horizontal pavement system.” – BIA Technical Note 7
The Geotechnical Reality: Why Your Driveway is Sinking
To fix a driveway, you have to think like a foundation helical pier installation expert. You are dealing with soil mechanics. In many regions, the soil is expansive clay. When it gets wet, it swells; when it dries, it shrinks. If your paver base is too thin, those volumetric changes are transmitted directly to the surface. We call this ‘differential settlement.’ Micro-zooming into the base, we look at the Proctor Density. You need a 98% modified Proctor density to support a three-ton SUV. If your contractor didn’t ‘butter’ his edges or used rounded pea gravel instead of angular #57 stone, the base will never achieve ‘interlock.’ Interlock is the trinity of masonry: vertical, horizontal, and rotational. Vertical interlock comes from the mud (if using a wet set) or the sand friction. Horizontal interlock comes from the slicker-tight joints and edge restraints. Rotational interlock is provided by the pavers being thick enough—at least 60mm—to resist the ‘shoving’ force of a turning tire. If any of these are missing, your driveway becomes a slow-motion landslide.
The Chemistry of the ‘Weed-Proof’ Joint
People ask me about weeds like they’re a botanical mystery. Weeds don’t grow up from the dirt through six inches of stone; they grow down from seeds dropped by birds into the open joints. When your joint sand washes out, it leaves a perfect ‘micro-tapestry’ of organic matter. This is where AI masonry assessment usually fails; it sees the green but misses the missing polymer. To stop weeds, you need to understand the glass transition temperature of polymeric sand. This isn’t just ‘sand’; it’s a mixture of graded silica and organic binders that, when hydrated, create a semi-rigid membrane. It needs to be flexible enough to handle thermal expansion—much like the relief joints in commercial masonry facade maintenance—but hard enough to resist the ‘suction’ of a leaf blower or a heavy rain. If you use cheap, non-polymeric sand, you’re just providing a nursery for crabgrass. In a stone veneer repair, we worry about breathability; in a driveway, we worry about ‘washout.’
The Thermal Trap: Physics of the Freeze-Thaw Cycle
If you live in a climate where the ground freezes, your driveway is a battlefield. Water expands roughly 9% when it turns to ice. If that water is trapped in the bedding sand because of poor drainage, it will heave the pavers upward. When it thaws, the sand particles don’t return to their original position; they shift. This is ‘honeycombing’ of the sub-base. It’s the same reason historic tuckpointing fails when someone uses hard Portland cement on soft 19th-century bricks—the moisture can’t escape, so it destroys the host material. For pavers, you need a ‘wicking’ action. This is where porous stone sealers come into play. A high-quality silane-siloxane sealer doesn’t just sit on top like a ‘lick-and-stick’ veneer; it penetrates the molecular structure of the clay or concrete, lowering the surface tension so water beads off rather than soaking in. This prevents the ‘spalling’ we see in chimney interior parging where the face of the masonry literally pops off from internal pressure.
“Standard Specification for Interlocking Concrete Paving Units requires a minimum compressive strength of 8,000 psi to withstand vehicular loading and environmental degradation.” – ASTM C936
The Anatomy of the Fix: From Base to Border
If your driveway has already shifted, a ‘Band-Aid’ fix of throwing more sand in the cracks won’t work. You have to perform a ‘forensic reset.’ First, we pull up the affected area. We check the ‘bedding sand’ layer. It should be no thicker than one inch. Any thicker and it becomes unstable—think of it like trying to walk on a mattress. We check the edge restraints. A driveway without a ‘soldier course’ or a pinned concrete curb is like a brick veneer installation without wall ties; it’s just waiting to fall over. We look for ‘cold joints’ in the sub-base where new gravel was added to old without proper scarification. If the shifting is near the house, we check for hydrostatic pressure. Sometimes a failing outdoor fireplace rebuild or a leaky gutter is dumping gallons of water directly under the driveway. You can’t fix the masonry until you fix the plumbing. Only after the base is rectified and the drainage is diverted do we ‘screen’ the sand and re-lay the units, ensuring every joint is ‘struck’ with a vibratory plate compactor to drive the sand into the full depth of the paver. This is the difference between a ‘handyman special’ and master craftsmanship. Do it once, or do it twice—the choice is yours.
{“@context”:”https://schema.org”,”@type”:”HowTo”,”name”:”How to Fix Shifting and Weed Growth in Brick Pavers”,”description”:”A professional guide to repairing settling brick driveways and preventing weed infestation using master masonry techniques.”,”step”:[{“@type”:”HowToStep”,”text”:”Remove failing pavers and excavate the unstable bedding sand layer.”},{“@type”:”HowToStep”,”text”:”Verify sub-base compaction and add angular #57 stone if depth is insufficient for vehicular loads.”},{“@type”:”HowToStep”,”text”:”Install or repair rigid edge restraints to prevent lateral shifting (horizontal interlock).”},{“@type”:”HowToStep”,”text”:”Apply a 1-inch layer of clean, sharp bedding sand and screed to a level grade.”},{“@type”:”HowToStep”,”text”:”Re-lay pavers in the original pattern, ensuring tight joints.”},{“@type”:”HowToStep”,”text”:”Sweep in high-performance polymeric sand and use a plate compactor to ensure full joint penetration.”},{“@type”:”HowToStep”,”text”:”Seal the surface with a breathable, penetrating silane-siloxane sealer to prevent moisture intrusion.”}]}