
The Anatomy of the Rollercoaster Driveway
I walked onto a site last November in the middle of a sleet storm that felt like needles on the face. The homeowner, a man who had spent a fortune on a custom ‘Old World’ brick driveway, was standing there looking at a three-inch vertical offset near his garage door. He called it a ‘nuisance.’ I called it a forensic scene. When I knelt down and pulled a single 4×8 clay paver, the story became clear. There was no ‘ring’ to the base, no resistance. Below the surface, the bedding sand had turned into a liquid slurry. The contractor hadn’t just cut corners; he had ignored the laws of physics. The structural steel of the adjacent garage was already showing signs of weeping rust, and the foundation was being undermined by the very driveway meant to protect it.
The Physics of the Failure: Why Your Driveway is Moving
Shifting bricks aren’t just an aesthetic failure; they are a symptom of a sub-base in cardiac arrest. In northern climates, we deal with the brutal reality of the freeze-thaw cycle. When water gets trapped in the voids of a poorly compacted base, it obeys the laws of thermodynamics: it expands by 9%. That expansion exerts thousands of pounds of pressure, literally heaving your soldier course out of alignment. If you’ve seen your driveway look like a ‘wavy’ mess, you’re looking at the result of capillary action drawing moisture up into the sub-base, followed by a hard freeze that pops the pavers like a cork from a bottle. This isn’t something a ‘handyman special’ with a bag of playground sand can fix. You need to understand the ‘tooth’ of your aggregate.
“Water penetration is the single greatest threat to masonry durability. Proper drainage and material selection are the only defenses against the destructive power of hydrostatic pressure.” – BIA Technical Note 7
The Micro-Science of the Sub-Base
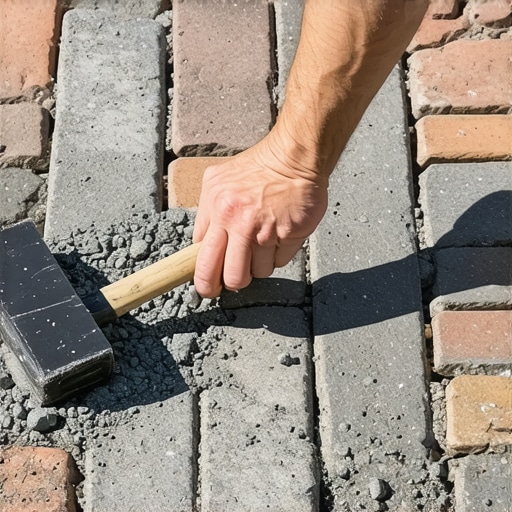
To fix a shifting driveway, we have to talk about the ‘Proctor Density.’ Most DIYers and low-bid ‘lick-and-stick’ crews think throwing some gravel in a hole is enough. It isn’t. You need a graduated aggregate. I’m talking about 3/4-inch minus crushed limestone. The ‘minus’ refers to the fines—the dust that fills the microscopic gaps between the larger stones. When you hit this with a 5,000-pound plate compactor, those stones lock together through mechanical friction. We call this the ‘interlock.’ If your base is just rounded river stone, it’s like trying to build a house on a pile of marbles. It will never achieve the ‘tooth’ required to resist the lateral loads of a three-ton SUV. [image_placeholder_1]
Step 1: Excavation and the Sins of the Past
The first step is always the most painful: you have to dig. You need to go deeper than you think. For a driveway, I don’t settle for less than 10 to 12 inches of sub-base. If you find organic soil—black, mucky ‘muck’—you keep digging until you hit virgin clay or hardpan. If you leave that organic material down there, it will decompose, create a void, and you’ll be right back here in three years looking at failing retaining wall repair options because your driveway took the wall down with it. Once you’re at depth, you lay down a woven geotextile fabric. This isn’t the cheap weed barrier you buy at a big-box store; this is a structural membrane that prevents the expensive gravel from migrating into the soft soil below. It’s the ‘skin’ that holds the skeleton together.
Step 2: Compaction and the Rule of Lifts
You don’t just dump 12 inches of gravel and run a vibratory plate over the top. That only compacts the top two inches, leaving the bottom ten as soft as a sponge. This leads to honeycombing within the base. You work in ‘lifts’—four-inch layers at a time. Wet it down slightly to lubricate the particles, then run the compactor until the machine literally starts to bounce off the surface. That’s the sound of a ‘tight’ base. If the machine ‘sinks’ or ‘plows,’ you have too much moisture or poor material. This is where the forensic eye comes in. You can feel it through your boots. A solid base should feel like concrete, even before you lay a single brick.
Step 3: The Bedding Layer and the ‘Slicker’ Truth
Now we talk about the bedding sand. This is where the amateurs fail. They use too much sand. You only want 1 inch—max. This isn’t for structure; it’s for leveling. We use an angular, manufactured sand (ASTM C33). If you use rounded sand, the pavers will ‘slide’ over the top of the base like they’re on ball bearings. You screed it out perfectly, and you do NOT walk on it. You want the ‘suction’ of the sand to hold the brick. If you’ve ever had to perform crumbling mortar joint repair on a brick wall, you know that the bond is everything. In a driveway, that bond is purely mechanical friction and sand-lock.
“Paving units shall be placed in the specified pattern with joints as tight as possible. The sand for the joints shall be dry and free-flowing to ensure complete filling of the voids.” – ASTM C936 Standards
Step 4: Setting the Soldier Course and the Edge Restraint
Your driveway is a pressurized system. Every time a car turns its wheels, it applies lateral torque. Without a rock-solid edge restraint, the pavers will migrate outward. I always recommend a soldier course—a row of bricks laid perpendicular to the edge—set into a reinforced concrete haunch. Forget those plastic spiked edges; they heave in the frost. A real mason uses a ‘mud’ bed for the edges. We ‘butter’ the sides of the perimeter units to ensure they never move. This is the same principle used in brick lintel replacement: if the edges don’t hold, the center will eventually collapse.
Step 5: Polymeric Sand and the Chemistry of Longevity
Once the bricks are set, you sweep in polymeric sand. This isn’t just sand; it’s sand mixed with high-tech polymers that turn into a flexible ‘glue’ when activated with water. It prevents washouts and stops ants from turning your driveway into a Swiss cheese of tunnels. But here’s the kicker: if you don’t clean the dust off the surface before you wet it, you’ll end up with a hazy ‘poly-fog’ that ruins the look of the brick. It’s like tile grouts on masonry; if you mess up the cleanup, you’ve ruined the job. You want that sand to sit 1/8th of an inch below the chamfer of the brick. This allows for the ‘breathing’ of the system while maintaining the interlock.
When Shifting Bricks Mean Structural Disaster
Sometimes, shifting bricks are just the tip of the iceberg. If you see a ‘stair-step’ crack running from your driveway into your garage foundation, you aren’t looking at a paver problem; you’re looking at a settlement issue. This is where foundation slab jacking or helical piers come into play. In the modern era, I’ve started using AI masonry assessment tools—using high-resolution photogrammetry to track movement over time. If that crack is widening, you have a geotechnical failure that a plate compactor won’t fix. You might be looking at a total foundation overhaul. Similarly, if your pavers are shifting because an old modular retaining wall is bowing, you have to address the wall’s drainage before you ever touch the driveway. You can’t put stone veneer over brick and call it a repair if the underlying structure is rotating into the neighbor’s yard.
The Forensic Conclusion: Do It Once
My grandfather used to say that a man who does a job twice is a man who didn’t respect the material the first time. Fixing shifting bricks isn’t about the bricks—it’s about the earth beneath them. It’s about understanding the ‘cold joint’ between the driveway and the garage. It’s about ensuring your tuckpointing is solid on the adjacent walls so water doesn’t infiltrate the sub-grade. If you treat your driveway like a structural slab rather than a decorative carpet, it will outlive you. If you treat it like ‘lick-and-stick’ veneer, the first hard freeze of the winter will be your undoing. Buy the right gravel, rent the big compactor, and don’t be afraid to get a little ‘mud’ on your boots. That’s how you build a legacy in stone.