The Wavy Walkway: A Forensic Autopsy of Failure
I was standing on a property in the rust belt last November, looking at a path that resembled a topographical map of the Himalayas. The homeowner was convinced they needed to haul three tons of clay-fired pavers to the landfill and start over. I knelt down, pulled a single unit from the middle, and smelled the earth. It wasn’t the brick that failed; it was the physics of the base. Most people see a sunken walkway and think ‘settlement.’ I see a failure of compaction and a total disregard for the 9% expansion of water during the freeze-thaw cycle. My old mentor used to say that a brick is only as good as the bed it sleeps in. He would make us hand-tamp every square inch until our forearms vibrated in our sleep. If you can’t hear the earth ‘thud’ with a certain resonance, you haven’t achieved the density required to fight the hydraulic pressure of a Canadian winter. We aren’t just laying stones; we are engineering a drainage plane that happens to be aesthetically pleasing.
“Water penetration is the single greatest threat to masonry durability, and its management begins at the sub-grade level where hydrostatic pressure originates.” – BIA Technical Note 7
The Micro-Physics of why Pavers Sink
To save a walkway without buying new materials, you have to understand why the old ones moved. In northern climates, the enemy is the pore pressure within the soil. When you have a high percentage of ‘fines’ in your bedding sand, those microscopic particles hold onto moisture through capillary action. When the temperature drops, that water freezes and expands, pushing the pavers upward. When it thaws, the soil loses its structural integrity, and the bricks sink into the resulting slurry. This creates ‘honeycombing’ in the sub-base where voids form, leading to the dreaded wavy pattern. If you’re managing commercial masonry maintenance, you know that this isn’t just an eyesore; it’s a liability. The solution isn’t more material; it’s the re-engineering of the existing material. We are going to excavate, screen, and re-compact the original base, focusing on the angularity of the aggregate. Round sand grains act like ball bearings under a soldier course, causing lateral shifting. You want crushed, angular fines that lock together like a jigsaw puzzle.
The Restoration Strategy: Step-by-Step Forensic Recovery
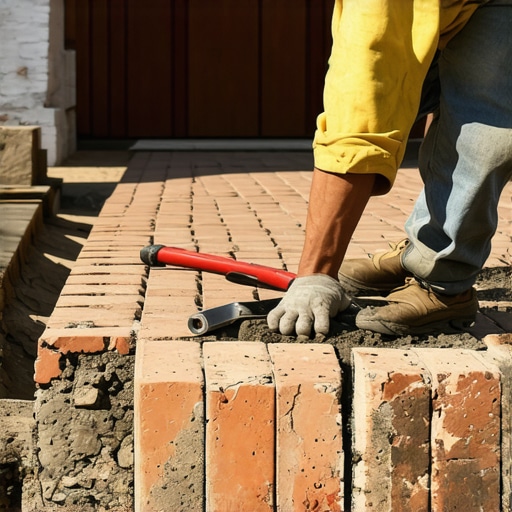
First, we lift the pavers. This is where you inspect for freeze-thaw damage restoration needs. If the brick faces are spalling, they’ve been saturated too long. But if they are solid, they are ready for another century of service. As we pull them, we categorize them. The soldier course units—those set on end at the border—usually have the most friction-fit stability and can be reused as the primary anchor. While the path is open, it’s the perfect time to look at the surrounding landscape. Is there a retaining wall drainage upgrade needed nearby? Often, a sunken path is just the symptom of a larger hydrostatic issue coming off a slope. If you don’t fix the re-pointing services on the adjacent stone wall repair, the runoff will just undermine your new work in three seasons.
“The stability of a segmental pavement system is dependent upon the mechanical interlock of the units and the shear strength of the bedding layer.” – ASTM C936 Standards
The Chemistry of the ‘Mud’ and the Base
Once the old pavers are staged, we address the sub-grade. We aren’t just throwing dirt around. We are looking for the ‘optimum moisture content’ for compaction. If the soil is too dry, the particles won’t slide into a dense configuration. If it’s too wet, you’re just making a cold joint of mud that will shrink. We use a plate compactor, but we do it in ‘lifts’ of no more than two inches. This is where BIM masonry projects often miss the mark—the digital model assumes uniform compaction, but the tactile reality of the site often reveals soft spots of organic matter that must be removed. After the base is hammered home, we apply a thin layer of bedding sand. Do not ‘butter’ the bottom of the pavers with mortar. This is a flexible system. The ‘tooth’ of the sand is what holds the brick. When you re-install, you are ‘screeding’ the sand to a precise level, accounting for a 1/4 inch ‘compaction set’ once the bricks are vibrated into place.
Advanced Restoration: From Chimneys to Arches
While you’re working on the ground, look up. A house is a system. If you see cracks in the path, check the chimney flashing repair or the brick arch restoration over the front door. Structural issues are rarely isolated. If the chimney is leaking, water is running down the wall cavity and saturating the foundation, which then affects the moisture levels under your walkway. We often see structural repointing needed on the water table of the house at the same time the walkway sinks. If the homeowner wants a modern touch, we can discuss metallic brick colors application for the borders, but the core of the work remains the same: suction and friction. You want the brick to feel like it’s part of the earth, not just sitting on it. When we finish, we sweep in polymeric sand—not the cheap stuff from the big box store, but a high-performance binder that prevents honeycombing and weed growth while remaining flexible enough to breathe with the seasons.
The Verdict: Do It Once or Do It Twice
Saving a walkway is about respecting the labor of the men who laid it the first time while correcting the geological mistakes they made. Using a slicker to finish any adjacent re-pointing services ensures that the entire facade is watertight. Don’t fall for the ‘lick-and-stick’ mentality of just pouring a concrete pad over the mess. That creates a vapor barrier that traps moisture and leads to massive structural failure. True masonry is about managing the relationship between stone, water, and gravity. If you get the physics right, you don’t need new bricks. You just need a better understanding of the ones you have. “, “image”: {“imagePrompt”: “A close-up, gritty photo of a master mason’s weathered hands using a pointed trowel to lift a vintage clay brick from a wavy, sunken walkway. The image should show the detailed texture of the damp earth and the granular bedding sand beneath the brick, with a focus on the ‘tooth’ of the masonry materials.”, “imageTitle”: “Forensic Masonry Inspection of Sunken Walkway”, “imageAlt”: “A master mason inspecting the sub-base of a sunken brick path”}, “categoryId”: 0, “postTime”: “”}