
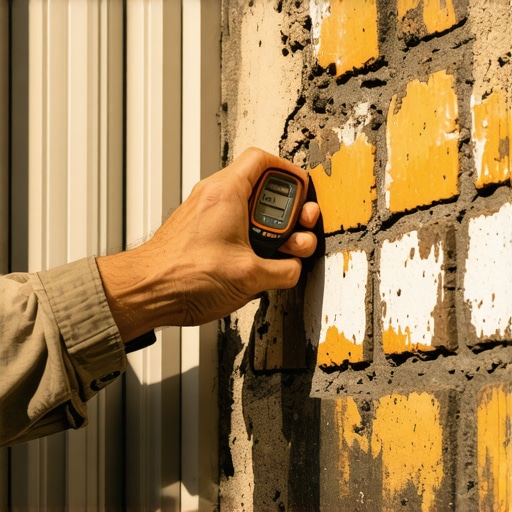
The Invisible Enemy: Why Moisture Detection in Masonry is Forensic Science
I remember the first time I realized that brick wasn’t solid. I was seven years old, watching my father demo a 1920s chimney. He pointed to a brick that looked perfectly fine from the outside, but when he struck it with his hammer, it didn’t shatter; it disintegrated into a wet, salty powder. The homeowner thought it was just a hairline crack on the surface. But when I put my scope inside that cavity decades later in my own practice, I saw the structural steel was rusted to dust. That is the reality of masonry. It breathes, it drinks, and if you don’t know how to read the signs, it dies from the inside out. Most people look at a wall and see a barrier. I look at a wall and see a complex vascular system of capillaries, pore structures, and thermal bridges that are constantly fighting a war against hydrostatic pressure and the relentless expansion of water molecules.
“Water penetration is the single greatest threat to masonry durability, accounting for more than 90% of all masonry failures.” – BIA Technical Note 7
The Physics of the Pore: Why Moisture Hides
To understand hidden moisture, you have to understand the ‘tooth’ of the material. Whether we are talking about historic mortar analysis or modern modular retaining walls, the physics remains the same. Brick is essentially a hard sponge. Through a process called capillary suction, water is pulled into the microscopic pores of the masonry unit. In a North/Freeze-Thaw environment, this is where the tragedy begins. When that trapped water hits 32 degrees Fahrenheit, it expands by approximately 9%. If the mortar is too hard—like a modern Type S Portland cement used on a soft 19th-century brick—there is nowhere for that pressure to go. The face of the brick simply pops off. This is called spalling, but the moisture that caused it was hiding there for months, if not years, before the first flake of clay fell.
The Commercial Parapet Wall: A Case Study in Hidden Decay
When I’m called for commercial parapet wall repair, I don’t start with the bricks; I start with the flashing and the ‘mud.’ A parapet is exposed to the elements on three sides, making it the most vulnerable part of any commercial structure. Hidden moisture here often manifests as efflorescence—that white, powdery salt staining. But the real danger is subflorescence. This is when the salt crystals recrystallize below the surface of the brick. You won’t see it until the masonry begins to crumble like a stale cookie. Detecting this requires more than just a visual check. We use thermal imaging to find ‘cool spots’ where evaporation is occurring behind the veneer, and sometimes robotic masonry repair sensors to gauge the density of the internal core without tearing the whole thing down. If the flashing is compromised, the water travels down the wall, rotting the wall ties and leaving the entire facade unanchored.
Identifying the ‘Ghost’ in the Chimney
Chimneys are the most abused masonry structures on any property. A chimney crown repair or chimney cap replacement is often treated as a cosmetic fix, but it’s a critical surgical intervention. When a crown cracks, it acts as a funnel. Water seeps into the flue liner and the surrounding brickwork. Look for ‘damp-shadowing’ on the interior plaster or firebox. This isn’t just a leak; it’s a saturation of the masonry mass. If you see moss or algae growth, you’re beyond a simple fix. The ‘wicking’ effect has taken hold. In these cases, tuck pointing services aren’t enough if you’re not also addressing the chimney crown repair. You have to stop the source, then use a slicker to strike the joints properly to ensure water sheds away from the mortar, rather than sitting on a ledge.
“Mortar shall be classified as Type M, S, N, O or K based on its compressive strength and its ability to accommodate movement and moisture vapor transmission.” – ASTM C270 Standard Specification for Mortar for Unit Masonry
Foundation Slab Jacking and Soil Hydrology
Hidden moisture isn’t always coming from the sky; sometimes it’s coming from the dirt. When I see a stair-step crack in a foundation, my mind goes straight to the soil. Hydrostatic pressure builds up behind the wall, pushing against the masonry until it yields. If the soil is heaving due to excessive moisture, foundation slab jacking might be necessary to stabilize the structure. We use high-density polyurethane injections to lift the slab, but the moisture problem persists unless you address the retaining wall drainage upgrade. Without weep holes or a proper gravel base (at least 8 inches, not the 4-inch ‘handyman special’), the wall is just a dam waiting to break. I’ve seen modular retaining walls lean four inches out of plumb because the contractor thought a little dirt behind the block was ‘good enough.’ It never is.
The Solution: Advanced Adhesives and Historic Precision
In the modern era, we have advanced masonry adhesives that allow for incredible bonding, but they can be a double-edged sword. If you seal a wall that already has moisture inside, you’ve just built a greenhouse for rot. This is why historic mortar analysis is non-negotiable for older buildings. You need a lime-based mortar that is ‘sacrificial’—it must be softer and more permeable than the brick so that the moisture evaporates through the mortar joint, not the brick face. When we perform tuck pointing services, we aren’t just ‘buttering’ the joints with new mud; we are restoring the building’s ability to breathe. We grind out the old, failing material to a depth of at least twice the width of the joint, ensuring the new mortar has the ‘tooth’ it needs to grab hold and stay there for the next fifty years. Don’t let a slick-talking contractor tell you a coat of waterproof paint will solve your moisture issues; that’s the fastest way to turn a structural wall into a pile of rubble. You have to respect the physics of the stone, the chemistry of the lime, and the inevitable reality that water always wins unless you give it a clear path out.