
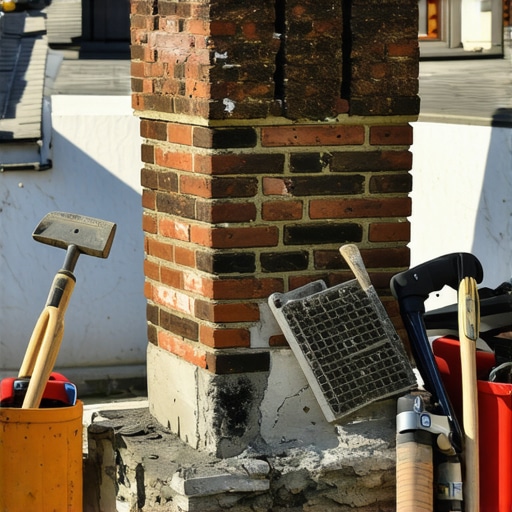
The Anatomy of a Dying Chimney: A Forensic Investigation
The homeowner looked up at the sky-line of her 1920s Tudor and saw what she thought was a bit of ‘character’—some dusting of red powder on the roof tiles. But when I sent the drone chimney inspections unit up to the pot, the 4k feed told a different story. The stack wasn’t just old; it was exfoliating. I saw the faces of the headers and stretchers shearing off in sheets, exposing a raw, honeycomb-like interior. This is the ‘death rattle’ of historic masonry. When you see the face of a brick on the ground, you aren’t looking at a cosmetic flaw; you are looking at the result of a microscopic war between water and chemistry. Most guys would tell you to just slap some hardware-store sealant on it and call it a day. Those guys are the reason I have a backlog of chimney rebuild services. They don’t understand the ‘tooth’ of the material or the ‘suction’ of a hundred-year-old clay unit.
“Water penetration is the single greatest threat to masonry durability.” – BIA Technical Note 7
To fix a spalling chimney, you have to understand why it’s happening. In the world of forensics, we look at the freeze-thaw cycle. Historic bricks, fired in kilns that didn’t have the digital precision of today, are relatively soft. They are porous, like a sponge. When rain hits that chimney, the brick drinks. That’s fine, as long as the brick can breathe. But when some ‘handyman’ comes along and performs cracked brick wall repair using modern, high-PSI Portland cement, he creates a tomb. The modern mortar is harder than the old brick. When the temperature drops and that trapped water expands by exactly 9% in volume, it has nowhere to go. The mortar won’t budge, so the brick face—the ‘fire-skin’—is pushed outward until it snaps. That is spalling. It is a mechanical failure caused by an architectural mismatch.
The Physics of the Pore: Why Historic Brick is Different
Let’s micro-zoom into the material science. A historic brick is a capillary network. Under a microscope, it looks like a series of interconnected tunnels. When we talk about brick efflorescence removal, we aren’t just cleaning off white stains; we are managing the migration of soluble salts through these tunnels. If you use a non-breathable coating or an incorrect advanced masonry adhesives application, those salts crystallize just beneath the surface—a process called subflorescence. The pressure of those crystals growing is enough to shatter the clay structure from the inside out. This is why historic tuckpointing isn’t just about aesthetics; it’s about choosing a sacrificial mortar. The mortar must be softer and more permeable than the brick so that the water and salts exit through the joints, not the brick face.
When I’m on a hawk and trowel, mixing a fresh batch of ‘mud,’ I’m looking for a specific consistency—not too wet, not too dry. For a historic stack, we’re usually looking at a Type O or a Lime-rich Type N. We avoid the high-strength stuff because we need that ‘sacrificial’ quality. If the building moves—and buildings always move—the mortar joints should take the stress and develop tiny, self-healing hairline cracks, rather than forcing the brick to crack. That is the fundamental law of restoration masonry.
The Restoration Process: From Diagnosis to Full Repointing Services
The first step in any brick quoin repair or chimney restoration is the removal of the failed material. You don’t just ‘skim’ over the old stuff. You have to grind out the joints to a depth of at least twice the width of the joint, or until you hit sound mortar. On a chimney, this is grueling work. You’re fighting the wind, the height, and the dust. I’ve seen guys ‘butter’ the edges of the bricks and call it a day—we call that ‘pointing’ (and not the good kind). True full repointing services require packing the ‘mud’ in layers. We use a slicker or a jointer tool to compact the mortar into the back of the joint. If you leave a void—a honeycombing effect—you’re just creating a new reservoir for water to sit and freeze.
If the spalling is localized to a few units, we perform a brick column repair technique where we ‘dentist’ out the bad bricks. We find a matching reclaim brick—often from the same era to ensure the expansion coefficients match—and we set it in. For clients who want a specific aesthetic, we might use metallic brick colors application to tint the new mortar or the repair patches so they don’t stick out like a sore thumb against the soot-stained originals. It’s about preserving the ‘patina’ while restoring the structural integrity.
“The use of mortar of a higher strength than the masonry units can lead to the deterioration of the units themselves.” – ASTM C270 Standard Specification
The Danger of the ‘Quick Fix’ and the Soldier Course Trap
I recently saw a soldier course at the top of a chimney—those are the bricks standing vertically—that was literally held together by nothing but gravity and a prayer. The previous contractor had used a silicone caulk to ‘fix’ the cracks. Silicone on masonry is a crime. It traps moisture, detaches from the porous surface, and leaves a sticky residue that prevents real mortar from ever bonding again. When we do a chimney rebuild services project, we strip it down past the cold joint. We ensure the flue liners are intact because the heat from the fireplace causes thermal expansion. If the liner is cracked, the heat hits the masonry directly, accelerating the drying of the mortar and leading to ‘flash setting’ where the mud turns to powder before it can chemically bond.
We also have to address the ‘crown’—that concrete slab on top. Most are just a thin layer of ‘mud’ smeared on top. A real crown has an overhang and a drip edge. Without it, water just runs down the face of the brick quoin repair, saturating the masonry and starting the spalling cycle all over again. It’s a system, not just a pile of rocks. If one part of the system—the drainage, the flue, or the mortar—fails, the whole stack is on a countdown to collapse.
Preserving Value vs. Destroying History
When you’re dealing with a chimney that has stood for a century, you aren’t just a contractor; you’re a steward. The difference between a $2,000 ‘patch job’ and a $15,000 historic tuckpointing project is about fifty years of lifespan. A ‘patch’ will fail in three seasons. A proper restoration, using lime-based mortars that allow for vapor permeability, will outlive the person who paid for it. Don’t let a ‘handyman’ with a ladder and a bag of Premix-80 ruin the ‘tooth’ of your historic home. If the mortar doesn’t ‘ring’ right when you strike the joint, it’s not done right. In this trade, you either do it once, or you do it twice—and the second time always costs triple because I have to clean up the first guy’s mess.
{“@context”:”https://schema.org”,”@type”:”HowTo”,”name”:”How to Fix Spalling Bricks on a Historic Chimney Stack”,”step”:[{“@type”:”HowStep”,”text”:”Conduct a drone chimney inspection to identify the extent of the spalling and internal flue damage.”},{“@type”:”HowStep”,”text”:”Remove damaged mortar joints to a depth of 1 inch using hand tools or specialized grinders, ensuring no damage to the brick edges.”},{“@type”:”HowStep”,”text”:”Clean the masonry surface to remove efflorescence and loose debris using a low-pressure water wash.”},{“@type”:”HowStep”,”text”:”Replace severely spalled bricks with reclaimed units that match the original’s density and color.”},{“@type”:”HowStep”,”text”:”Apply lime-based mortar (Type O or N) in layers, compacting each layer with a slicker to ensure no voids.”},{“@type”:”HowStep”,”text”:”Tool the joints to match the historic profile (tuckpointing) to ensure proper water shedding.”}]}