
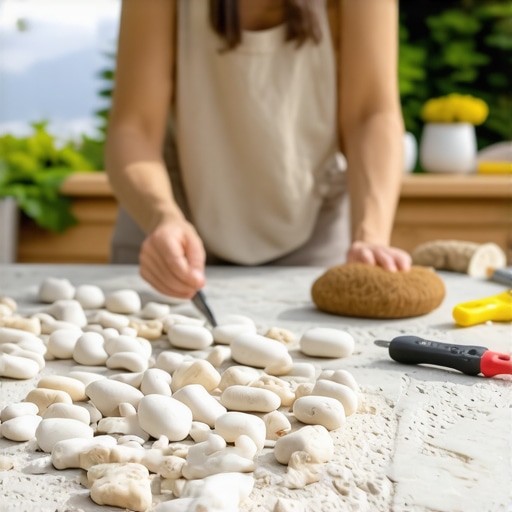
The Forensic Scene: When the ‘Dream Kitchen’ Becomes a Rockslide
I recently walked onto a patio in Scottsdale where a $30,000 outdoor kitchen was literally shedding its skin. The homeowner was distraught; every time they fired up the high-BTU professional grill, two or three more pieces of expensive fieldstone would clatter onto the travertine floor. To the untrained eye, it looked like a bad batch of glue. To me, it was a classic case of thermal shock and ‘starved’ mortar joints. I pulled a loose stone away with my bare hands, and the back of it was as clean as the day it was quarried. There was no ‘tooth,’ no mechanical bond, just a thin, brittle film of dried-out mud. This wasn’t just a failure of materials; it was a failure to respect the laws of thermodynamics in masonry repair services.
Most modern outdoor kitchens are built using ‘lick-and-stick’ methods. Contractors throw up a frame of cement board or CMU, slap some thin-set on the back of a stone, and press it on like a postage stamp. But when you introduce a 50,000 BTU burner into that equation, the substrate expands at a different rate than the stone veneer. This differential movement, known as the coefficient of thermal expansion, creates a shear stress at the bond line. Without the right fire-rated masonry installation techniques, that bond is doomed to fail. We aren’t just building a wall; we are building a heat exchanger.
“Adhesion of thin-set mortars is significantly impacted by the rate of moisture loss during the curing phase, particularly in high-ambient-temperature environments.” – ASTM C270 Standard Specification for Mortar for Unit Masonry
The Physics of the Bond: Why ‘Butter’ Matters
When we talk about fixing loose stones, we have to talk about the ‘suction’ of the stone. A dry, dusty stone will suck the moisture out of your mortar before the chemical hydration process can even begin. This is what we call ‘burning’ the mud. To get a permanent fix, you need to understand the micro-porosity of the material. I always tell my apprentices to ‘butter’ the stone properly. You don’t just glob it on; you ‘burn’ a thin layer of fiber-reinforced mortars into the back of the stone first with the flat side of your trowel to fill those microscopic voids. Only then do you add your notched layer for the mechanical bond. This creates a monolithic structure rather than two separate surfaces just touching each other.
In high-heat areas, specifically near the firebox or grill insert, standard Type S mortar won’t cut it. You need a fire-rated masonry installation that can handle the cycling of temperatures without calcifying. This is where the chemistry of fiber-reinforced mortars comes into play. The micro-fibers act as internal ‘rebar,’ arresting the propagation of micro-cracks that form during the rapid expansion and contraction cycles of a Texas summer or a searing grill. If you’re seeing ‘honeycombing’ in your mortar bed, it means the mix was too dry or wasn’t consolidated properly against the substrate.
The Role of Digital Twins and Historic Analysis
It sounds like science fiction to some old-timers, but digital twin masonry projects are changing how we approach forensic repairs. By creating a digital model of the structure, we can simulate the thermal stresses and identify exactly where the expansion joints should have been placed. Often, the reason a stone pops is that there’s no ‘give’ in the system. A long run of stone veneer needs relief. Without it, the wall acts like a bow being pulled back; eventually, something has to snap, and it’s usually the bond line of the weakest stone.
When I’m called in for a historic mortar analysis on older outdoor structures, I often find that the original masons used lime-rich mixes that were ‘self-healing.’ Modern Portland-heavy mixes are incredibly strong but also incredibly brittle. For a repair to last, the new mortar must be compatible with the old in terms of compressive strength and vapor permeability. If you put a hard, modern mortar into a soft, historic stone wall, the stone will be the sacrificial element. It will spall and shatter because the mortar refused to budge.
Advanced Techniques: From Metallic Finishes to Sustainable Cutting
We are seeing more metallic masonry finishes in modern outdoor designs, which adds another layer of complexity. These finishes often have different surface tensions, making traditional adhesion difficult. In these cases, we have to use specialized bonding agents or even mechanical ties to ensure the ‘skin’ stays on the ‘bones.’ Furthermore, the industry is moving toward sustainable block cutting, reducing waste but also changing the texture of the stone we receive. A machine-cut stone has a much smoother back than a hand-split one, meaning we have to manually create ‘tooth’ using a diamond grinder or a bush-hammering tool to ensure the mud has something to grab onto.
“The presence of water behind masonry veneers is the primary catalyst for bond failure and efflorescence.” – BIA Technical Note 27
Water is the silent killer. If your outdoor kitchen doesn’t have a proper ‘drip edge’ or if the brickwork pointing styles are concave and holding water, that moisture will migrate behind the stone. In colder climates, this leads to the dreaded freeze-thaw cycle. Water expands by 9% when it turns to ice. That’s enough hydraulic pressure to pop a 50-pound slab of granite right off the wall. This is why tuckpointing machine services and proper joint finishing are not just about aesthetics; they are about shedding water away from the bond line. I always prefer a ‘weathered’ or ‘v-joint’ for outdoor stone because it compacts the mortar and creates a natural ramp for water to run off.
The Restoration Reality: Fixing it Right
If you’re staring at a pile of loose stones, don’t just reach for a tube of construction adhesive. That’s a ‘handyman special’ that will fail by next season. The forensic fix involves: 1. Mechanical cleaning of the substrate to remove all old, calcified mortar. 2. Saturating the stone to Surface Saturated Dry (SSD) condition to prevent ‘moisture robbery.’ 3. Using a polymer-modified, fiber-reinforced mortar. 4. Ensuring proper chimney damper repair if the kitchen includes a wood-fired oven, to manage heat flow correctly. It’s about ‘buttering’ the stone, ‘striking’ the joint with a slicker or jointer tool, and giving the assembly the 28 days it needs to fully hydrate and reach its design strength. Do it once, do it right, or keep your mason on speed dial.