
The Forensic Reality of the Bowing Wall
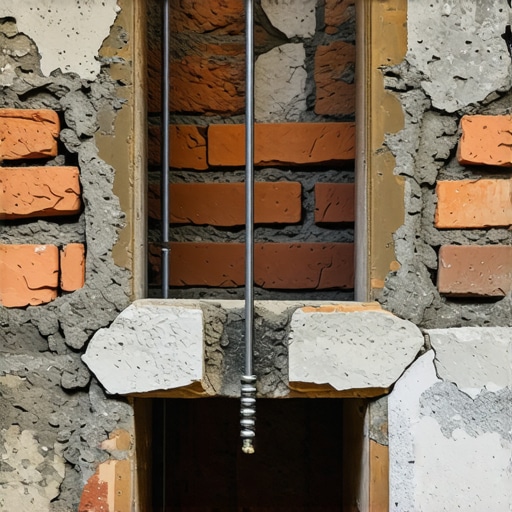
The homeowner called me out because they noticed a ‘slight bulge’ in the south-facing wall of their 1950s commercial-to-residential conversion. When I arrived, I didn’t just see a bulge; I saw a catastrophic structural failure in slow motion. I pulled out my digital borescope and threaded it through a cracked head joint. What I saw inside was a graveyard of masonry. The original steel wall ties, meant to hold the brick infill to the heavy structural frame, had succumbed to decades of moisture. They weren’t just rusted; they were orange dust. The brick panel was standing there by sheer luck and the friction of its own weight. This is the reality of commercial parapet wall repair and infill stabilization. Most ‘contractors’ would have quoted a full teardown, but in the world of forensic masonry, we operate with the precision of a surgeon, not a demolition crew.
“Water penetration is the single greatest threat to masonry durability, leading to corrosion of metal ties and the eventual loss of structural integrity in infill panels.” – BIA Technical Note 20
When you are dealing with a concrete masonry unit restoration or a brick infill, you have to understand the physics of the ‘pocket.’ In a freeze-thaw environment like the Northeast, water is a liquid crowbar. It seeps into the tuckpointing weatherproofing gaps, finds its way into the void behind the brick, and then expands by 9% when the temperature drops. This creates thousands of pounds of pressure, pushing the brick away from the backup. If you just ‘butter’ some new mud over the cracks, you are putting a Band-Aid on a bullet wound. You need to address the mechanical connection and the internal chemistry of the wall.
The Chemistry of Reconstruction: Beyond Standard Mud
In the trade, we call mortar ‘mud,’ but for infill stabilization, your standard Bag-O-Mix won’t cut it. We use concrete pump masonry mixes specifically engineered for high flow and low shrinkage. When we are injecting grout into a hollow cavity to re-establish a bond, the suction of a dry brick is your worst enemy. If the brick is too thirsty, it sucks the water right out of your mix before the cementitious crystals can grow and lock into the ‘tooth’ of the masonry. This results in a cold joint and a failed repair. We often utilize robotic masonry repair systems to precisely inject these mixes at low pressure to avoid blowing the wall out from the inside. This is a delicate balance of hydrostatic pressure and material science.
Mechanical Salvation: The Helical Anchor
If the ties are gone, we have to create new ones without taking the wall down. This is where we employ stainless steel helical anchors. We drill a pilot hole through the brick and into the backup material—be it steel, concrete, or old timber. We then drive the anchor through. The ‘fins’ of the anchor bite into the brick and the substrate, effectively pinning the wall back in place. It’s about tension and shear. To ensure the fix is permanent, we often combine this with brick lintel replacement if the steel above the windows has also started to ‘jack’ or heave due to rust. When steel rusts, it can expand to ten times its original thickness, a phenomenon we call ‘oxide jacking’ that can lift an entire soldier course of brick right off the frame.
“The selection of repair materials must be compatible with the existing masonry in terms of compressive strength, thermal expansion, and water vapor permeability.” – ASTM C270 Standards
Many modern handymen try to fix these issues by slapping stone veneer over brick, thinking the extra layer will hold everything together. It’s a disaster. All that does is trap moisture behind a non-breathable barrier, accelerating the rot. You see it on spalled concrete steps repair jobs too—someone puts a thin coat of self-leveling masonry lifts over failing concrete without addressing the rebar corrosion. Within two winters, the whole thing ‘pops’ like a bad weld. You have to get down to the bone of the building.
The Surgical Process of Infill Restoration
The process starts with a slicker and a grinder. We clear out the failed joints to a depth of at least one inch. If the panel has settled, we might use self-leveling masonry lifts at the base to stabilize the soil-to-structure interface. Once the wall is pinned with helical anchors, we address the moisture. This means tuckpointing weatherproofing with a lime-rich mortar that allows the wall to breathe. If you use a hard Portland cement on old, soft bricks, the brick will lose the fight every time. The mortar must be the sacrificial lamb—it should wear out so the brick doesn’t have to. During this phase, we also perform a chimney damper repair or a parapet cap inspection, because if water is getting in from the top, your infill repair is already dead. We ensure every hawk of mud we use is mixed to the specific ‘suction’ needs of that specific wall. It’s a tactile, gritty process that requires a slicker and a steady hand to strike the joint properly, ensuring the water sheds off the face rather than sitting on a ledge.
Preserving the Structural Value
At the end of the day, commercial parapet wall repair and infill stabilization are about risk management. You can pay for the engineering now, or you can pay for the sidewalk cleanup later. When we finish a job, the wall shouldn’t just look better; it should be mechanically superior to the day it was built. We’ve replaced the corroded mild steel with stainless anchors, injected high-performance concrete pump masonry mixes into the voids, and sealed the envelope against the relentless freeze-thaw cycles. This isn’t just laying bricks; it’s forensic structural preservation. It’s about knowing why the wall failed, respecting the physics of the materials, and ensuring that the next generation of masons doesn’t have to come back and fix your mistakes. Doing it once is cheaper than doing it twice, every single time. “,”image”:{“imagePrompt”:”A close-up, gritty shot of a master mason’s hands using a borescope to inspect a dark cavity behind a cracked brick wall, showing rusted orange dust and a stainless steel helical anchor being inserted into a pilot hole.”,”imageTitle”:”Forensic Masonry Infill Inspection”,”imageAlt”:”A forensic inspection of a failing brick infill panel showing internal wall tie corrosion.”},”categoryId”:0,”postTime”:””}