3 Proven Tactics to Fix a Sagging Brick Arch in 2026
The Anatomy of a Dying Smile: Why Brick Arches Fail
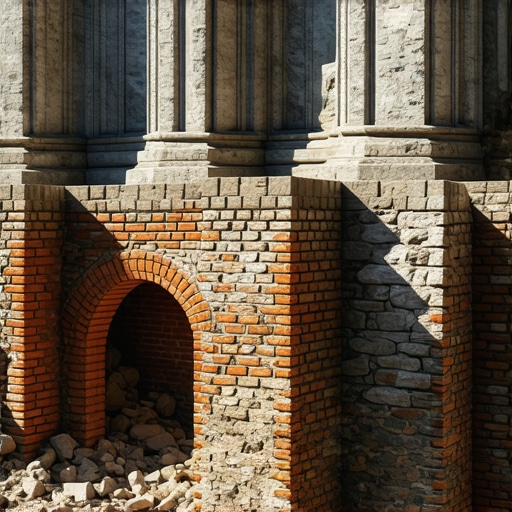
When you walk up to a 1920s Tudor or a late-Victorian storefront and see that the center of the window head is dipping, you aren’t just looking at a cosmetic flaw. You are looking at a structural system that has forgotten how to fight gravity. In the trade, we call that a ‘smiling’ arch, but nobody is happy about it. A sagging arch is a slow-motion collapse, a failure of the skewbacks to hold their ground and the voussoirs to maintain their friction. If you’re seeing this in 2026, you’re likely dealing with a century of freeze-thaw damage restoration needs or, worse, a botched ‘handyman’ repair from a decade ago that used the wrong high-performance mortar mixes.
Years ago, I spent a month under the tutelage of an old-timer named Elias who worked out of the Philadelphia union halls. He had hands that looked like dried leather and a temper to match. He used to say that a brick arch is like a marriage—it only works if both sides are pushing equally toward the center. One afternoon, he showed me an elliptical arch that had dropped three inches. He didn’t reach for a trowel first. He reached for a string and a plumb bob. He showed me that the ‘springing point’ had shifted because the lime had turned to dust, leaving nothing but air where the brickwork pointing styles used to provide the ‘tooth’ for structural stability. This article is the distillation of those hard-earned lessons, updated for the forensic standards of 2026.
“The resistance of an arch to external pressure is due to the shape of the stones and the closeness of the joints, which transmit the pressure to the abutments.” – Vitruvius, De Architectura
The Physics of the Deflected Voussoir
To understand the fix, you have to understand the chemistry of the failure. Most sagging arches fail because of a breakdown in the ‘sacrificial’ nature of the mortar. In historic pointing styles, the mortar is designed to be softer than the brick. This allows the masonry to breathe. When a modern contractor slaps Type S Portland cement into a 19th-century arch, they create a ‘hard point.’ As the building shifts and breathes, the hard mortar doesn’t give; instead, it crushes the face of the soft clay brick. This is where masonry water damage repair becomes critical. Water enters the micro-fissures created by the crushed brick, freezes, expands by 9%, and pops the face of the voussoir right off. Once the face is gone, the structural integrity of the wedge is compromised, and gravity begins its inevitable downward pull.
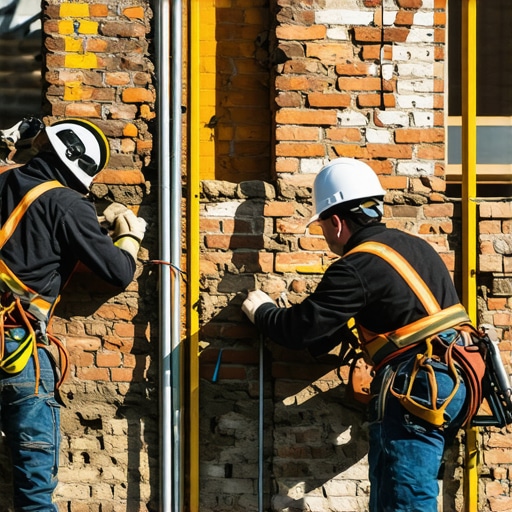
Tactic 1: The Precision Shoring and Re-Wedge (The ‘Jack’ Method)
In 2026, we don’t just shove a 4×4 post under an arch and hope for the best. Masonry rescue after disaster or long-term neglect requires a synchronized shoring system. First, we construct a ‘centering’—a wooden or steel form that perfectly matches the original radius of the arch. This isn’t just about support; it’s about re-training the masonry. Using hydraulic micro-jacks, we slowly—often over the course of several days—apply upward pressure to the sagging voussoirs. This must be done with extreme care to avoid ‘oil-canning’ the surrounding wall.
Once the arch is back to its original ‘spring,’ we perform a masonry damage assessment on every individual unit. If the bricks are sound, we rake out the joints to a depth of at least 1.5 inches. This is where we apply the ‘butter.’ For historic arches, we use a high-performance mortar mix based on Natural Hydraulic Lime (NHL). Unlike Portland cement, which creates a brittle bond, NHL allows for autogenous healing—meaning if a micro-crack forms, the lime can actually re-seal itself over time through carbonation. We use a slicker tool to pack the mud deep into the joints, ensuring no air pockets are left to harbor moisture.
Tactic 2: Helical Reinforcement and Structural Stitching
Sometimes the arch is sagging because the ‘abutments’ (the walls on either side) are spreading apart. No amount of cracked brick wall repair on the arch itself will fix a building that is literally widening. This is where we turn to 2026-grade forensic masonry. We use stainless steel helical anchors, often 1 meter or longer, to ‘stitch’ the arch back into the main structural wythes of the building. These rods are spun into pre-drilled pilot holes at an angle, crossing the failure planes of the arch.
The science here is about shear strength. By embedding these anchors in a thixotropic grout, we create a reinforced masonry beam within the existing wall. This is particularly effective for concrete masonry unit restoration where the outer brick veneer has detached from the inner block backup. The helical rods provide the tension strength that masonry naturally lacks, while the high-performance mortar mixes provide the compression strength. This method is a ‘stealth’ repair; once the brickwork pointing styles are matched—whether it’s a weather-struck joint or a tuckpoint—the structural reinforcement is invisible to the naked eye.
“Mortar should be designed to be weaker than the masonry units so that it acts as the sacrificial element in the wall system, preventing damage to the brick itself.” – ASTM C270 Standards
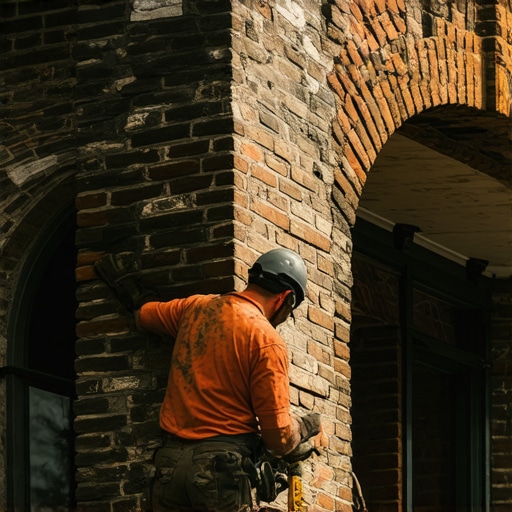
Tactic 3: Total Voussoir Reconstruction and Flashing Integration
In the worst cases—usually involving freeze-thaw damage restoration on chimneys or exposed garden walls—the bricks themselves have turned to shale. When you touch them, they crumble like a dry biscuit. Here, masonry water damage repair involves a full ‘surgical’ replacement. We remove the sagging bricks one by one, keeping the arch supported by the centering. But before we ‘butter’ the new bricks back in, we address the root cause: the chimney flashing repair or the lack of a proper drip edge.
We integrate a stainless steel or lead-coated copper flashing above the arch. This diverts water away from the ‘throat’ of the arch and prevents the hydrostatic pressure that caused the original failure. When laying the new bricks, we pay close attention to the historic pointing styles. If the original was a ‘grapevine’ joint, we replicate that precisely. Why? Because the shape of the joint isn’t just for looks—it affects how water sheds off the wall. A poorly struck joint can actually ‘shelf’ water, inviting it back into the brick and starting the cycle of decay all over again. We finish the job with a slicker, ensuring the ‘mud’ is tight and the soldier course above the arch is perfectly aligned.
The Professional Verdict: Do Not Gamble with Gravity
Repairing a sagging arch is not a ‘weekend warrior’ project. It requires an understanding of how loads are transferred through a curved surface and the chemical compatibility of 100-year-old clay with modern materials. If you see ‘honeycombing’ in the mortar or a cold joint where a previous repair didn’t bond, you are looking at a ticking time bomb. A masonry damage assessment in 2026 utilizes thermal imaging and moisture meters to find the hidden pockets of decay before the first brick falls. Remember, in the world of masonry, you either do it right once, or you do it twice—and the second time usually involves a pile of rubble on the sidewalk. Keep your arches tight, your mortar soft, and your flashing integrated. That is the only way to ensure the ‘smile’ on your building is one of structural health, not impending collapse.
![Stop Retaining Wall Leans with 3 Pro Reinforcement Fixes [2026]](https://masonryrescue.com/wp-content/uploads/2026/03/Stop-Retaining-Wall-Leans-with-3-Pro-Reinforcement-Fixes-2026.jpeg)