
The Tragedy of the Mud-Soaked Common
I remember a job site in the late 90s where a developer had spent a fortune on 20,000 reclaimed ‘Old Milwaukee’ cream city bricks. By the time I arrived for the brick veneer installation, the ‘pro’ they hired had dumped them in a low-lying area of the lot. They sat in the mud for three weeks of spring rain. When I picked one up, it didn’t ‘ring’—it gave a dull, sodden thud. My old mentor, Silas, a man who had more lime in his lungs than a quarry, used to say that a brick that doesn’t sing is a brick that’s already dead. He would strike a salvaged unit with his steel hammer; if it didn’t produce a clear, metallic ‘ping,’ he’d toss it into the rubble pile for retaining wall block replacement filler. Those Milwaukee bricks had absorbed so much ground moisture that they were literally dissolving from the inside out. We lost 30% of the inventory before the first trowel of mud ever touched a bed joint. Salvaging masonry isn’t about being a recycler; it’s about being a forensic scientist who knows how to fight entropy.
The Microscopic Warfare of the Stack
When you are dealing with stone wall repair or historic chimney repair services, you aren’t just moving heavy objects; you are managing a material’s ‘thirst.’ Old-world masonry is porous. Unlike the vitreous, glass-like bricks produced in modern high-heat kilns, salvaged units rely on a delicate balance of capillary action. When you stack them incorrectly, you invite subflorescence—a silent killer where salts crystallize inside the brick’s pores rather than on the surface. This happens because the stack acts like a giant wick, drawing moisture from the soil through Poiseuille’s Law. As the water evaporates, the salt stays behind, expanding with enough force to shatter the internal structure of the shale or clay. This is why masonry water damage repair starts long before the repair itself; it starts with how you organize your yard.
“The use of salvaged brick should be approached with caution, as its durability is often unknown and its properties can vary significantly from unit to unit.” – BIA Technical Note 15
The Physics of Stacking: Air, Elevation, and Gradation
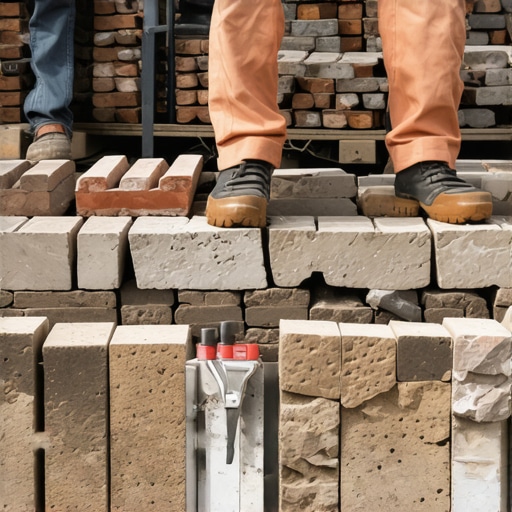
Properly organizing a salvage yard requires an understanding of ‘The Tooth.’ Salvaged bricks often have remnants of old lime mortar. This mortar is softer than modern Portland cement, and if left to sit in a damp stack, it creates a ‘cold joint’ effect where the bricks fuse together into a useless monolith. [image_placeholder_1] To avoid this, every stack must be elevated on dunnage—typically 4×4 pressure-treated lumber—to break the capillary bond with the earth. You need a minimum of four inches of clear air space beneath the first course. If you’re prepping for a brick paver driveway repair, the organization must be by ‘firing temperature.’ In the old days, bricks near the center of the kiln (the ‘clinkers’) were harder and darker, while the ‘salmon’ bricks on the outside were softer. Mixing these in a stack is a recipe for disaster; you’ll end up putting a soft brick in a high-traffic area where it will spall into dust within two winters.
Freeze-Thaw Cycles and the 9% Expansion Rule
In the North, we deal with the most violent force in masonry: the 9% expansion of water as it transitions to ice. When you have a disorganized pile of stone or brick, water gets trapped in the ‘honeycombing’—the irregular gaps between units. When that water freezes, it creates mechanical pressure that can crack a four-inch thick stone. For anyone involved in commercial masonry maintenance, this is the primary concern. If you are stacking for outdoor masonry fountain restoration, the stones must be tilted slightly to shed water. A flat stack is a drowning stack. You butter your joints with the right mud eventually, but if the stone is already micro-fractured from a winter in a bad stack, your stone wall repair will fail before the check clears.
The Modern Edge: AI Assessment vs. The Trowel
We are seeing more AI masonry assessment tools entering the field, using LIDAR and photogrammetry to scan salvaged piles for structural integrity. It’s a far cry from Silas and his steel rod, but the physics haven’t changed. These tools can detect ‘blind cracks’ that the human eye misses, which is vital for high-stakes projects like chimney leak detection or structural retaining wall block replacement. But no machine can feel the ‘suction’ of a brick. When you pick up a salvaged unit, you should feel its weight—if it feels too light for its size, the ‘matrix’ has been compromised by repeated freeze-thaw cycles. It’s ‘sugar brick’ now, and it belongs in the landfill, not your facade.
“Mortar should always be weaker than the masonry units it binds, ensuring that stresses are relieved through the joints rather than the units themselves.” – ASTM C270
Logistics of the Master Mason
Before you start a brick veneer installation using reclaimed material, you must ‘gauge’ your bricks. Salvaged units are never the same size. You need to organize your stacks by thickness—increments of 1/8th of an inch. If you don’t, your ‘bond’ will be a mess of ‘creeping’ head joints and ‘wavy’ bed joints. You’ll be fighting the mud all day. Use a slicker to test the hardness of the remaining mortar on the salvaged units. If it’s old lime, it’ll scrape off like chalk; if someone used modern cement in a previous ‘handyman’ repair, you’ll need a diamond blade. Never mix the two in your stack. You want a clean, organized ‘hawk’ and a clean, organized yard. It’s the difference between a craftsman and a guy who just plays with dirt. Do it once, do it right, or don’t do it at all. The stone doesn’t lie, and it doesn’t forgive laziness.