The Silent Scream of 19th-Century Masonry
My mentor once told me that a building doesn’t die all at once; it bleeds out through its joints, one rainstorm at a time. I remember a job in a historic district where a homeowner had hired a ‘guy with a truck’ to clean a 120-year-old brownstone facade. By the time I arrived, the surface of the stone was shedding like a sunburned tourist. The ‘pro’ had used a 4,000-PSI pressure washer, thinking he was removing dirt. Instead, he had stripped the protective case-hardening off the stone, exposing the soft, granular interior to the elements. He hadn’t cleaned it; he had lobotomized it. That is the tragedy of modern ‘lick-and-stick’ mentalities meeting ‘Old World’ materials. When we talk about the best way to clean grime off delicate historic stone, we aren’t just talking about aesthetics. We are talking about forensic preservation and the chemical reality of mineral structures.
The Chemistry of Grime: Why Water is Both Life and Death
To clean stone, you must first understand the ‘tooth’ of the material. Historic limestone and sandstone are porous, living systems. Over decades, atmospheric pollutants—sulfur dioxide and nitrogen oxides—react with the calcium carbonate in the stone to form a gypsum crust. This black ‘grime’ isn’t just sitting on the surface; it is often chemically bonded to it. If you use a harsh acid or a high-pressure jet, you tear the crust off along with the face of the stone. This creates honeycombing, where the internal structure remains but the protective skin is gone. We call this ‘spalling’ in the trade, and it’s the first step toward a total structural failure. Before you even think about cleaning, you need an AI masonry assessment to map the density and moisture content of the wall. Modern sensors can tell us if the interior of the wall is saturated, which would mean that cleaning might actually trap salts inside, leading to sub-florescence.
“When water enters a masonry wall, it must be allowed to escape through the mortar joints rather than the face of the brick or stone.” – BIA Technical Note 1
The Sacrificial Principle of Historic Brickwork Repointing
One of the biggest sins I see in the field is the use of modern Portland cement on old buildings. It’s too hard. It doesn’t breathe. In a historic context, your mortar must be the sacrificial lamb. It has to be softer than the surrounding stone. This is why historic brickwork repointing requires a mix of lime putty and sand, perhaps a touch of Type O mortar if the stone can handle it, but never the high-strength Type S or M used in modern skyscrapers. When the building shifts or the temperature swings, the mortar joints should take the stress and crack, not the stone. I’ve seen commercial parapet wall repair jobs where the contractor used heavy-duty cement, causing the entire parapet to bow and eventually explode outward because the stone had nowhere to expand. We use a slicker to strike the joint, ensuring the ‘mud’ is packed tight, creating a weather-tight seal that still allows vapor transmission.
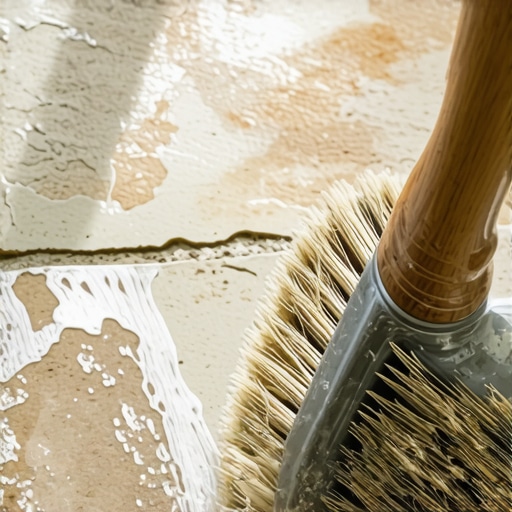
Micro-Zooming into the Restoration Process
The actual cleaning of delicate stone should be a slow, boring process. We start with a low-pressure water mist—a ‘nebulous spray’—that runs for hours or even days. This softens the carbon crust without mechanical force. If the grime is stubborn, we move to a poultice. We butter the stone with a mixture of kaolin clay and specific detergents, wrap it in plastic, and let it draw the salts and dirt out of the stone’s pores over 48 hours. It’s like a facial for a building. While we are up on the scaffolding, we often find other failures. A brick arch restoration might be necessary if the keystone has slipped due to mortar erosion. You can’t just slap some patch on an arch; you have to understand the physics of the load. We use fiber-reinforced mortars for non-visible structural stabilization, but the exterior face must always look and behave like the original 19th-century material.
“Mortar should be designed to be weaker than the masonry units so that it acts as a sacrificial element.” – ASTM C270
Hardscape Truths: From Patios to Retaining Walls
Cleaning the facade is only half the battle. If the ground at the base is shifting, the stone above will suffer. I’ve walked onto many sites for a brick patio restoration where the client thought they just needed a wash. In reality, the base compaction had failed, leading to ‘wavy’ patterns and trip hazards. In these cases, self-leveling masonry lifts can sometimes stabilize the substructure, but often we have to pull the pavers, fix the 8-inch gravel base, and perform a full brick paver driveway repair. The same logic applies to a failing retaining wall repair. If the weep holes are clogged and hydrostatic pressure is building up, no amount of cleaning will save that wall from a catastrophic collapse. You have to address the water first. Always. Once the structural integrity is verified, our tuck pointing services ensure that every horizontal and vertical line is crisp, keeping the water where it belongs: on the outside. Don’t be fooled by ‘handyman specials’ that promise a quick fix. In the world of masonry, if you do it cheap, you do it twice.