
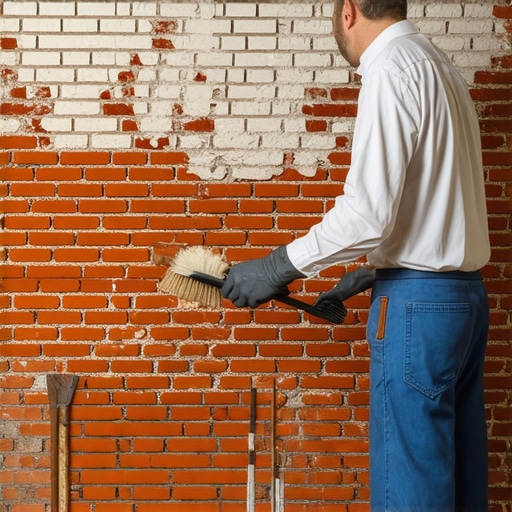
The Ghost of the Fireskin: Why Cleaning Isn’t Just Aesthetics
I remember my old man standing in front of a 19th-century warehouse in the garment district, watching a crew blast the facade with high-pressure sand. He didn’t say a word; he just walked up to a pile of red dust on the sidewalk, rubbed it between his thumb and forefinger, and looked at me. ‘That’s the soul of the building, kid,’ he said. ‘They’re killing the fireskin. Once that vitrified layer is gone, the brick is just a sponge waiting to rot.’ He was right. Most people see a dirty building and think ‘pressure washer’ or ‘muriatic acid,’ but if you’re dealing with pre-1940s masonry, those are the fastest ways to turn a historic asset into a liability. Understanding the physics of a structural masonry inspection starts with recognizing that historic brick was fired at lower temperatures than modern extruded units. This created a hard, protective outer skin and a soft, porous interior. When you use harsh chemicals or abrasive force, you strip that skin, leading to a death spiral of spalling and internal degradation.
“The goal of cleaning is to remove the dirt without damaging the masonry units or the mortar joints.” – BIA Technical Note 20
The Chemistry of the Crust: Micro-Zooming Into Carbon and Calcite
Grime on historic brick isn’t just ‘dirt.’ In an urban environment, it’s a complex chemical cocktail. You’re looking at gypsum crusts, carbon deposits from decades of coal-burning furnaces, and organic biofilms. When sulfur dioxide from the air reacts with the calcium carbonate in the mortar or the brick itself, it forms gypsum. This gypsum traps soot and dirt, hardening into a black crust that is often tougher than the brick underneath. If you attack this with a heavy-handed acid, you don’t just dissolve the crust; you trigger a chemical reaction that can cause honeycombing within the clay body. This is why a digital twin masonry projects approach is becoming popular for high-value restorations—it allows us to map the thickness of the sulfate crust before we ever touch a slicker or a hawk to the surface. We need to respect the ‘breathability’ of the wall. Historic masonry works on the principle of ‘mass wall’ construction; it absorbs water and then lets it evaporate out. If you clog those pores with porous stone sealers that are too dense, or if you melt the surface with acid, the moisture gets trapped, freezes, and pops the face of the brick off in the next winter cycle.
The Gentle Methodology: From Nebulous Spray to Peelable Pastes
The first rule of masonry restoration is to start with the mildest method possible. I always begin with a ‘nebulous spray.’ This isn’t a pressure washer. It’s a fine mist of water that runs over the building for hours, even days. This softens the carbon crusts through slow hydration, mimicking a long, gentle rain. We aren’t trying to blast the dirt off; we’re trying to coax it into letting go. When we move to more stubborn areas, we use a ‘poultice’ or a ‘peelable paste.’ You butter the masonry with a clay or paper-based paste infused with mild detergents or EDTA (a chelating agent). You cover it with plastic, let it sit, and then peel it off. The grime stays stuck to the paste, leaving the brick skin intact. This is especially critical in commercial smokestack repair, where the creosote and heavy metal deposits are so thick that traditional washing would just create toxic runoff. During these projects, I often find that the cleaning reveals the true state of the joints, leading to a more accurate tuckpointing cost estimation.
The Interaction of Cleaning and Repointing
Cleaning and historic brickwork repointing are two sides of the same coin. You can’t do one properly without the other. Often, once the grime is removed, you’ll find that the flush pointing services performed in the 1970s used a high-strength Portland cement. This is a disaster for historic brick. Because the cement is harder than the brick, the natural thermal expansion of the wall forces the brick to crush itself against the mortar. We call this ‘sacrificial masonry’—the mortar must always be softer than the brick. During a masonry rescue after disaster, such as a fire or a flood, the cleaning process serves as a diagnostic tool. It reveals the ‘ring’ of the brick. A healthy brick sounds like a bell when tapped; a compromised, ‘burnt’ brick sounds like a dull thud.
“Mortar should be weaker than the masonry units so that any movement is accommodated in the joints rather than through the units themselves.” – ASTM C270
Advanced Forensic Interventions
In some cases, the damage goes deeper than the surface. If I’m doing an inspection and I see stair-step cracks that go all the way through a soldier course, cleaning is the least of the owner’s worries. That’s when we talk about foundation underpinning. But for surface-level restoration, we are seeing the rise of robotic masonry repair, where precision lasers can actually ablate the soot off the brick without raising the temperature of the substrate. It’s high-tech, but the principle remains the same as my grandfather’s trowel: respect the material. Whether you’re working on a small chimney or a massive factory, remember that every time you use a harsh chemical, you’re taking years off the building’s life. Do it once, do it right, and use a soft hand. Don’t let a cold joint in your maintenance plan lead to a structural failure down the road.