
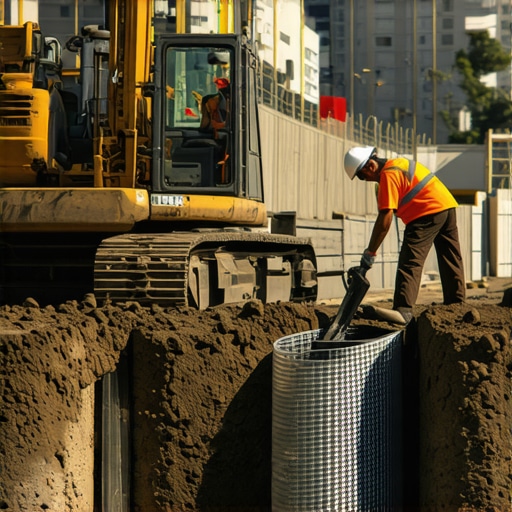
The Anatomy of a Failing Wall: A Forensic Perspective
I was standing on a job site in the outskirts of a humid, clay-heavy valley last November, looking at a fifteen-foot-high retaining wall that was leaning three inches off-center. The homeowner, a man who had clearly spent too much on a ‘handyman special,’ thought he just needed a bit of brick quoin repair or maybe some masonry staining to hide the ‘cosmetic’ cracks. I put my scope into a gap near the base and saw the truth: the structural steel was already weeping rust, and the block cores were filled with nothing but air and broken dreams. There was no geogrid. The ‘contractor’ had simply stacked blocks and hoped gravity would be a nice guy. Gravity isn’t nice. It’s a relentless bastard that wants to push everything into the lowest point of the earth. When you’re dealing with shifting soils, especially expansive clays that swell like a sponge in the rain and shrink like a sun-dried grape in the heat, hope is not a strategy. You need geogrids, you need high-performance mortar mixes, and you need to understand the physics of lateral earth pressure before you even think about picking up a trowel.
The Physics of the Push: Why Geogrids Are Non-Negotiable
Soil isn’t a solid mass; it’s a collection of particles with varying degrees of internal friction. In a ‘perfect’ world, dirt stays where you put it because of the ‘angle of repose.’ But add water, and those clay platelets start sliding over each other like they’re greased. This is where foundation underpinning and soil reinforcement become the difference between a wall that lasts a century and one that becomes a liability in three years. A geogrid is a high-tenacity polymer mesh that acts as a tensile reinforcement. It doesn’t just ‘hold’ the wall; it creates a coherent gravity mass by locking the soil particles into its apertures. This process, known as ‘interlock,’ turns the soil itself into the structure.
“Soil reinforcement is not merely an additive; it is a fundamental shift in the mechanical behavior of the retained mass, essentially creating a ‘composite’ material with high compressive and tensile strength.” – ASTM D6637 Technical Commentary
When we talk about commercial masonry maintenance, we aren’t just talking about cleaning the face; we’re talking about ensuring the structural integrity of the reinforced zone remains intact from hydrostatic pressure.
Micro-Zoom: The Chemistry of Hydration and High-Performance Mud
Most ‘muddies’ today just dump a bag of Type S into a mixer and call it a day. They don’t understand the ‘suction’ of the stone or the ‘tooth’ of the mortar. In shifting soils, your mortar needs more than just compressive strength; it needs flexural bond strength. We use high-performance mortar mixes that utilize polymers to increase elasticity. If the ground moves—and it will—you don’t want a mortar that is so brittle it snaps. You want it to have just enough ‘give’ to distribute the load. This is especially critical during brick veneer installation where the expansion of the substrate can pop the ‘butter’ right off the back of the brick if it isn’t mixed with the right hydration control. When I’m ‘buttering’ a course, I’m looking for that perfect consistency—like thick peanut butter that clings to the ‘hawk’ without sliding. If it’s too wet, you get honeycombing; too dry, and you get a cold joint that will leak water faster than a screen door on a submarine. We’re also seeing a rise in self-healing concrete foundations. These mixes contain crystalline admixtures that remain dormant until a crack forms. When water enters the crack, it reacts with the unhydrated cement particles to grow new crystals, effectively plugging the leak. It’s the closest thing to ‘biological’ masonry we’ve ever seen.
The Thermal Expansion War: Hot Soil and Flash Setting
In the southern heat, soil doesn’t just shift; it bakes. When you’re laying a soldier course on a hot July afternoon, the ‘flash setting’ of the mud is your greatest enemy. If the mortar dries too fast, the hydration process is cut short, leaving you with a chalky, weak bond that will crumble under the first sign of pressure. We have to ‘pre-wet’ the bricks to manage the suction. You want the brick to pull just enough water from the mortar to create a mechanical bond, but not so much that it starves the cement of the moisture it needs to crystallize. This is why brickwork sealants application is so misunderstood. People think they can just spray a cheap silicone sealer over everything. But a porous stone sealer must be breathable. If you trap moisture behind a non-breathable sealer in a hot climate, you’re creating a pressure cooker that will eventually lead to stone facade restoration projects that cost five times the original build. The vapor needs to escape, or it will push the face of the stone right off the wall.
The Process: Installing Geogrid the Right Way
First, you don’t just lay the grid on the dirt. You need to excavate back into the ‘hillside’ at a distance usually equal to the height of the wall. The base must be compacted to 95% Standard Proctor density. If you skip the compaction, you’re building on a marshmallow. Next, you lay the geogrid over the compacted lift and extend it right to the face of the block. I’ve seen guys leave a two-inch gap at the front—that’s a death sentence for the wall. The grid must be ‘sandwiched’ between the courses of block, pinned by the ‘friction’ and the ‘mud’ or the mechanical pins.
“Water penetration is the single greatest threat to masonry durability, and without proper drainage aggregate behind the reinforced zone, hydrostatic pressure will eventually overcome any tensile reinforcement.” – BIA Technical Note 7
Behind that wall, you need a ‘chimney’ of clean, crushed stone and a perforated pipe that actually leads somewhere. If the water has nowhere to go, it builds up ‘head’ pressure. I’ve seen 80,000-pound walls pushed over like toy blocks because the drain was clogged with silt. This is why commercial masonry maintenance involves checking those weep holes every single spring. If they’re dry during a rainstorm, you’ve got a problem.
The Hardscape Truth: Do It Once or Do It Twice
People ask me why I’m so cynical about modern masonry. It’s because I see the ‘lick-and-stick’ brick veneer installation failing in every suburb in the country. They use a ‘slicker’ to make the joints look pretty, but underneath, there’s no structural integrity. If you’re building in shifting soil, you have to respect the earth. Use the geogrid. Spend the extra money on self-healing concrete foundations. Invest in stone facade restoration techniques that prioritize ‘breathability’ and mechanical anchors over cheap adhesives. Whether it’s a brick quoin repair or a massive foundation underpinning project, the principles are the same: manage the water, reinforce the soil, and never trust a ‘mud’ that hasn’t been mixed to the exact specifications of the environment. Masonry isn’t just about stacking rocks; it’s about a 100-year conversation between the craftsman and the ground. If you don’t speak the language of physics, the ground will have the last word. [{“@context”:”https://schema.org”,”@type”:”HowTo”,”name”:”How to Install Geogrid for Soil Stabilization”,”step”:[{“@type”:”HowToStep”,”text”:”Excavate the area behind the wall to the required depth, usually 1:1 ratio with wall height.”},{“@type”:”HowToStep”,”text”:”Compact the subgrade soil to 95% Proctor density to prevent future settlement.”},{“@type”:”HowToStep”,”text”:”Lay the geogrid mesh flat, ensuring it is perpendicular to the wall face with no folds.”},{“@type”:”HowToStep”,”text”:”Place the next course of masonry units or blocks directly over the geogrid to lock it in place.”},{“@type”:”HowToStep”,”text”:”Backfill with clean crushed stone and compact in 6-inch lifts, ensuring the geogrid remains taut.”}]}]