
The Forensic Reality of the ‘Puff Pastry’ Column
I was called to a 1920s warehouse conversion where the owner pointed out a hairline vertical fissure running the length of a massive load-bearing brick column. To the untrained eye, it looked like a settling crack. But when I slid my fiber-optic borescope into the void, I didn’t see solid masonry. I saw a structural steel core that had expanded to twice its original thickness. This is ‘rust jacking’—where iron oxide exerts up to 9,000 psi of internal pressure, literally shredding the brickwork from the inside out. The homeowner thought it was just cosmetic, but the structural steel was rusted to dust, and the entire floor above was being held up by a prayer and the friction of crumbling clay.
The Physics of Failure: Why Brick Columns Buckle
A brick column is more than just a stack of ‘mud’ and ‘loam.’ It is a finely tuned instrument of compression. When we talk about commercial parapet wall repair or column reinforcement, we have to understand axial loads. In a perfect world, the weight sits dead-center. But once a column settles or the mortar degrades, that load becomes ‘eccentric.’ Suddenly, one side of the brick is under massive compression while the other is experiencing tension—and brick hates tension. In colder climates, this is exacerbated by brick spalling prevention failures. Water enters the micro-cracks, freezes, and expands by 9 percent, popping the face off the brick like a bottle cap. If you try to fix this with a standard concrete patch from a big-box store, you’ve just signed the column’s death warrant. Modern Portland cement is too hard; it won’t allow the historic brick to breathe, trapping moisture and accelerating the decay.
“Steel embedded in masonry that is not properly protected from moisture will eventually undergo expansive corrosion, leading to cracking and spalling of the masonry cover.” – BIA Technical Note 20
The Science of the Mud: Historic Mortar Analysis
Before you ever pick up a trowel or a hawk, you need a historic mortar analysis. You cannot just guess the mix. In the old days, we used lime putty—calcium hydroxide. Over a century, that lime absorbs carbon dioxide from the air and turns back into calcium carbonate (limestone). This process is slow, but it creates a ‘sacrificial’ joint. The mortar is softer than the brick, so the mortar takes the brunt of the weathering. If you slap Type S mortar (high Portland content) into a wall built with soft-fired 19th-century clay, the brick will shatter before the mortar even flinches. We use sustainable tuckpointing mortars specifically formulated to match the vapor permeability and modulus of elasticity of the original materials. This isn’t just ‘repair’; it’s molecular matching.
Step-by-Step Reinforcement Protocol
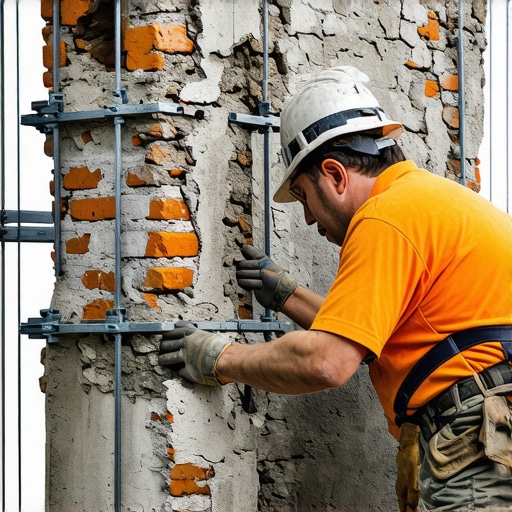
Reinforcing a column safely requires a surgical approach. We start with ‘shoring.’ You never touch a weakened column without ‘deadman’ shores or hydraulic jacks taking the load off the masonry. Once the column is ‘unloaded,’ we can begin the forensic extraction of compromised units. [IMAGE_PLACEHOLDER] This is where the sustainable block cutting techniques come into play—using diamond-tipped blades with vacuum shrouds to minimize dust and prevent vibration damage to the fragile surrounding ‘wythes.’ If the core is steel, we treat it with zinc-rich cold galvanizing compounds to stop the oxidation. If the core is solid masonry that has ‘barreled’ out, we use helical stainless steel ties. These ties are screwed into the core and the facade, stitching the column back together without the need for ugly external straps.
“The best sand for masonry is that which, when rubbed between the fingers, makes a creaking sound; that which is earthy and does not have this sharpness is not fit for use.” – Vitruvius, De Architectura
Advanced Diagnostics: Drones and Scopes
Modern masonry forensics has moved beyond the hammer-tap. While my grandfather could hear a ‘dead’ brick by its ring, we now use drone chimney inspections and thermal imaging to find hidden moisture pockets in high-reach columns and parapets. These tools allow us to see ‘honeycombing’—voids where the mortar has leached out—without building $10,000 worth of scaffolding. If the base of the column is sinking due to soil issues, we might even look at foundation slab jacking to stabilize the substrate before we ever touch a brick. You have to fix the feet before you fix the spine.
The Finish: Striking the Joint
Once the structural reinforcement is done, the tuckpointing begins. You ‘butter’ the brick with just the right amount of ‘mud,’ using a slicker to compress the joint. This compression is vital; it closes the pores and creates a ‘weather-struck’ edge that sheds water. This is also the time to address secondary issues like chimney damper repair or flashing if the column is part of a larger stack. A master mason doesn’t just look at the crack; they look at the whole water-shedding system of the building. Do it once, do it right, or don’t do it at all. The goal is a repair that lasts another hundred years, not just until the check clears.