
The Anatomy of a Separating Wall
The homeowner thought it was just a hairline crack near the window frame, a bit of cosmetic fatigue in a house that had seen forty winters. But when I slid my borescope into the cavity, the reality was grim: the original corrugated galvanized ties, which are supposed to bridge the gap between the brick and the timber stud, had been reduced to a fine orange powder. The structural steel was rusted to dust, and the entire four-ton brick facade was standing purely by its own weight, leaning precariously away from the home. It wasn’t just a crack; it was a structural collapse in slow motion.
“Water penetration is the single greatest threat to masonry durability.” – BIA Technical Note 7
When you see a brick veneer pulling away, you aren’t just looking at a masonry problem; you are looking at a failure of the mechanical connection system. In a standard veneer wall, the brick doesn’t actually hold up the house. It’s a rainscreen, a protective skin. It relies on metal ties to transfer lateral loads to the structural framing. In the world of freeze-thaw damage restoration, we see this most often in the North, where moisture gets trapped in the 2-inch air cavity, undergoes the 9% volume expansion of freezing, and slowly jacks the brick away from the studs. This process, repeated over decades, exerts a ‘pumping’ force that snaps brittle, corroded ties. If your wall has started to bow or show a widening gap at the soffit, the clock is ticking.
The Forensic Masonry Damage Assessment
Before we even touch a bag of mud, we have to understand the ‘why.’ A proper masonry damage assessment involves more than just looking at the surface. We look for ‘weeps’ that are clogged. If the original mason didn’t leave open vertical joints at the bottom of the wall, moisture is trapped. I’ve seen cavities filled with two feet of mortar droppings, a phenomenon called ‘honeycombing’ at the base, which creates a bridge for water to move from the brick to the wood. This damp environment is a breeding ground for galvanic corrosion. We also check for foundation movement. If the foundation itself is tipping, no amount of re-anchoring will save the veneer. In cases of soil subsidence, we might first need a foundation helical pier installation to stabilize the weight-bearing footing before we can address the decorative skin.
The Physics of Re-Anchoring: Helical vs. Mechanical
Once we’ve confirmed the structure is stable, we move to ‘The Cure.’ We don’t tear the wall down anymore; we use surgical intervention. The modern standard involves helical masonry anchors. These are stainless steel fins that we drive through the brick and into the substrate (studs, concrete, or CMU).
“The use of stainless steel anchors in masonry restoration ensures that the repair will outlast the original structure by eliminating the risk of future corrosion.” – ASTM C109 Standard
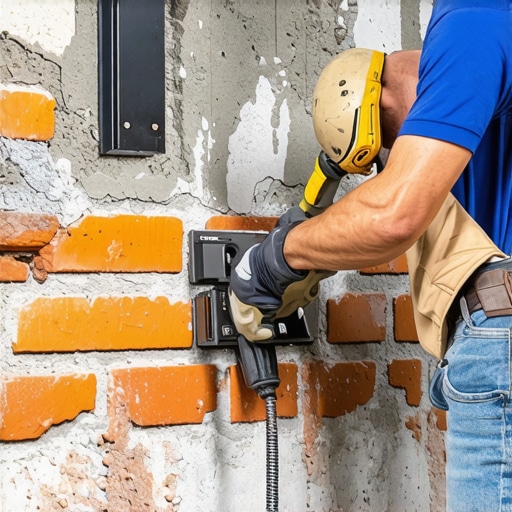
The physics here is fascinating. We drill a pilot hole, and then we use a specialized driver to ‘thread’ the anchor through the brick. It creates a mechanical interlock without the ‘wedge’ stress of an expansion bolt. When we hit the stud, the anchor bites. We then use a self-leveling masonry lift or hydraulic jacks to gently nudge the wall back toward the house if the gap is significant, though often we are simply ‘pinning’ it in its current stable position to prevent further migration. For newer builds, some are even looking at 3D printed masonry repairs to create custom-fit replacement units for decorative elements, but for a standard veneer, the helical tie remains the gold standard.
The Process: Re-Establishing the Bond
First, we clean the facade. Professional masonry cleaning isn’t just about aesthetics; it’s about removing the carbon crust and salts (efflorescence) so we can see the true condition of the joints. We then mark out our ‘soldier course’ and regular ‘stretcher’ patterns to locate the studs behind the brick. We ‘butter’ the pilot holes with a specialized epoxy or simply leave them for a ‘dry-fix’ installation depending on the substrate density. Once the anchors are set, we have to address the mortar. This isn’t just about slapping some mud in a hole. We have to match the ‘compressibility’ of the existing wall. If the house was built in the 1920s, using a hard Portland cement will actually destroy the surrounding brick. We use a softer Type N or Type O mortar, striking the joint with a slicker to ensure a weather-tight seal that matches the original profile.
Beyond the Veneer: Comprehensive Masonry Care
Often, a pulling veneer is a symptom of larger moisture issues. We look at the chimney. If the flue is venting moisture into the attic space, it’s saturating the top of the veneer. A chimney heat shield installation or a new cap can often stop the water source. Similarly, if the ground-level brick is spalling, it’s often due to retaining wall installation errors nearby that are directing hydrostatic pressure toward the house. We’ve even begun experimenting with self-healing concrete foundations in high-moisture zones, which use calcite-precipitating bacteria to seal micro-cracks before they become structural failures. In the end, masonry is a game of management. You manage the water, you manage the expansion, and you manage the chemistry. Do it once, do it right, or you’ll be watching your house peel like an orange in a summer drought.