
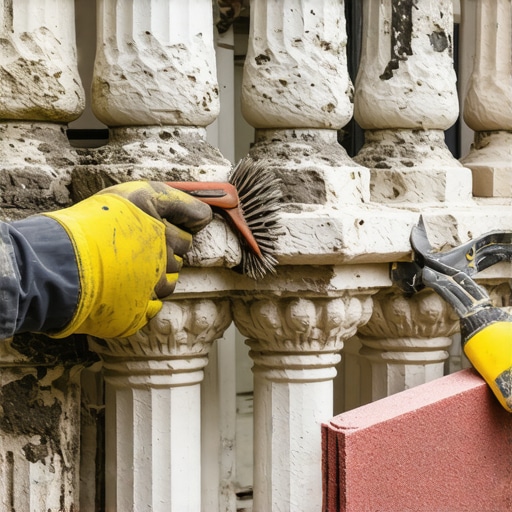
The decay of a historic stone balustrade isn’t a slow walk; it is a structural slide into oblivion that most homeowners don’t notice until a baluster literally falls onto the driveway. I’ve seen it a thousand times. The homeowner thinks it is just a hairline crack, a little character on a century-old rail. But when I put my scope inside the joint, I saw the structural steel was rusted to dust, expanding with such force that it was blowing the limestone apart from the inside out. This is the forensic reality of masonry: if you don’t respect the physics of the assembly, the assembly will eventually find a way to punish you. Stone balustrades are the most exposed architectural elements on a building. They take the sun from the top, the splashback from the bottom, and the wind from all sides. Prepping them for a deep restoration isn’t about slapping on some caulk; it’s about a deep, microscopic understanding of the tooth of the stone and the suction of the old work.
The Anatomy of Failure: Why Stone Railings Die
Before we even pick up a hawk or a slicker, we have to understand why the stone is failing. Most balustrades from the early 20th century were built with internal pins, often carbon steel. When water penetrates the mud joints, it hits that steel. Steel doesn’t just rust; it oxidizes and expands. That expansion creates hoop stress—a pressure from the inside that the stone cannot resist. It’s like a slow-motion explosion. You’ll see it first as a vertical crack in the baluster or a heaving in the top rail. This is where cracked brick wall repair logic and stone restoration merge. You aren’t just fixing a crack; you are managing a structural failure. In many cases, the porch or balcony supporting the balustrade has settled. If the foundation is moving, no amount of tuckpointing cost estimation will save the rail. You might actually need foundation helical pier installation to stabilize the entire structure before you even think about the aesthetics of the stone.
“Water penetration is the single greatest threat to masonry durability. In balustrades, the concentration of joints and horizontal surfaces makes moisture management the primary engineering challenge.” – BIA Technical Note 7
The Cleaning Phase: Removing a Century of Grime
The first real step in prep is facade cleaning. But I’m not talking about a 4000-PSI power washer. If I see a contractor approach a historic stone rail with a high-pressure wand, I’ll kick them off the job site myself. High pressure doesn’t just clean; it destroys the fire-skin of the stone, opening up the pores and making it even more susceptible to the freeze-thaw cycle. We use low-pressure steam or specialized chemical rotors that lift the carbon and biological growth without chewing into the substrate. We are looking to reveal the true condition of the stone. Only after a proper cleaning can we perform a historic mortar analysis. We need to know the exact calcium carbonate content and the aggregate size of the original mud. If you put a hard, modern Portland cement into a soft limestone rail, the stone will become the ‘sacrificial’ element. The mortar will stay, but the stone will crumble around it.
The Forensic Teardown and Internal Stabilization
Preparation often requires a partial teardown. We mark every stone like a puzzle. If the internal pins are rusted, they must be cut out. We replace them with 316-grade stainless steel or fiberglass rods that won’t oxidize. This is where we often see honeycombing in the original core—voids where the mortar never reached. During the prep, we must ensure every surface is cleaned of old, brittle mortar. We use small pneumatic chisels, never grinders, to avoid scarring the stone. This is a surgical process. For modern updates, some projects now utilize robotic masonry repair for carving replacement pieces that match the original profile exactly, though I still prefer the touch of a chisel in a master’s hand. If the stone has lost its color or has been badly stained by rusted hardware, we might employ masonry staining techniques to blend the old with the new, ensuring the restoration doesn’t look like a patchwork quilt.
“Mortar should always be weaker than the masonry units it binds. A mortar that is too hard will cause the masonry units to fail under thermal expansion and moisture movement.” – ASTM C1713 Standard
The Science of the Mud: Mortar Matching and Application
Once the stone is prepped and the pins are set, we look at mortar matching services. This isn’t just about color; it’s about vapor permeability. Stone needs to breathe. Moisture must be able to move through the mortar joints and evaporate. If you seal those joints with a non-breathable material, the moisture gets trapped behind the stone face. When the temperature drops, that water freezes and expands by 9%, popping the face of your expensive stone right off. We call this spalling, and it’s the hallmark of a ‘handyman special.’ When we start to butter the joints, we ensure the stone is ‘Saturated Surface Dry’ (SSD). If the stone is too dry, it will suck the moisture out of the mortar too fast—we call this ‘burning’ the mud. The mortar won’t hydrate properly, and it will just turn to dust in a few years. We want a slow cure, sometimes hanging damp burlap over the work to keep the hydration process moving at a crawl.
Finishing and Long-Term Protection
The final prep involves looking at the top rail. This is the ‘roof’ of the balustrade. We ensure there is a proper wash—a slight slope—to shed water. Without it, the water sits, finds a micro-crack, and the whole cycle starts over. For some high-end restorations, we are seeing a trend toward metallic masonry finishes on the hardware or decorative inserts, which adds a layer of modern resilience and aesthetic flair. If the property has other issues, like a failing stack, we often bundle this with chimney rebuild services because the scaffolding is already up and the physics of the vertical exposure are identical. A stone balustrade is a legacy. It’s a testament to a time when we built things to last centuries, not decades. If you prep it with the heart of a mason and the mind of a forensic engineer, it will still be standing when your grandkids are old enough to complain about the weather.
The Restoration Workflow
Task: Prepping and Restoring a Historic Stone Balustrade
- Step 1: Structural Assessment. Check for internal pin corrosion and foundation settlement. Use foundation helical pier installation if movement is detected.
- Step 2: Controlled Cleaning. Perform facade cleaning using low-pressure steam or pH-neutral chemicals to remove biological growth and soot.
- Step 3: Mortar Analysis. Conduct a historic mortar analysis to determine the mix of lime, sand, and cement.
- Step 4: Joint Preparation. Rake out old joints to a depth of at least 1 inch using hand tools. Avoid power grinders on soft stone.
- Step 5: Pin Replacement. Remove rusted carbon steel dowels and replace them with stainless steel or epoxy-coated pins.
- Step 6: Mortar Application. Use mortar matching services to create a sacrificial mud. Butter the stones while they are in an SSD state.