
The Sin of the Shallow Joint
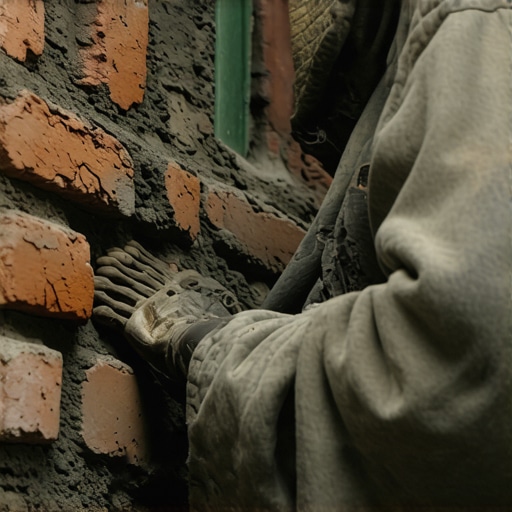
My old foreman, a man who had more lime in his lungs than blood in his veins, would run his thumb over a raked joint with the intensity of a diamond grader. If he felt even a microscopic lip of old mortar remaining on the top or bottom edge of the brick, he’d make me grind it again until the brick edges were clean and ‘hungry’ for the new mud. He used to say that a shallow joint is a lie told in mortar; it looks good for a season, but the first hard freeze will rip its mask off. I’ve spent thirty years watching those lies fail. When we talk about historic masonry preservation, we aren’t just talking about aesthetics. We are talking about the mechanical survival of a structure against the relentless physics of water and thermal movement.
The biggest mistake I see from these ‘weekend warriors’ and ‘all-in-one’ handymen using basic tuckpointing tools for DIY is the ‘shave and save’ method. They take a diamond blade, scratch the surface about a quarter-inch deep, and smear a thin layer of hard Portland-based mortar over the top. It’s a death sentence for the wall. To understand why, you have to look at the ‘tooth’ of the masonry. Structural repointing requires a depth of at least two to two-and-a-half times the width of the joint. Anything less, and the new mortar doesn’t have the mass or the surface area to form a permanent bond. It becomes a ‘scab’—a thin layer that traps moisture behind it and eventually pops off, often taking the face of the brick with it.
“Water penetration is the single greatest threat to masonry durability, and the proper preparation of joints is the only defense.” – BIA Technical Note 7
The Physics of the Sacrificial Lamb
In the world of historic masonry preservation, there is one law: the mortar must be the sacrificial lamb. If you are working on a pre-1940s building, those bricks were fired in old-style kilns. They are soft, porous, and they breathe. If you slap a modern, hard Type S mortar into those joints, you’ve just built a cage. When the temperature drops and the water trapped in the wall expands—remember, water expands 9% when it freezes—the hard mortar won’t budge. The soft brick, however, will crushed against that hard ‘mud.’ This is how you get freeze-thaw damage restoration calls that cost sixty grand instead of six. You need a lime-based mortar, something with high ‘suction’ and low compressive strength, like Type O or K, that allows the wall to move and moisture to evaporate through the joint, not the brick face.
The chemistry of this is fascinating if you’ve got the stomach for it. Lime mortar doesn’t just ‘dry.’ It undergoes carbonation. As the water evaporates, carbon dioxide from the air penetrates the joint, reacting with the calcium hydroxide to form calcium carbonate—essentially turning the mortar back into limestone over a century. This process is slow, which is why ‘flash setting’ is the enemy. In hot climates, if you don’t soak your bricks—what we call ‘controlling the suction’—the dry brick will suck the water out of your mud before it can chemically bond. You’ll end up with a dusty, crumbly mess that has the structural integrity of a sandcastle.
The Anatomy of a Forensic Grind
When I’m performing a brick quoin repair or addressing a failing chimney flue liner installation, the grind is where the battle is won or lost. I don’t care if you’re using a high-end vacuum-shrouded grinder or a hammer and a cape chisel; you have to reach the ‘meat.’ For a standard 3/8-inch joint, I’m looking for a minimum depth of 3/4-inch to 1-inch. This ensures that the new mortar has enough volume to resist the sheer forces of the building’s natural settlement. If I see metallic brick colors application on the surface, I know I have to be even more careful—those glazed or metallic finishes are often brittle and prone to chipping if the grinder wanders even a fraction of an inch.
“Mortar joints should be raked to a depth of 1/2 to 3/4 inches, or until sound mortar is reached, to provide an adequate key for the new repointing mortar.” – ASTM C270 Standard Specification
Once the joints are raked, the cleaning phase is where most people get lazy. You can’t just blow a little air in there. You need to flush the joints with water to remove the ‘fines’—the microscopic dust that acts like a bond-breaker. If that dust stays in the joint, your new mortar is just floating on a layer of powder. When we move into modular masonry construction or 3D printed masonry repairs, the precision of the substrate becomes even more critical. Even the most advanced robotic mortar application can’t overcome a dirty, shallow, or crumbling base. It’s about the ‘tooth’—the physical interlocking of the new material into the old.
Beyond the Vertical: Patios and Driveways
The same logic applies when we move to the ground. A brick paver driveway repair or a patio stone realignment often fails because the ‘joint’ was treated as an afterthought. People think pavers stay in place because they’re heavy. Wrong. They stay in place because of interlock and friction. If you don’t have a properly compacted 8-inch sub-base of crushed stone and a 1-inch setting bed of sand, those pavers are going to dance. When I see a ‘wavy’ driveway, I don’t look at the stones; I look at the drainage. If water can’t get out, it turns the base into mush, and the freeze-thaw cycle does the rest, heaving the stones until the whole thing looks like a frozen ocean.
The Master’s Verdict
Whether you’re dealing with brick quoin repair on a Victorian mansion or just trying to fix a brick paver driveway repair, stop looking for the easy way out. Don’t be seduced by ‘quick-fix’ epoxy injections or ‘lick-and-stick’ veneers. Masonry is a game of centuries, not seasons. You grind deep, you clean thoroughly, you match the mortar strength to the brick, and you ‘butter’ your joints with the respect the craft deserves. If you don’t have the time to do it right, you’d better have the money to do it twice. Put your slicker to the mud and compress that joint like your reputation depends on it—because in this trade, it does.