
The Forensic Scene: When a Hairline Crack Becomes a Structural Grave
The homeowner called me out for what they thought was a routine stone balustrade restoration. From the curb, the facade looked decent, but as I climbed the scaffolding and put my borescope into a quarter-inch gap, I saw the skeleton of the building was screaming. The structural steel lintels were rusted to dust, expanding with enough force to lift a ten-ton soldier course. Why? Because the previous guy didn’t understand the physics of depth. He had done a ‘shave-and-save’ job, grinding out a mere eighth of an inch and buttering new mud over the top. It looked pretty for a season, then the winter came. When I pulled a chunk of that fake mortar away, it fell off like a scab that never healed. Underneath, the original lime mortar was a damp, sandy mess that had been trapped in a tomb of non-breathable Portland cement.
“Water penetration is the single greatest threat to masonry durability.” – BIA Technical Note 7
If you think tuckpointing is just about making the joints look white and crisp, you are mistaken. We are talking about the respiratory system of your home. In northern climates, we deal with the brutal reality of the freeze-thaw cycle. Water is a relentless invader; it finds its way into the smallest voids, and when the temperature drops, that water expands by 9% in volume. If your mortar joints are shallow or made of the wrong material, that expansion has nowhere to go but out, popping the faces off your bricks in a process we call spalling. To prevent this, we have to talk about the ‘tooth’ of the joint and why full repointing services require a commitment to depth that most handyman specials ignore.
The Physics of the Bond: Why 1/2 Inch Isn’t Enough
When we perform crumbling mortar joint repair, we aren’t just cleaning out the dust. We are creating a mechanical keyway. For a new mortar joint to survive, it needs sufficient mass to handle the thermal expansion and contraction of the wall. The industry standard, often cited by the Brick Industry Association, is that you must grind out the old mud to a depth of at least two to two-and-a-half times the width of the joint. If you have a 3/8-inch joint, you better be digging at least 3/4 of an inch into that wall. Any less, and the new mortar lacks the ‘body’ to adhere. It becomes a ‘veneer’ of mortar, and veneers fail because they don’t have enough surface area to create a lasting bond with the brick’s internal pores.
Micro-zooming into the chemistry, we look at the hydration process. When I ‘butter’ a joint, I am looking for suction. If the brick is too dry, it sucks the moisture out of the mud too fast, leading to a ‘flash set.’ This creates a cold joint where the mortar just sits on the surface like a piece of dried gum. We prevent this by pre-wetting the masonry, ensuring the hydration of the cement or lime happens slowly, allowing the crystalline structures of the mortar to grow into the microscopic nooks and crannies of the brick. This is the difference between a job that lasts five years and an emergency masonry repair that lasts fifty.
The Restoration Reality: Breathability and Sacrificial Principles
In historic restoration, we live by one rule: the mortar must be softer than the brick. This is the ‘sacrificial principle.’ If you use a modern, high-strength Portland cement on a pre-1940s home, you are signing the building’s death warrant. The old bricks are soft and porous. They need to breathe. If the mortar is harder than the brick, the stress of the building’s movement will crush the edges of the brick rather than compressing the mortar. This is why we use Type N or even softer Type O lime-based mortars for brick patio restoration and chimney crown repair. Lime is a self-healing material. As it carbonates over a century, micro-cracks can actually seal themselves when rainwater dissolves a bit of the free lime and redeposits it into the void. It is a living, breathing component of the masonry.
“The use of mortar with a higher compressive strength than the masonry units can lead to irreversible damage of the units themselves during thermal expansion.” – ASTM C270 Standards
The Process: From Grinding to the Slicker
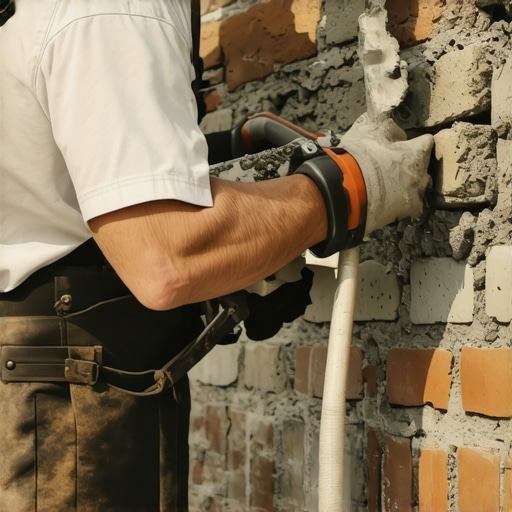
Commercial tuckpointing starts with the right equipment. You won’t find us using a hammer and chisel for a whole building; we use dust-shrouded grinders with diamond blades, but we have to be surgical. One slip and you’ve ‘scarred’ the brick, a permanent mark of a hack. After the deep removal, we use compressed air to blow out every speck of debris. If there is dust in the joint, the new mud is just sticking to dust, not the substrate. We then load the hawk, take our slicker, and pack the mortar in ‘lifts.’ You don’t just slap a whole inch of mud in at once. You do it in layers, packing the back of the joint first, letting it firm up, and then coming back for the finish pass. This prevents shrinkage cracks and ensures the joint is solid from the inside out.
Whether you are looking at an outdoor fireplace rebuild or a foundation stabilization, the logic remains the same: the base is everything. For a brick patio restoration, the ‘base’ is the compacted gravel and sand. For a wall, the ‘base’ is the clean, deep-cut joint. If you are looking for tuckpointing tools for DIY, don’t skimp on the jointer or the mortar bag, but more importantly, don’t skimp on the labor of the prep work. Grinding is the dirtiest, hardest part of the job, which is why most people skip it. But as a third-generation mason, I can tell you: the beauty of the finish is only as good as the ugliness of the prep.
When to Panic: Recognizing Forensic Failure
How do you know if your previous repair was a ‘lick-and-stick’ job? Look for ‘hollycombing’ in the joints or areas where the mortar is pulling away in long, thin strips. If you can take a pocket knife and easily slide it behind the mortar, the bond has failed. This often happens on a chimney crown repair where the sun beats down and the thermal expansion is at its peak. Without deep removal, the mortar ‘burns’ and loses its structural integrity. If you see white powder on the surface (efflorescence), that’s the wall telling you that water is trapped behind the mortar and is leaching out salts as it tries to escape. It is a cry for help. Do it once, or do it twice. In this trade, there are no shortcuts that don’t eventually lead to a pile of rubble on the sidewalk.