
The Ghost in the Wall: A Forensic Look at Decaying Facades
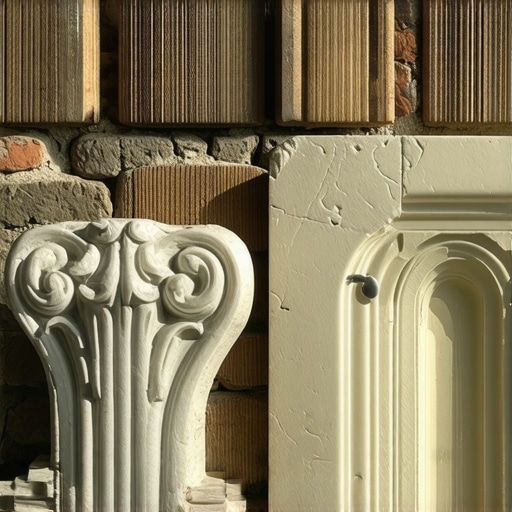
The homeowner thought it was just a hairline crack, a minor blemish on a 1910 Romanesque Revival facade. But when I put my digital scope inside that void, I saw a nightmare: the structural steel lintel was rusted to dust, and the custom-cast terracotta blocks above it were held together by nothing but habit and gravity. In the old days, replacing those units meant commissioned sculptors, months of lead time, and a price tag that usually led to the building being ‘modernized’ with cheap EIFS or aluminum siding. But we are in a different era now. The intersection of digital twin masonry projects and additive manufacturing is doing the impossible: it is making high-end restoration affordable and precise. I have spent thirty years with a hawk and trowel, and I can tell you, the smell of fresh mud is now frequently accompanied by the hum of a 3D printer.
The Physics of Failure and the 3D Solution
Masonry fails because of water and movement. In the Northeast, we deal with freeze-thaw damage restoration on a constant loop. Water gets into the pores of a soft, historic brick, expands by 9% when it freezes, and literally blasts the face off the unit. When we are dealing with complex shapes—fluted columns, ornate cornices, or custom brick column repair—the geometry is our biggest enemy. Traditional mortar repointing services can fix the joints, but they cannot fix a shattered ornamental detail. This is where 3D printed molds change the game. By using photogrammetry to create a digital twin of a surviving ornament, we can print a negative mold that captures every nuance of the original craftsman’s thumbprint.
“The restoration of historic masonry requires a compatibility of materials, where the new repair material matches the physical and chemical properties of the original substrate.” – ASTM E2260 Guide for Rehabilitation of Historical Masonry
Once we have that mold, we do not just pour in standard hardware-store concrete. We use fiber-reinforced mortars. These mixes contain micro-strands of alkali-resistant glass or polymers that provide the tensile strength the original units lacked. It prevents the ‘honeycombing’ effect you see in poor pours and ensures the new piece can withstand the thermal expansion cycles that bake our cities every summer.
Foundation First: The Helical Pier Necessity
You cannot restore the top of a building if the bottom is sinking into a prehistoric swamp. Before we even think about crumbling mortar joint repair on a leaning chimney, we look at the soil. Foundation helical pier installation has become the backbone of our forensic work. If the geotechnical report shows unstable silt or expansive clay, we drive those steel screws down to load-bearing strata. It is the only way to stop the ‘stair-step’ cracking that plagues historic brickwork. Without a stable base, your fancy 3D-printed ornaments will be in a pile of rubble within five years. I have seen guys try to ‘butter’ over a structural crack with Type S mortar, only to have the wall shear the patch right off because the hydrostatic pressure from the soil was pushing the footer inward.
The Art of the Joint: Pointing Styles and Mud Chemistry
Even with the best printed molds, the ‘tooth’ of the restoration depends on the brickwork pointing styles. If you are working on a pre-1940s building, you better keep the Portland cement in the truck. Those old bricks were fired at lower temperatures; they are ‘soft.’ If you use a modern, hard mortar, the brick becomes the sacrificial element. In a freeze-thaw cycle, the mortar stays rigid while the brick face spalls off. We use lime-based ‘mud’—Type O or K—to ensure the joint is the breathable part of the wall. Whether we are doing a flush joint, a grapevine joint, or a weathered strike, the goal is shedding water. This is especially true in chimney flashing repair, where the saturation levels are highest. A cold joint in a chimney is a death sentence; it invites water to sit, freeze, and explode the masonry from the inside out.
“Water penetration is the single greatest threat to masonry durability. Proper detailing of joints and flashings is the first line of defense.” – BIA Technical Note 7
The Gritty Reality of Modern Restoration
I’ve seen too many ‘handyman specials’ where they slapped ‘lick-and-stick’ stone over a retaining wall installation that didn’t have a single weep hole. The result is always the same: the wall bows, the stone pops, and the homeowner is out twenty grand. The 3D printing revolution isn’t a shortcut for lazy masons; it is a precision tool for the masters. We still have to grind out the joints by hand, we still have to ‘butter’ the units with the right suction, and we still have to use a slicker to ensure the density of the joint is uniform. But now, when we encounter a piece of history that was thought to be lost, we don’t have to say ‘it can’t be done.’ We scan it, we print the mold, we mix our fiber-reinforced mud, and we put it back better than the day it was built. That is the future of the craft: old-world soul meets new-world science. Just don’t let me catch you using a dry-cut blade without a vacuum; my lungs have enough dust in them already. “,”image”:{“imagePrompt”:”A gritty, close-up shot of a 3D-printed plastic mold being filled with fiber-reinforced mortar on a weathered wooden workbench. In the background, an old mason’s trowel and a digital 3D scanner are visible, showing the contrast between traditional tools and modern technology.”,”imageTitle”:”Digital Masonry Restoration Process”,”imageAlt”:”3D printed mold for historic brick restoration being filled with fiber-reinforced mortar”},”categoryId”:0,”postTime”:””}