
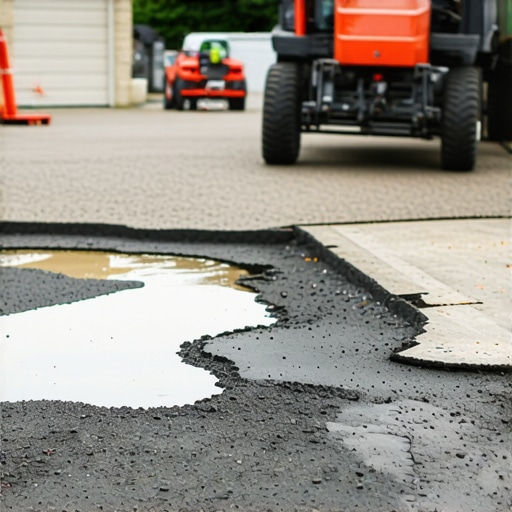
I remember standing over a driveway in a suburb where the frost heave was so aggressive it looked like a frozen ocean. The homeowner pointed to a three-inch crater and told me he had ‘patched it’ three times already with the cheap bags from the hardware store. I took my hammer and tapped the surrounding area; it sounded like a hollow drum. When I put my borescope into a nearby hairline fracture, I didn’t see solid ground. I saw a void where the sub-base had washed out because of a failed retaining wall drainage upgrade nearby. The structural integrity was a ghost, and the owner was just putting lipstick on a corpse. This is the reality of masonry forensics: a hole is never just a hole. It is a symptom of a deeper chemical or mechanical failure.
The Chemistry of the Cold Joint and Why Most Patches Fail
Most DIY repairs fail because they ignore the fundamental physics of the ‘cold joint.’ When you pour fresh ‘mud’ onto old, cured concrete, they don’t magically fuse. Without proper preparation to create a mechanical ‘tooth,’ the new patch simply sits on top like a scab. Industrial-grade concrete patches are formulated with polymers and acrylic fortifiers that modify the hydration process. In standard concrete, the Calcium Silicate Hydrate (C-S-H) crystals grow and interlock. In a patch, these crystals must penetrate the pores of the existing substrate. This is why masonry cleaning is not an aesthetic choice but a structural necessity. If there is oil, salt, or even fine dust in that hole, the bond will fail before the sun sets. The suction of the old concrete will pull the moisture out of the new patch too quickly, causing it to ‘burn’ or flash set, leaving you with a brittle, chalky mess that will pop out during the next freeze-thaw cycle.
“Surface preparation is the most important factor in the longevity of any concrete repair. The substrate must be saturated surface dry (SSD) to prevent the old concrete from robbing the repair material of its hydration water.” – ACI 546R-14 Guide to Concrete Repair
The Freeze-Thaw War: A 9% Expansion Nightmare
In northern climates, water is the primary antagonist. When water enters a crack in your driveway, it doesn’t just sit there. When it freezes, it expands by approximately 9% in volume. This generates internal pressures that can exceed 100,000 psi—far greater than the tensile strength of any concrete. This leads to ‘spalling,’ where the surface of the concrete begins to flake off in layers. If you are dealing with spalled concrete steps repair or driveway craters, you cannot use a standard Type N mortar. You need an air-entrained, industrial-grade patch that contains microscopic bubbles. These bubbles act as internal pressure relief valves, giving the freezing water a place to expand into without shattering the crystalline matrix of the patch.
Micro-Zooming into the Repair Process: From Tooth to Slicker
To fix a driveway hole correctly, you don’t reach for a trowel first; you reach for a cold chisel or a diamond-blade saw. You must undercut the edges of the hole so the patch is wider at the bottom than at the top. This creates a mechanical lock. After the excavation, you must address the ‘honeycombing’—those pockets of air and exposed aggregate that suggest poor consolidation in the original pour. Once the hole is prepped and the masonry cleaning is complete, we apply a bonding agent. This isn’t just glue; it’s a re-emulsifiable resin that ensures the new ‘mud’ bites into the old surface. When you ‘butter’ the edges of the repair, you ensure there are no voids. Finally, use a ‘slicker’ or a steel trowel to finish the surface, but don’t over-work it. Over-troweling draws too much ‘cream’ to the top, weakening the surface and leading to future scaling.
Interconnected Systems: Chimneys, Foundations, and Walls
A failing driveway is often part of a larger masonry ecosystem. For instance, the same hydrostatic pressure that causes driveway holes often necessitates a foundation crack repair or a cracked brick wall repair elsewhere on the property. If your driveway is sloped toward the house, that water is migrating into the footings. This is where we look at fire-rated masonry installation for interior safety or even chimney cap replacement to ensure that water isn’t infiltrating the core of the home from above. In historic contexts, we must be even more careful. Using a high-strength industrial patch near an old house requires an understanding of historic pointing styles and historic tuckpointing. You cannot put a rock-hard modern patch against soft, 19th-century brick. The patch will win, and the brick will shatter. This ‘sacrificial’ principle is the cornerstone of all high-end restoration.
“Water penetration is the single greatest threat to masonry durability. Proper flashing and drainage are the primary defenses against premature failure.” – BIA Technical Note 7
Aesthetic Integration and Final Protection
Once the structural repair is sound, we address the ‘scar.’ This is where masonry staining comes into play. A raw concrete patch sticks out like a sore thumb. By using iron-oxide based stains, we can blend the new patch into the weathered patina of the surrounding driveway. This isn’t just about looks; many industrial stains also act as silane-siloxane sealers, which are hydrophobic. They change the surface tension of the concrete, causing water to bead up and roll off rather than soaking in to start the freeze-thaw cycle all over again. Whether you are dealing with a driveway, a retaining wall, or spalled concrete steps, the mantra is the same: fix the water, prep the tooth, and respect the chemistry. Do it once, or do it twice. The choice is yours, but the physics won’t wait.