The Forensic Scene: When the Walls Start Weeping
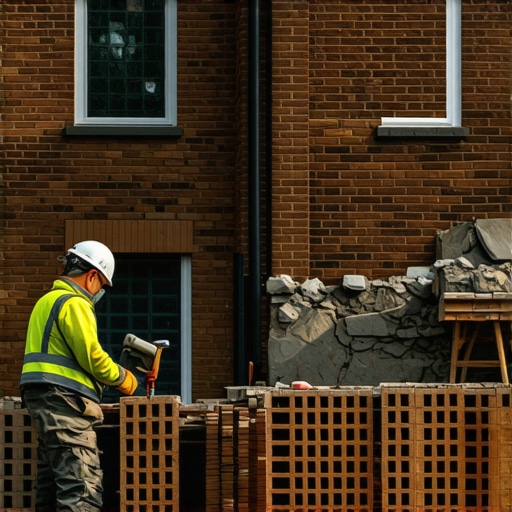
The call came in on a Tuesday. A homeowner in a 1920s-era industrial loft conversion noticed a fine, reddish dust settling on his floor every morning. He thought it was sawdust. When I arrived for the structural masonry inspection, I didn’t see sawdust; I saw the literal blood of the building. Someone had recently hired a ‘pro’ for facade cleaning, and that contractor had used a 15,000 PSI pressure washer on a century-old soft-fired clay facade. They had blasted away the ‘kiln skin’—the hard, protective outer layer formed during the firing process. Now, the soft, porous heart of the brick was exposed to the elements, and it was disintegrating at a rate of millimeters per month. This is the tragedy of improper salvage and restoration. You don’t just ‘fix’ a historic wall; you enter into a chemical and physical contract with the materials used by the men who came before you. If you break that contract, the building will punish you. Whether you are performing a brick column repair or a full-scale restoration, understanding the physics of salvage is the difference between a century of durability and a decade of decay.
“Mortar should always be weaker than the masonry units it binds, acting as a sacrificial element to protect the brick from stress and moisture damage.” – BIA Technical Note 1
Rule 1: The Physics of Compatibility (The Sacrificial Joint)
The biggest mistake in modern tuck pointing services is the ego of the mason. We love to think that harder is better. We see Type S mortar with its high compressive strength and think it’s ‘heavy duty.’ But in a historic salvage scenario, high strength is a death sentence. Old bricks, especially those manufactured before the standardized high-heat kilns of the mid-20th century, are ‘soft.’ They move. They breathe. They expand and contract with the seasons. When you pack a joint with hard Portland cement, you create a rigid cage. When the wall tries to move, the mortar won’t give, so the brick has to. The result? Spalling—where the face of the brick literally pops off. For successful salvage, you must use high-performance mortar mixes specifically engineered for low compressive strength and high vapor permeability. We are talking Type O or even pure lime putty. The mortar is meant to be the ‘wick’ that draws moisture out and the ‘bumper’ that absorbs movement. It is a sacrificial element. You want the mortar to fail over 50 years, not the brick to fail over five.
Rule 2: Structural Integrity and the Batter Correction
When salvaging materials for a new life—say, rebuilding a tumbled boundary using retaining wall batter correction—you have to respect gravity’s long game. I’ve seen salvaged stone walls lean until they become a liability because the ‘batter’ (the inward slope of the wall) was ignored. In historic salvage, the units are rarely uniform. You aren’t playing with LEGOs. You are managing a puzzle where every piece has a different density. If you are dealing with a brick column repair, you must ensure the core is structurally sound before applying the salvaged veneer. This often requires fiber-reinforced mortars in the structural core to provide the tensile strength that old lime-based systems lack, while keeping the exterior ‘mud’ authentic to the period. You butter the ends of each brick with precision, ensuring no honeycombing exists in the center of the wall where water can pool and freeze. If the wall is leaning, you don’t just push it back; you excavate, reset the footing, and recalculate the center of mass.
“The durability of a masonry wall is inversely proportional to the speed at which it was constructed.” – ASTM C270 Commentary
Rule 3: Moisture Management and the Flashing Nexus
Water is the only enemy that never sleeps. In historic salvage, the most vulnerable point is where the masonry meets the roof or the ground. A common failure point I see during forensic inspections is the chimney flashing repair gone wrong. Contractors often use modern sealants that trap moisture behind the lead or copper. In a salvaged brick chimney, that trapped vapor will go through a freeze-thaw cycle, expanding by 9% and shattering the internal flues. The same logic applies to green roofing masonry integration. If you are putting a living roof on an old structure, you are introducing a massive constant moisture load. You need a specialized drainage plane and masonry joint sand repair that allows for rapid drainage without washing out the fines of your mortar. You can’t just ‘slap some mud’ on it. You have to understand the capillary break—the point where the water stops moving inward and starts moving out. Using a slicker to tool the joints into a concave shape isn’t just for looks; it’s a hydraulic design to shed water away from the ‘heart’ of the wall.
Rule 4: Surface Preservation vs. Cosmetic Vanity
Everyone wants their old brick to look ‘new.’ That’s the first sign of an amateur. When we talk about facade cleaning for salvaged materials, we are talking about conservation, not a makeover. Using harsh chemicals or abrasive blasting destroys the very thing that makes the brick durable. If you have to clean it, use the lowest pressure possible and a pH-neutral detergent. If you are dealing with salvaged pavers for a walkway, masonry joint sand repair is your best friend. Don’t use polymeric sand that turns into plastic; use a breathable, graded sand that allows for natural drainage. This prevents a cold joint from forming between the paver and the base, which eventually leads to the ‘wavy’ driveway syndrome. Real masonry is about the slow dance of carbonation. It’s about the lime in the mud absorbing CO2 over decades and turning back into stone. It’s a living system. If you treat it like a dead, static object, it will crack, crumble, and remind you that it was here long before you, and if treated right, it will be here long after.