
The Forensic Reality of the Hairline Crack
The homeowner called me out to a 1924 Dutch Colonial because they noticed what they called a ‘minor cosmetic blemish’—a hairline crack snaking through the mortar joints of the chimney stack. They had already bought a $15 grout bag from a big-box store and a few bags of premixed Type S, ready to ‘squeeze it in like cake frosting.’ But when I slid my fiber-optic scope into a localized void where the mortar had already failed, I didn’t see solid masonry. I saw a cavity of rusted-out wall ties and a structural substrate that was literally turning to dust because the previous owner had used a non-breathable sealant. This is the danger of the DIY mentality when it involves historic tuckpointing: if you don’t understand the chemistry of the wall, you aren’t fixing it; you’re burying the evidence of its demise. To choose between bagging and pointing, you have to understand the ‘tooth’ of the brick and the physics of how mud bonds to 100-year-old clay.
The Physics of the Bond: Why Your Tool Choice Dictates Longevity
In the world of brick wall restoration, the finish isn’t just about aesthetics; it is about managing the hydraulic pressure of water vapor trying to escape the building envelope. When we talk about bagging (using a grout bag) versus pointing (using a hawk and a slicker), we are debating two entirely different methods of material delivery and compaction. Bagging is an extrusion process. You are forcing a high-slump, wet mortar through a nozzle. This requires the mortar to be ‘fat’—high in lime or plasticizers—to prevent it from clogging. Pointing, however, is a mechanical compaction process. You take a ‘dry-pack’ mortar, one that barely holds its shape when squeezed in your fist, and you ram it into the joint using a slicker.
“Water penetration is the single greatest threat to masonry durability, and the density of the mortar joint is the primary defense against such ingress.” – BIA Technical Note 7
This density cannot be achieved with a grout bag. The bagging method leaves microscopic voids as the excess water evaporates, creating a honeycomb structure that invites the freeze-thaw cycle to do its worst. In northern climates, this is a death sentence for a commercial smokestack repair or even a simple residential wall.
The Grout Bag: The ‘Lick-and-Stick’ Temptation
For the weekend warrior, the grout bag feels like a savior. It’s fast. It’s familiar. But in masonry damage assessment, we see the ‘bagger’s curse’ constantly: the smear. Because the mortar in a bag must be wet to flow, it often lacks the surface tension to stay within the joint. As you squeeze, the ‘mud’ sags, bleeding over the edges of the brick. If you try to wipe that wet mortar off a porous, historic brick, you’ve just permanently stained the brickwork restoration project. The Portland cement particles are driven deep into the ‘pores’ of the clay, and no amount of acid washing will ever truly get it out. Furthermore, bagging is notoriously difficult for historic tuckpointing because old bricks are rarely uniform. A bag doesn’t allow you to ‘butter’ the back of the joint; it just fills the void haphazardly. You lose the ability to create a ‘sacrificial’ joint—a core principle of restoration where the mortar is designed to be softer than the brick so it fails first, saving the expensive masonry from spalling.
The Hawk and Slicker: The Master’s Approach
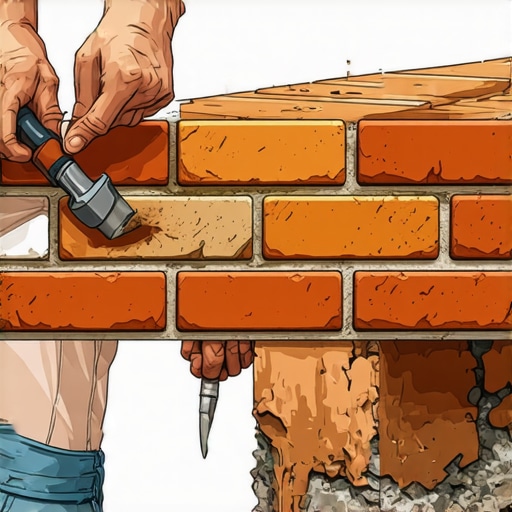
If you want a cleaner finish, you have to learn to use a hawk and a slicker. This is the tuckpointing tools for DIY gold standard. You hold the hawk—a flat square of aluminum with a handle—flush to the horizontal joint. You then use the slicker (or a pointing trowel) to ‘slice’ a ribbon of mud off the hawk and pack it into the joint. Because the mortar is ‘stiff’ or ‘low-slump,’ there is zero smear. You are ironing the mortar into the brick. This compaction forces the binder (lime or cement) to make intimate contact with the ‘tooth’ of the brick, creating a waterproof seal that a grout bag could never replicate. When I perform a masonry damage assessment, I can always tell a hand-pointed joint by its ‘ring.’ If you tap a properly pointed joint with a hammer, it sounds like stone. A bagged joint often sounds hollow, like a drum, indicating the honeycombing hidden beneath the surface.
The Chemistry of the ‘Mud’: Lime vs. Portland
In any brick wall restoration, the material science is more important than the tool. If you are working on a home built before 1940, you are likely dealing with lime-based mortar. Modern Type S or Type M cement is incredibly hard. If you use a grout bag to inject a hard Portland-rich mix into a soft lime-based wall, you are creating a ‘thermal bridge’ that will cause the brick faces to pop off during the first hard freeze.
“The mortar should always be weaker than the masonry units so that any movement is taken up in the joints, which are easier to repair than the bricks themselves.” – Vitruvius, De Architectura
This is why tuck pointing services often insist on custom-mixing lime putty. A grout bag struggle with true lime putty because the aggregate size is often too coarse for the nozzle. For a clean finish, you need a mortar that has ‘suction’—it needs to pull the moisture out of the mix and into the brick quickly so you can ‘strike’ the joint without it smearing. This ‘flash setting’ is your friend; it allows you to tool the joint into a weather-struck or concave profile that sheds water effectively.
When Bagging Makes Sense (The Exception)
I’m not a complete Luddite. There are times when bagging is acceptable—specifically in commercial smokestack repair or deep-void filling where you are more concerned with volume than the finish of the face. If you are doing foundation slab jacking and need to fill a secondary void behind a stone veneer, a bag can get the material where a slicker can’t. But even then, you must be wary of cold joints. If you stop bagging for ten minutes to refill, the first batch has already begun its initial set. When you start again, the two batches won’t chemically bond, leaving a hairline fracture that water will find. For brickwork sealants application, a bagged joint is often too porous to accept the sealant evenly, leading to splotchy protection and eventual failure of the green roofing masonry integration at the parapet walls.
The Foreman’s Verdict: Tooling for the Future
If you are looking for a ‘clean’ finish, the answer isn’t in the tool you use to put the mortar in; it’s the tool you use to finish it. After the mud has ‘cheesed up’ (attained the consistency of hard cheese), you must use a jointer tool to strike it. This further compacts the surface, closing the capillary pores. If you bagged the joint, the moisture content is too high, and striking it too early will bring the ‘fines’ to the surface, creating a weak, dusty finish that will erode within five years. In digital twin masonry projects, we model these erosion patterns, and the data is clear: hand-packed, tool-struck joints outlast bagged joints by a factor of three to one. Don’t be the ‘handyman special’ that ruins a historic facade. Get a hawk, get a slicker, and learn to feel the suction of the brick. Your foundation—and your legacy—depend on it.