
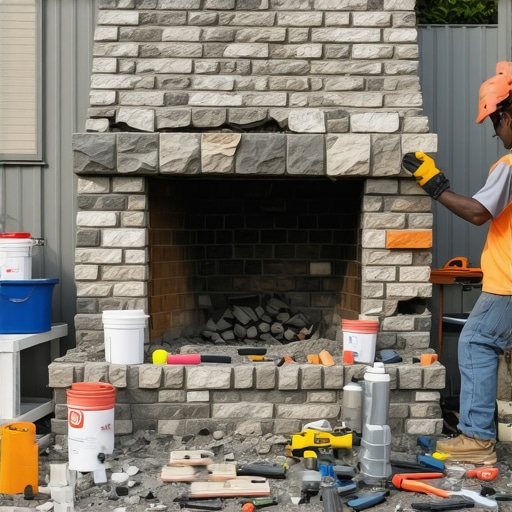
The Autopsy of a Crumbling Hearth
I stood looking at an outdoor fireplace last October that the homeowner claimed only needed a little touch-up. They thought it was just a hairline crack, a minor blemish on the face of their patio’s centerpiece. But when I put my scope inside the cavity between the veneer and the firebox, the reality was a structural horror show. The internal structural steel was rusted to orange dust, and the firebrick was essentially floating on a bed of saturated silt. This is the reality of the forensic masonry business; what you see on the surface is rarely the full story of the failure. In the harsh freeze-thaw cycles of the north, an outdoor hearth isn’t just a luxury—it is a thermal machine that must survive 9% water expansion every time the mercury drops. If you do not build it to breathe and move, it will tear itself apart from the inside out.
“Water penetration is the single greatest threat to masonry durability, leading to efflorescence, spalling, and the eventual degradation of the structural bond.” – BIA Technical Note 7
The Foundation Underpinning: Why Most Hearths Sink
Before you even look at a brick, you have to look at the soil. A standard 4-inch patio slab is not a foundation for a masonry hearth. You are looking at several tons of concentrated dead load. In my thirty years, I have seen more chimney structural repair jobs caused by inadequate footings than by actual weather. If your hearth is pulling away from the house or leaning, you are likely looking at foundation underpinning as your first step. You need to get below the frost line. If you don’t, the ground will heave that masonry like a toy, snapping your brick arch restoration work before the first winter is over. We look for a consolidated sub-grade, often requiring a reinforced concrete mat that distributes the weight of the massive fire-rated masonry installation across a wider footprint than the structure itself.
The Physics of the Fire-Rated Masonry Installation
Building for fire is different than building a garden wall. You are dealing with extreme thermal gradients. The inside of the firebox hits 800 degrees while the outside is at 30. This creates massive internal stress. We use firebrick because of its high alumina content, but it is the mud that usually fails first. When performing a fire-rated masonry installation, you cannot use standard Type N mortar. It will vitrify and crack. You need a refractory mortar that chemically bonds with the brick. I prefer a hydraulic-setting refractory mud over the air-dry stuff for outdoor applications because it handles the moisture better. You have to butter every joint perfectly—no voids. Voids are where water hides, and where it turns into steam when you light that first fire of the season, blowing the face off your brickwork.
Structural Brick Ties Replacement: The Invisible Skeleton
When I’m doing a forensic tear-down, I often find that the structural brick ties replacement was skipped in a previous ‘handyman’ repair. The ties are what hold your veneer to the backup wall. In an outdoor hearth, these are subjected to constant moisture. If they aren’t stainless steel, they will corrode. When they rust, they expand—sometimes up to four times their original thickness. This expansion creates a ‘jacking’ effect that lifts the courses of brick, creating those horizontal cracks that everyone misdiagnoses as simple settlement. We use 16-gauge corrugated or wire ties, spaced every 16 inches vertically and 24 inches horizontally, ensuring they are embedded deep into the mortar bed to provide the ‘tooth’ needed for a permanent mechanical bond.
“Materials used in masonry construction shall be selected and detailed to resist the effects of fire, weather, and the specific environmental conditions of the site.” – ASTM C199 Standard for Firebox Materials
Historic Pointing Styles and the Sacrificial Joint
If you are working on a hearth that was built before the 1940s, you are likely dealing with soft, handmade bricks. This is where most modern masons fail. They come in with a bag of high-strength Portland cement and ‘fix’ a historic hearth. The Portland is harder than the brick. When the wall moves, the mortar doesn’t give—the brick snaps. This is why we study historic pointing styles. We use a lime-rich mortar, perhaps a Type O or even a straight lime putty for very old work. The mortar must be the sacrificial lamb; it is designed to weather so the brick doesn’t have to. When we are commercial tuckpointing or doing a private restoration, we match the aggregate size and the color of the original mud to ensure the capillary action of the wall remains consistent. We use a slicker or a jointer to strike the joint, compressing the surface to create a ‘skin’ that sheds water while allowing the internal moisture to evaporate through the pores.
The Restoration of the Stone Balustrade and Arch
An outdoor hearth often features decorative elements like a stone balustrade restoration or a complex brick arch. These are the high-stress points. A brick arch restoration requires a temporary ‘center’ or form. The physics of the arch depends on the keystone and the tightness of the radiating joints. If the arch is failing, it’s usually because the abutments have shifted. We check the ‘thrust’ of the arch. For stone balustrades, we often find that the internal dowels were made of iron, which has rusted and split the stone. We replace these with 316-grade stainless steel pins and use a breathable stone consolidant to stop the spalling.
Brickwork Sealants Application: The Final Shield
After the mud has cured for 28 days, we talk about brickwork sealants application. This is a controversial topic in the trade. If you use a ‘wet look’ sealer that creates a plastic film, you have just killed your masonry. That film traps moisture inside the brick. When it freezes, it will pop the face of the brick off in a process we call spalling. I’ve seen ‘handyman specials’ where the entire hearth looks like it’s peeling like a sunburn. You must use a silane-siloxane penetrating sealer. This doesn’t form a film; it changes the surface tension of the pores at a molecular level. Water beads off the surface, but water vapor can still escape from the inside. It’s the difference between wearing a plastic bag and wearing a Gore-Tex jacket.
The Master Mason’s Checklist for Rebuilding
1. Excavation and Footing: Dig to the frost line and pour a 3000 PSI reinforced slab. 2. Thermal Core: Build the firebox using firebrick and hydraulic refractory mortar. 3. Air Gap: Leave a 1-inch air space between the firebox and the exterior veneer to allow for thermal expansion. 4. Weep Holes: Install weeps at the base of the veneer so any moisture that gets behind the brick can escape. 5. Tie-In: Use stainless steel ties to secure the veneer, never reusing old, rusted hardware. 6. Joint Striking: Use a concave joint for maximum water shedding. 7. Curing: Keep the masonry damp for the first few days to prevent ‘flash setting’ in the sun. 8. Final Seal: Apply a vapor-permeable sealer only after the mortar has fully carbonated.