
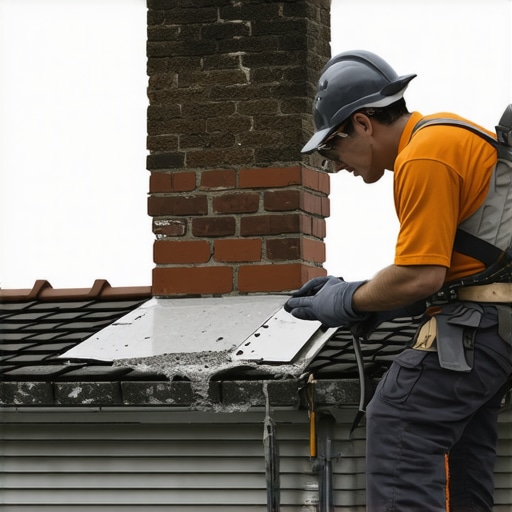
The Forensic Scene: A Hairline Fracture and a Hidden Disaster
I stood on a slate roof in the middle of a damp November, looking at a chimney that most homeowners would have ignored. The owner thought it was just a hairline crack in the mortar, a minor annoyance that a ten-dollar tube of caulk could fix. But when I slid my fiber-optic scope inside the wythe, I saw the true horror: the structural steel lintel had rusted to a ghost of its former self, expanding in a process we call ‘oxide jacking’ until it had literally started to lift the top three courses of brick from the inside out. The flashing wasn’t just leaking; it was the epicenter of a slow-motion explosion. This is the reality of masonry forensics. What looks like a surface blemish is often the external symptom of a deep, chemical failure that no amount of ‘lick-and-stick’ repair can solve.
The Great Tar Delusion: Why Bitumen is the Enemy of Brick
Walk down any suburban street and you’ll see it: thick, black, ugly smears of plastic cement glopped around the base of a chimney. Contractors love it because it’s fast. Homeowners love it because it’s cheap. I hate it because it’s a death sentence for your brickwork. Masonry is a breathing, porous system. It’s a series of capillary tubes that constantly move moisture through the wall. When you slap a non-breathable, petroleum-based tar over the junction between your roof and your masonry, you aren’t sealing water out; you’re sealing water in. During the brutal freeze-thaw cycles of the north, that trapped moisture is your worst nightmare. Water expands by 9% when it turns to ice. If that expansion happens behind a layer of tar, it has nowhere to go but through the face of your brick. This leads to spalling—the process where the hard outer ‘crust’ of the brick pops off, leaving the soft, inner core exposed to the elements like an open wound.
“Water penetration is the single greatest threat to masonry durability. Proper flashing and drainage systems are mandatory to redirect water away from the structural core.” – BIA Technical Note 7
The Physics of the Flashing Connection
To understand why chimney leak detection is so complex, you have to understand the thermodynamics of the chimney itself. A chimney is a massive thermal bridge. It gets hot, it gets cold, and it moves independently of the wood-frame house it’s attached to. This differential movement is why we use two-part flashing: the base flashing (attached to the roof) and the counter-flashing (embedded into the brick). If you just ‘butter’ some mortar or tar over the gap, the first time the sun hits that brick and it expands via thermal heave, your seal is gone. Proper flashing requires ‘kerfing’—cutting a deep groove into the masonry and tucking metal—preferably lead or copper—directly into the joint. We don’t use ‘mud’ to hold it; we use lead wedges and then point over it with a high-quality mortar that matches the historic mortar analysis of the original build. Without this mechanical bond, you’re just whistling in the dark.
Historic Mortar Analysis: Respecting the Ancestors
When I’m performing a brick wall restoration on a home built before 1940, the biggest mistake I see is the use of modern Type S Portland cement. It’s too hard. It’s too brittle. In the forensic world, we follow the ‘Sacrificial Principle.’ The mortar should always be softer than the brick. If the house settles—and it will—you want the mortar joint to take the stress and crack, not the brick. Modern cement is like putting a steel rod inside a glass tube; when the tube bends, the glass shatters. We use historic mortar analysis to determine the exact ratio of lime to sand. Lime mortar is ‘self-healing.’ Over decades, carbonation allows the mortar to actually seal micro-cracks on its own. If you’re dealing with a chimney leak, and you try to fix it with a hard concrete patch, you’re essentially creating a ‘cold joint’ that will separate the first time the temperature drops to zero.
The Nightmare of Stone Veneer Over Brick
In the last twenty years, we’ve seen a plague of people wanting to ‘modernize’ their chimneys by putting stone veneer over brick. It’s a forensic nightmare. They take a perfectly functioning, breathable chimney and wrap it in a layer of non-porous synthetic stone. This creates a giant moisture trap. The chimney can no longer dry out from the outside. I’ve seen chimneys where the original brick underneath has literally turned to red dust because it was saturated for ten years straight behind a ‘lick-and-stick’ veneer. If you’re planning an outdoor kitchen masonry build or a chimney facelift, you have to ensure there is a drainage plane—a way for water that gets behind the stone to escape. Without it, you’re building a vertical bathtub that will eventually collapse under its own weight.
Foundation Stress and the Chimney Connection
Don’t think for a second that a chimney leak is just about your attic getting wet. A chimney is often the heaviest part of your home’s foundation. If the flashing is failed and water is running down the interior of the masonry, it eventually reaches the ‘footing.’ In many older homes, the chimney sits on a separate foundation than the rest of the house. Constant water saturation at the base leads to soil erosion and hydrostatic pressure. Suddenly, you’re not just looking at a chimney leak; you’re looking at a foundation crack repair job. I’ve seen chimneys that have started to ‘lean’ away from the house because the water from the roof was dumped directly at the base for a decade. This is where we have to bring in the heavy hitters: self-leveling masonry lifts or even helical piers to stabilize the stack before the whole thing comes down on the neighbor’s driveway.
The Anatomy of a Proper Chimney Restoration
A real mason doesn’t reach for a bucket of tar; they reach for a ‘slicker’ and a ‘hawk.’ The process of brick wall restoration begins with grinding out the old, failing joints to a depth of at least one inch. You have to get back to ‘good mud’ to ensure a bond. We then use sustainable masonry materials—natural hydraulic lime is my go-to—and carefully pack the joints in lifts. We don’t just ‘smear’ it on. We ‘strike’ the joint to compress the mortar, which creates a ‘tooth’ that resists water penetration. For the flashing, we look at the ‘soldier course’ at the top. Are the bricks vertical? Are they shedding water or holding it? Often, we have to rebuild the chimney crown with a proper ‘drip edge’ so water never even touches the flashing in the first place.
“The primary function of masonry mortar is to provide a weather-resistant seal while allowing for the relief of internal stresses.” – ASTM C270 Standard Specification
Sustainability and the Future of Masonry
We are moving back to the old ways, and for good reason. Using sustainable masonry materials isn’t just about being ‘green’; it’s about being ‘long.’ A lime-based chimney restoration can last 100 years. A tar-based patch will fail in three. When we talk about the longevity of a structure, we’re talking about the chemistry of the bond. If you want to avoid the ‘forensic scene’ at your own house, stop looking for the quick fix. If a contractor shows up with a bucket of black goop to fix your chimney, send them packing. You need a mason who understands the suction of a dry brick, the chemistry of the mortar, and the physics of the water table. Anything else is just a temporary bandage on a wound that’s going to keep bleeding until it destroys your home.