
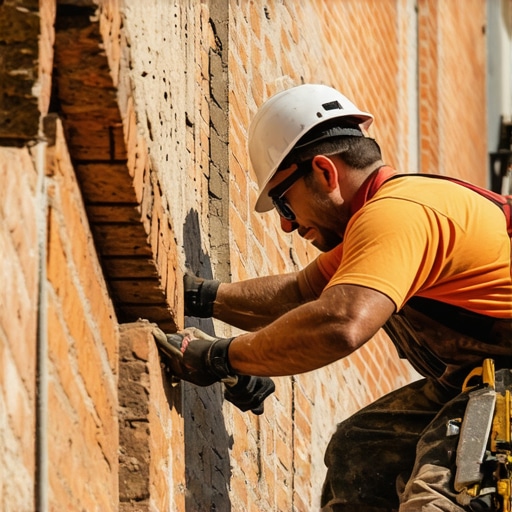
You can tell a lot about a man by the way he looks at a radius. To most, a curved brick wall is just a bit of architectural flair—a turret, a bay window, or an old silo. To a third-generation mason, that curve represents a complex battle against geometry, physics, and the inevitable decay of time. I have spent thirty years fixing the mistakes of ‘handyman specials’ who tried to treat a curved wall like it was flat. They slap on some hard Portland cement and wonder why the historic brick starts spalling and popping off like a cheap scab. They don’t understand the suction, the tooth, or the simple fact that a curve breathes differently than a plane.
My Uncle Joe used to keep a collection of custom-bent slickers in a leather roll. He didn’t buy them; he forged them. He would say, ‘A straight line is a gift from the architect, but a curve is where the devil hides in the mud.’ I remember him showing me a 19th-century chimney damper repair on a rounded stack. He’d tap the brick with a hammer, listening for that high-pitched ‘ting’ of a healthy unit. If it thudded, it was dead—saturated with water and ready to crumble. He taught me that the masonry isn’t just a shell; it is a living, breathing lung made of clay and lime. When you work on a radius, you aren’t just laying brick; you are managing radial stress and capillary action.
“Water penetration is the single greatest threat to masonry durability.” – BIA Technical Note 7
When dealing with commercial tuckpointing on rounded structures, the physics of the joint changes. In a standard flat wall, your mortar joints are uniform. But on a curve, the outer edge of the joint is wider than the inner edge. It’s a wedge. If you don’t account for this, your ‘mud’—the mortar—won’t pack correctly. You’ll end up with honeycombing deep inside the joint where you can’t see it, but the water sure as hell can find it. This is why historic brick salvage is so critical. You cannot mix modern, hard-as-nails Type S mortar with 100-year-old salvaged clay bricks. Those old bricks are soft. They were fired in kilns that didn’t reach the temperatures of modern plants. They rely on a ‘sacrificial’ mortar—a lime-heavy mix that is softer than the brick itself. If the mortar is harder than the brick, the brick will lose the fight every time the temperature drops.
In the North, we deal with the freeze-thaw cycle, the ultimate mason’s nightmare. When water gets into a joint and freezes, it expands by about 9%. If that water is trapped behind a hard, non-breathable mortar, it exerts thousands of pounds of pressure. The face of your beautiful historic brick will simply shear off. That’s spalling. To prevent this, especially on rounded facades where water tends to wrap around the surface due to surface tension, we use sustainable masonry materials like natural hydraulic lime (NHL). This allows the wall to ‘wick’ moisture out. The moisture evaporates through the mortar joint, not through the brick face. It’s the difference between wearing a Gore-Tex jacket and a plastic trash bag.
For a stone balustrade restoration or a curved outdoor kitchen masonry build, the prep work is where the job is won or lost. You don’t just ‘slick’ new mud over the old. You have to grind out the joints to a depth of at least twice the width of the joint, or until you hit sound mortar. On a curve, this often means hand-chiseling to avoid nicking the edges of the brick. If you’re working with metallic brick colors application, which is becoming popular in modern commercial designs, you have to be even more surgical. One slip of the grinder and you’ve ruined the finish on a brick that can’t be easily replaced.
“The mortar should be weaker than the masonry units so that any cracks will occur in the mortar joints where they can be easily repaired.” – ASTM C270 Standard Specification
One of the most common failures I see is foundation wall bowing repair on curved basement walls. Homeowners think the curve makes it stronger—and it does, if it’s an arch—but hydrostatic pressure is a beast. If the soil outside is saturated and the drainage is shot, that wall will start to lean. I’ve seen chimney flashing repair jobs where the contractor used some ‘miracle’ caulk instead of lead or copper. On a rounded chimney, the flashing has to be stepped and hand-rolled to follow the radius. If you don’t do it, the water will find the cold joint and migrate straight into your living room ceiling. We often integrate green roofing masonry integration now, which adds another layer of complexity. The parapet walls on these projects are often curved, requiring a perfect seal between the masonry and the roof membrane to prevent the weight of the wet soil from pushing the brickwork out of alignment.
To perform true tuckpointing—which is different from repointing—you are actually using two different colors of mortar. First, you fill the joint with a base mortar that matches the brick color. Then, you ‘butter’ a thin, contrasting line of ‘bead’ mortar over the top. This creates the illusion of perfectly sharp, narrow joints on what might actually be irregular, old bricks. On a curve, keeping that bead perfectly level and consistent requires a steady hand and a custom ‘hawk’ to hold your mud. You have to work in small sections, making sure the mud doesn’t ‘burn’ or flash-set. If it dries too fast, it won’t bond, and it will fall out in three years. I always tell the apprentices: wet the bricks first. If the brick is thirsty, it’ll suck the water right out of your mortar before the chemical bond can form. You want ‘suction,’ but you don’t want a vacuum.
When you’re finishing a commercial tuckpointing job on a radius, the ‘strike’ is everything. You use your slicker to compress the mortar into the joint. This compaction is what makes the joint watertight. For rounded walls, a ‘concave’ joint is usually best because it sheds water effectively regardless of the wind direction. If you leave a ‘ledge’ or a ‘recessed’ joint on a curve, you’re just inviting water to sit there and start the decay process all over again. It’s about more than just looking good for the client; it’s about making sure that wall is still standing when my grandson is the one carrying the trowel. Don’t settle for a handyman who thinks a bag of Quikrete and a trowel makes them a mason. Hire someone who knows the smell of the lime and the sound of a ringing brick.