The homeowner thought it was just a hairline gap in the mortar, a minor cosmetic flaw on the parapet. But when I stepped onto that roof and put my pry bar under the edge of the 150-pound limestone cap, the stone didn’t just wiggle; it floated. Below it, the structural brick was a graveyard of pulverized lime and damp dust. The steel anchors were gone—eaten by sixty years of oxidation until they were nothing more than red streaks in the mud. This is the reality of masonry forensics: by the time you see the loose stone, the crime has been in progress for decades.
“Water penetration is the single greatest threat to masonry durability. Properly designed and maintained coping is the first line of defense against the systemic failure of the wall assembly.” – BIA Technical Note 7
When we talk about resetting loose stone coping without making a mess, we aren’t just talking about aesthetic cleanliness. We are talking about the physics of the “umbrella” of your building. In the North, we deal with the brutal reality of the freeze-thaw cycle. Water expands 9% when it turns to ice. If your coping joints are cracked, water migrates into the core of the wall. When that water freezes, it exerts thousands of pounds of pressure per square inch, literally popping the faces off your bricks—a process we call spalling. To fix this, you need to understand the tuckpointing brick walls process starts with the capstone. If the cap is failing, your mortar repointing services are a waste of money.
The Material Science of the Bed Joint
Modern guys love to reach for a bag of high-strength Portland cement, thinking harder is better. They’re wrong. In stone balustrade restoration or coping repair, the mortar must be the sacrificial lamb. If the mortar is harder than the stone, the stone will crack when the building moves. I advocate for sustainable tuckpointing mortars, specifically those based on natural hydraulic lime (NHL). These mortars are breathable; they allow vapor to escape through the joint rather than trapping it inside the masonry, where it causes foundation rot and brick column repair nightmares. We look for a specific ‘tooth’ in the mortar—a mechanical bond created by the sharp edges of the sand grains interlocking with the microscopic pores of the stone.
Step 1: Forensic Preparation and Cleaning
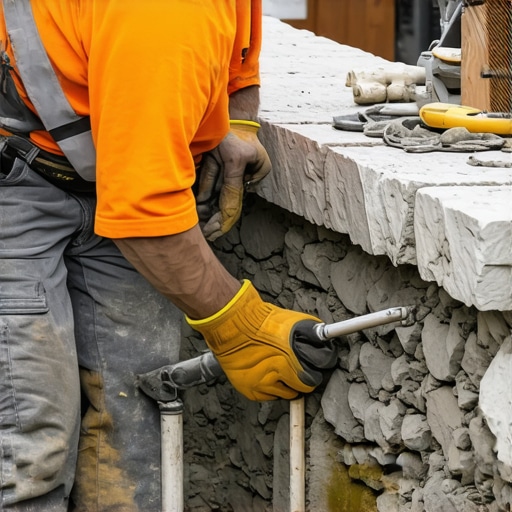
You can’t just ‘butter’ a stone and hope it sticks. First, you must remove every trace of the old, failed ‘mud.’ I use a specialized vacuum-shrouded grinder to keep the dust down, followed by facade cleaning techniques using low-pressure water and soft-bristle brushes. You need to achieve ‘SSD’—Saturated Surface Dry. This means the stone is damp but not glistening. Why? Because a bone-dry stone has high ‘suction.’ It will suck the water out of your fresh mortar before the hydration process can complete, leaving you with a ‘burnt’ joint that has no structural integrity and will result in a cold joint failure within two seasons.
“Mortar shall be specified by property or proportion, but the selection must prioritize the compatibility with the masonry unit’s compressive strength and absorption characteristics.” – ASTM C270 Standard Specification for Mortar
Step 2: The Physics of the Setting Bed
When laying the new bed, we don’t just ‘slap it on.’ We look for masonry birdsmouth cuts or specific drips on the underside of the stone to ensure water shed. I use a hawk and trowel to lay a consistent 3/8-inch bed of Type N or Type O mortar. The secret to not making a mess is the ‘stiff mud’ technique. Your mortar should have the consistency of peanut butter—firm enough to hold its shape but wet enough to be plastic. If it’s too wet, it ‘bleeds’ down the face of the stone, causing staining that requires aggressive chemical facade cleaning to remove later. If you’re dealing with a retaining wall weep hole cleaning project simultaneously, ensure your drainage paths are clear before the stone is set; otherwise, hydrostatic pressure will push your new work right off the wall.
Step 3: Setting and Striking the Joint
Once the stone is lowered, you don’t ‘tap’ it into place—you ‘set’ it. Use a rubber mallet to vibrate the stone until it hits its marks. The excess mud that squeezes out should be allowed to ‘set up’ for about 20 minutes before you touch it. If you try to wipe it while it’s wet, you’ll smear the cement paste into the pores of the limestone. Wait until it’s ‘thumbprint hard,’ then use a slicker or a jointing tool to strike the joint. This compacts the mortar, pushing the binder to the surface and creating a weather-tight seal. For vertical joints between stones, I often recommend a high-quality sealant over a lead shim, as this allows for the thermal expansion that occurs when the sun hits that stone in mid-July. Without this relief, you’ll see honeycombing in the mortar or vertical cracks through the concrete patch repairs below.
The Long Game: Maintenance and Forensics
A masonry wall is a living thing. It breathes, it moves, and it eventually dies if ignored. Resetting coping is just one part of a larger forensic strategy. You must inspect your foundation for settling, ensure your retaining wall weep hole cleaning is up to date, and check that your soldier course bricks aren’t bowing out. Don’t fall for the ‘handyman special’ where they just smear caulk over a crack. That’s like putting a Band-Aid on a gunshot wound. You need the right chemistry, the right physics, and the hands of someone who knows what the ‘ring’ of a healthy stone sounds like. Do it once, do it right, and that limestone cap will still be protecting that building when your grandkids are laying bricks.