
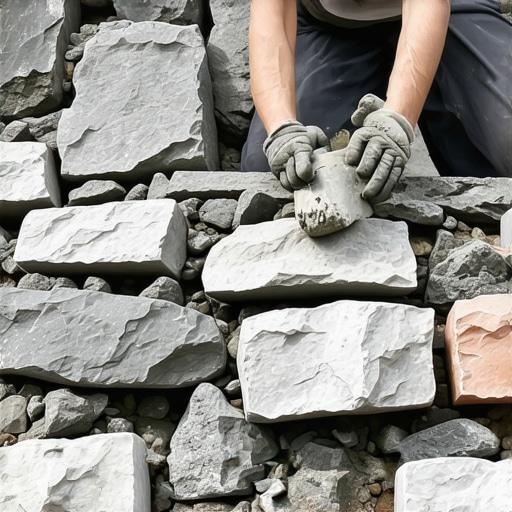
The Forensic Reality of Stone Masonry
I was called out to an old mill house in the humid corridor of the Brandywine Valley last November. The homeowner was frantic, claiming their foundation was ‘turning to sand.’ At first glance, it looked like a standard case of age-related wear. But when I pulled my borescope from my kit and inserted it into a hairline fracture in the corner, I didn’t see the solid rubble core I expected. Instead, I saw a cavern of white, powdery decay. A previous contractor—the kind who thinks a bag of Type S Portland cement is a universal cure—had ‘repointed’ the exterior with a mix so hard it was effectively a tombstone for the wall. The moisture was trapped behind that hard shell, and the original soft lime mortar behind it was being pulverized by hydrostatic pressure. This wasn’t just a repair job; it was a forensic scene where the modern material had murdered the historic structure.
“Mortar should be weaker than the masonry units so that any stress-induced cracking occurs in the mortar rather than the units.” – BIA Technical Note 1
The secret to getting mud to stick to old stone isn’t found in a chemical bonding agent or a fancy additive. It’s found in the physics of suction and the chemistry of the sacrificial bond. When you are dealing with masonry repair services, you have to understand that old fieldstone and lime-burned brick are porous, living things. They breathe. If you slap a non-breathable, high-strength mortar against a soft, porous stone, the stone will lose that battle every single time. The bond fails because the thermal expansion coefficients are mismatched, and the ‘pore-size distribution’ of the new mud doesn’t allow moisture to escape.
The Physics of Suction: Why the ‘Mud’ Falls Off
To get your mud to stick, you have to respect the ‘thirsty’ nature of the stone. This is what we call ‘suction’ or the initial rate of absorption. If you butter a dry, dusty stone with fresh mortar, the stone will instantly suck the moisture out of the mix. This ‘burns’ the mortar. The hydration process—the chemical reaction where water and binder create crystals—is cut short. Instead of a structural bond, you get a brittle layer of dried dust that will pop off the moment the first freeze-thaw cycle hits. To prevent this, we use the SSD method: Saturated Surface Dry. You douse the masonry until it stops drinking, then wait until the surface sheen disappears. This ensures the stone doesn’t rob the mortar of the water it needs to grow its crystalline structure into the stone’s pores.
The Sacrificial Principle and Material Science
In tuckpointing or full-scale restoration, we follow the law of the sacrificial lamb. The mortar must be the weakest part of the wall. It must be softer and more permeable than the stone. Why? Because buildings move. They settle, they expand in the sun, and they contract in the winter. If the mortar is soft (like a high-calcium lime putty), the stress cracks the mortar, which is easy to fix. If the mortar is hard (like modern Portland cement), the stress cracks the stone, which is a catastrophe. This is why stone veneer repair on older homes often fails; people use modern thin-sets on stones that require flexibility.
“The use of mortars with high Portland cement content on older, softer masonry can lead to rapid deterioration of the masonry units themselves.” – ASTM C270 Standard Specification
The Micro-Zoom: Carbonation vs. Hydration
Modern concrete relies on hydration—a rapid chemical reaction. Historic lime mortar relies on carbonation. Over decades, the lime (calcium hydroxide) absorbs carbon dioxide from the air and literally turns back into limestone (calcium carbonate). It is a slow, ‘self-healing’ process. This is why self-healing concrete foundations are such a buzzword today; we are trying to replicate what the Romans and 18th-century masons already knew. When we perform masonry cleaning before a job, we aren’t just making it look pretty. We are opening those pores so the carbonation process can link the new mud to the old substrate at a molecular level. If there is a film of biological growth or old brickwork sealants application residue, the bond will be ‘cold,’ and the two materials will never truly become one.
Structural Integrity: Beyond the Surface
Sometimes the problem is deeper than the mortar. On many old multi-wythe walls, the inner and outer skins begin to separate. This is where structural brick ties replacement becomes the surgical necessity. You can have the best mud in the world, but if the wall is bulging because the headers have snapped, you’re just putting lipstick on a pig. Similarly, when we look at masonry joint sand repair for historic patios, we avoid polymeric sands that act like plastic. We want materials that allow for the migration of salts—efflorescence—to the surface without trapping them. If you trap those salts with metallic masonry finishes or improper sealants, they will crystallize inside the stone and blow the face right off (spalling).
The Process: How a Master Butters the Stone
First, you rake out the old, failing joints to a depth of at least twice the width of the joint. You don’t use a grinder if you can help it; a hammer and a narrow chisel give you the ‘tooth’ you need. After cleaning the joint and achieving an SSD state, you mix your mud to a ‘peanut butter’ consistency. You load your hawk, take your slicker, and pack the mortar in ‘lifts’—layers of no more than 1/4 inch at a time. You don’t just smear it on the face. You pack it tight to eliminate voids. This prevents honeycombing and ensures that the ‘suction’ is uniform across the depth of the repair. If you’re working with mortarless masonry systems or modern dry-stack, the physics change, but for the old world stone, the pressure of the slicker is what drives the bond. Finally, you wait for it to be ‘thumb-print hard’ before you strike the joint to match the historic profile.