
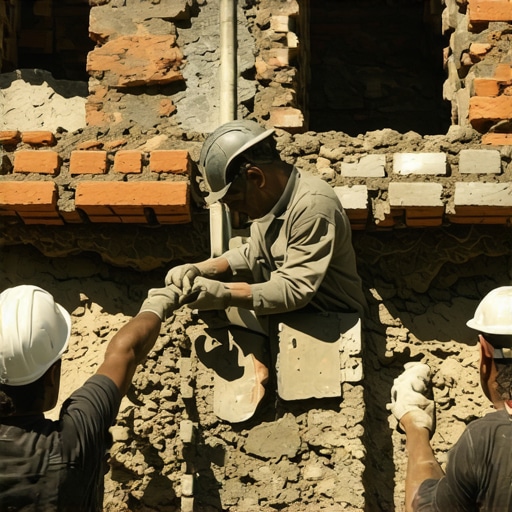
The Ghost of the Facade: Why Your Repointing is Failing
I recently walked past a 1920s Tudor in the city where the homeowner had clearly hired a ‘weekend warrior’ to fix some weathered joints. From twenty feet away, it looked like a gray spiderweb had been vomited onto the beautiful crimson clay. Up close, it was worse. The new mortar was a hard, Portland-heavy Type S, smeared into the joints without any regard for the original substrate. The brick faces were already beginning to shear off, a process we call spalling. This wasn’t just an eyesore; it was a structural execution. When you treat a historic building like it’s a modern ‘lick-and-stick’ brick veneer installation, you aren’t repairing it; you are destroying it. The secret to bonding new mortar to old bricks isn’t found in a bag of pre-mix from a big-box store; it’s found in the delicate balance of material physics and the ‘sacrificial’ nature of the mortar joint.
The Old Master’s Wisdom: The Ring and the Suction
My mentor, a man who had more lime dust in his lungs than oxygen, used to stand over me while I mixed the mud. He’d pick up a reclaimed brick from the pile and rap it with the butt of his trowel. If it didn’t ‘ring’ with a high-pitched, clear chime, he’d toss it into the rubble heap, claiming it was ‘blown out’ internally. But the real lesson wasn’t just the sound; it was the suction. He’d spit on the brick. If the moisture disappeared instantly, he’d yell at me to soak the wall. ‘A thirsty brick is a greedy brick,’ he’d say. ‘It’ll suck the life right out of your mud before it has a chance to shake hands with the clay.’ This is the Initial Rate of Absorption (IRA), and ignoring it is the primary reason for a cold joint—where the mortar sits in the gap but never actually bonds to the unit.
“Water penetration is the single greatest threat to masonry durability. The interface between the mortar and the masonry unit is the most common path for this ingress.” – BIA Technical Note 7
The Physics of the Sacrificial Joint
In the world of historic restoration, we live by one golden rule: The mortar must be softer and more permeable than the brick. Old bricks, fired in kilns that had hot and cold spots, are relatively soft and porous. They expand and contract with the seasons. If you pack those joints with a high-strength, modern high-performance mortar mix that is harder than the brick itself, the brick has nowhere to go when the temperature shifts. The internal pressure builds until the face of the brick pops off. The mortar wins, but the wall loses. Proper brickwork pointing styles, especially for pre-1940s structures, require lime-based mixes (Type O or even K) that act as a ‘sacrificial’ element. It is much easier and cheaper to replace mortar every 50 years than to replace the bricks themselves.
Micro-Zooming: The Chemistry of the Bond
When we talk about ‘bonding,’ we are looking at the hydration process. In modern Portland-based mortars, this is a chemical reaction that happens relatively fast, forming a dense crystalline structure known as Calcium Silicate Hydrate (C-S-H). However, in traditional restoration using lime putty, the process is carbonation. The lime (Calcium Hydroxide) reacts with Carbon Dioxide in the air to turn back into Calcium Carbonate (limestone). This is a slow, ‘breathing’ process. The ‘tooth’ of the bond is created when the microscopic particles of the mortar migrate into the pores of the brick. If you use advanced masonry adhesives in a historic context, you often seal those pores, trapping liquid water behind the surface. When the freeze-thaw cycle hits, that trapped water expands by 9%, and you get total bond failure. This is why flush pointing services must be executed with a deep understanding of the wall’s vapor permeability.
The Forensic Scene: Diagnosing the Failure
I’ve been called to sites where ‘fiber-reinforced mortars’ were used on a chimney structural repair, thinking the fibers would add strength. What the contractor didn’t realize is that while fibers help with tensile strength in new construction, they can create ‘wicking’ channels for moisture in old chimneys. I’ve seen retaining wall reinforcement projects where they used 3D printed masonry repairs to mimic the look of stone, but failed to address the hydrostatic pressure behind the wall. Without proper drainage, no amount of ‘super mud’ will keep that wall standing. You’ll see ‘honeycombing’ in the joints where the mortar wasn’t packed tight enough with a slicker, or ‘burn-outs’ where the sun hit the wall too hard during the set, evaporating the water and leaving a crumbly, useless mess on the hawk.
“Mortar should be designed to be weaker than the masonry units so that any structural movement or thermal expansion results in cracks in the mortar, which is easily repaired, rather than the units themselves.” – ASTM C270 Standard Specification for Mortar
The Process: How to Do It Right
First, you have to get the old, failing material out. This means grinding or chiseling out the joints to a depth of at least twice the width of the joint. You can’t just ‘butter’ the surface; that’s a handyman special that will flake off in one season. You need to clean the joint of all dust—dust is a bond-breaker. Then, you pre-wet the masonry. Not soaking wet, but ‘Surface Saturated Dry’ (SSD). This prevents the brick from stealing the hydration water from your tuckpointing weatherproofing mix. When you apply the mud, you do it in ‘lifts’ or layers, especially if the joint is deep. You pack it tight using a jointer or slicker to ensure there are no air pockets. For a soldier course or any vertical orientation, the bond is even more critical as gravity is working against you. Finally, you choose your finish—whether it’s a weather-struck joint to shed water or a deep-raked joint for shadow lines—based on the climate and the original architecture.
When New Tech Meets Old Walls
While I’m a purist, I’m not a Luddite. There is a place for 3D printed masonry repairs when you need to replicate a complex, vanished terra cotta ornament. There is a place for fiber-reinforced mortars in modern, high-stress commercial applications. But when you are standing in front of a wall that has stood for a century, you owe it to the craftsmen who came before you to use the right materials. Don’t be seduced by the promise of ‘eternal’ adhesives. The secret isn’t a chemical shortcut; it’s the humble, breathable, and sacrificial bond of lime and sand. Do it once, do it right, or don’t do it at all. The wall always tells the truth in the end.