
The Forensic Reality of the Masonry Strike
The homeowner thought the brick lintel over the garage just needed a bit of ‘caulk’ to hide a diagonal crack. I put my scope into the void behind the soldier course and saw the steel angle was gone—not rusted, but literally transformed into a handful of iron oxide flakes that crumbled like dried leaves. This is the reality of forensic masonry: what looks like a surface issue is usually a chemical war happening behind the facade. When you decide to tackle crumbling mortar joint repair or a brick lintel replacement yourself, the tool you hold in your hand determines whether you are a surgeon or a demolition crew. If you walk into a big-box store and grab a 22-ounce framing hammer for historic brickwork repointing, you have already failed. You aren’t just hitting a wall; you are interacting with a complex structural system that has been absorbing hydrostatic pressure and thermal stress for decades.
“Water penetration is the single greatest threat to masonry durability, leading to efflorescence, subflorescence, and the catastrophic failure of the bond between unit and mortar.” – BIA Technical Note 7
In the world of historic brick salvage and restoration, we don’t ‘bash.’ We ‘pluck.’ To do that, you need a hammer with the right metallurgy and balance. Modern mortar—anything mixed after the mid-1940s—is often loaded with Portland cement. It’s brittle, hard, and unforgiving. But historic mortar is a living thing, a mix of lime and sand that allows the building to breathe. If you use a heavy-handed tool on soft, 19th-century clay bricks, the vibration alone will cause brick veneer detachment blocks away from your strike point. This is where historic mortar analysis becomes critical before you even touch a slicker or a hawk.
The Physics of the Blow: Why Weight Matters
Let’s micro-zoom into the physics of the strike. When a hammer head hits a chisel—or the mortar joint directly—it sends a shockwave through the material. In a freeze-thaw environment like the Northeast, those bricks are already under internal tension. Water trapped in the pores expands 9% when it freezes, creating microscopic fissures. A hammer that is too heavy (like a 3lb drilling hammer) provides too much kinetic energy, which doesn’t just break the mortar; it propagates the crack through the ‘throat’ of the brick. For historic brickwork repointing, you want a hammer that allows for ‘high-velocity, low-mass’ strikes. This is the secret to crumbling mortar joint repair without shattering the units.
The Top Contenders for DIY Mortar Removal
When you are preparing for chimney interior parging or a retaining wall drainage upgrade, you need a tool that can handle the grit. Here are the three hammers that have earned a permanent spot in my truck.
1. The 20oz Forged Steel Brick Hammer (The Surgeon’s Scalpel)
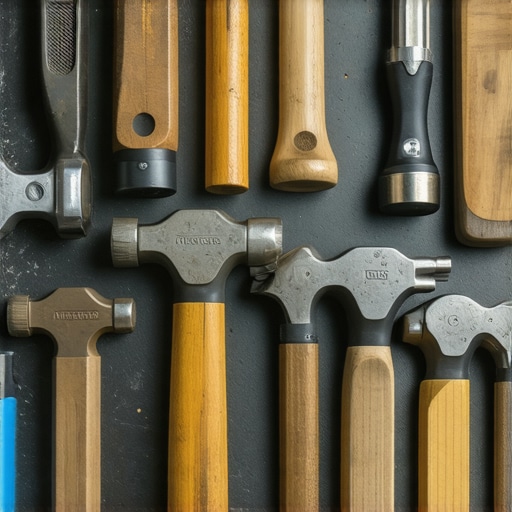
An Estwing or a Plumb with a forged, one-piece head is the gold standard. Why one-piece? Because a wood handle absorbs too much of the feedback. As a forensic inspector, I need to ‘feel’ the density of the mud through the grip. If the hammer ‘rings’ when it hits the joint, the mortar is high-strength Portland. If it ‘thuds,’ you’re dealing with lime. This hammer is essential for brick lintel replacement where you need to carefully ‘butter’ the edges of the remaining brickwork without disturbing the structural integrity of the courses above. It’s also the primary tool for retaining wall capstone replacement, allowing you to chip away old adhesive without cracking the expensive stone cap.
2. The Scutch Hammer (The Historic Specialist)
If you are working on historic brick salvage, the scutch hammer is your best friend. It features square openings on both ends that hold replaceable ‘combs’ or ‘droves.’ These multi-toothed bits allow you to rake out crumbling mortar joints without the localized impact of a single chisel point. It distributes the force. It’s the only tool I trust for outdoor masonry fountain restoration, where the stone is often soft limestone or decorative terracotta that would shatter under a standard hammer face.
3. The 10oz Plugging Chisel and Lump Hammer Combo
Technically two tools, but they act as one. For brick veneer detachment repair, you often need to remove mortar in tight vertical joints (head joints) where a swinging hammer can’t reach. A 10oz hammer provides just enough ‘tap’ to drive the plugging chisel. This is surgical work. You are looking for the ‘suction’—that moment the mortar loses its grip on the brick. If you feel the tool ‘bounce,’ stop. You’ve hit a tie-wire or a structural member, and continuing will cause honeycombing or further detachment.
“Mortar should always be weaker than the masonry units it binds, acting as a sacrificial element that accommodates movement and moisture.” – ASTM C270 Standards
The Micro-Chemistry of the Joint
Why do we care so much about the tool? Because of the carbonation process. Over 100 years, lime mortar absorbs CO2 from the air and turns back into calcium carbonate—essentially stone. This process is slow. When you are performing historic brickwork repointing, you are intervening in a century-long chemical reaction. A high-vibration power tool or a poorly balanced hammer disrupts the ‘tooth’ of the brick—the microscopic peaks and valleys that allow the new mud to grab hold. Without that tooth, your new joint will fail in five years, falling out in long strips like a ‘handyman special.’
Step-by-Step: Preparing for Mortar Removal
Whether it’s retaining wall drainage upgrade or chimney interior parging, the process is the same. First, dampen the wall. A dry brick is a thirsty brick; it will suck the moisture out of your new mortar (a ‘flash set’), leaving it weak and powdery. Second, use your masonry hammer to ‘test’ the joints. Tap. Listen for the hollow sound of brick veneer detachment. Third, begin removal at the center of the joint, working toward the brick edges. Never start at the edge; you’ll blow the ‘corner’ off the brick, and there is no fixing that without a full historic brick salvage operation.
In the end, masonry isn’t about strength; it’s about management. You are managing water, managing thermal expansion, and managing the inevitable decay of materials. Using the right hammer for crumbling mortar joint repair isn’t just a DIY choice—it’s an act of respect for the tradesmen who stood on the scaffolding a hundred years ago and laid those soldier courses with nothing but a hawk, a trowel, and a prayer. Don’t be the guy who ruins a century of history because he wanted to save twenty bucks at the tool counter.