
The Forensic Reality of a ‘Simple’ Hairline Crack
The homeowner called me out to look at what they described as a minor cosmetic issue—a thin, wandering hairline crack tracing the mortar joints of a second-story bay window. To the untrained eye, it was a weekend DIY project with a tube of caulk. But as a third-generation mason, I know that masonry never lies; it only waits for someone to listen. When I inserted my fiber-optic scope into a small void, the truth was grim. The internal structural brick ties replacement that should have been holding the outer wythe to the frame had been consumed by oxidation. They weren’t just rusted; they were gone, reduced to a ghost of iron oxide dust. This ‘minor crack’ was actually the entire facade beginning to peel away from the structure like wet wallpaper. It is a classic failure seen in commercial masonry facade maintenance where previous ‘fixes’ involved sealing the wall so tight with non-breathable coatings that moisture was trapped against the steel.
‘Water penetration is the single greatest threat to masonry durability.’ – BIA Technical Note 7’
This reality is why the tools we use for joint preparation—specifically the chisels we choose—determine whether we are actually restoring a building or merely accelerating its funeral.
The Metallurgy of the Joint: Why Your Chisel Matters
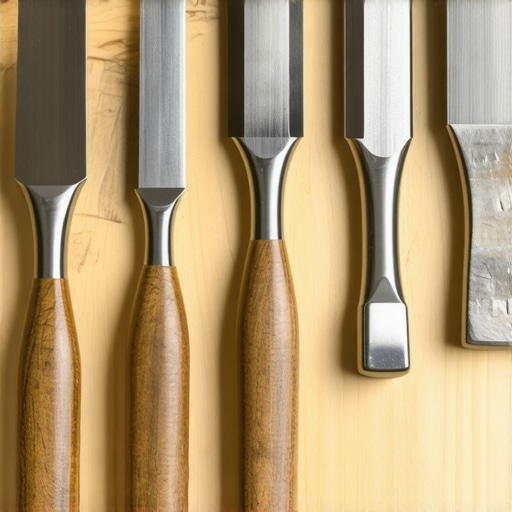
When you are performing tuckpointing or a full-scale brick patio restoration, the chisel is the primary bridge between your intent and the stone’s integrity. Most DIYers head to the big-box store and grab a generic cold chisel, which is like trying to perform surgery with a butter knife. A true masonry chisel, particularly a plugging chisel, is engineered with a specific taper and hardness. The physics of the strike is about energy transfer. When you hit the head of a high-carbon steel chisel, that kinetic energy must travel through the shank and concentrate at the tip to fracture the mortar bond without sending a lateral shockwave into the brick. If the chisel is too wide or the steel too soft, you end up ‘stunning’ the brick, causing micro-fractures that will lead to spalling in three winters. For brickwork pointing styles like the weathered joint or the concave joint, you need a tool that can rake out the old, failing ‘mud’ to a consistent depth of at least 3/4 of an inch. Anything less, and your new sustainable tuckpointing mortars won’t have the ‘tooth’ they need to hang on. We call this the mechanical bond, and it’s the difference between a repair that lasts fifty years and one that falls out in five.
The Restoration Reality: Soft Bricks and Hard Lessons
In the world of pre-1940s restoration, the greatest enemy isn’t the weather; it’s modern Portland cement. Most historic bricks were fired at lower temperatures, making them softer and more porous than the iron-hard modular units used in modular retaining walls today. These old bricks need to breathe. If you use a high-strength Type M or Type S mortar on a historic facade, you are signing a death warrant for the masonry.
‘Mortar should always be weaker than the masonry units it binds, acting as a sacrificial element that allows for thermal movement and moisture evaporation.’ – ASTM C270 Standards’
When the wall expands in the summer sun, the mortar must give. If the mortar is harder than the brick, the brick will crush itself against the mortar, leading to ‘face popping’ or spalling. This is why we use lime-based mortars. The carbonation process of lime is a slow, beautiful chemical dance where the mortar absorbs CO2 from the air over decades, slowly turning back into stone. When we are doing brick infill panel repair or outdoor masonry fountain restoration, we are looking for that perfect ‘suction.’ If the brick is too dry, it sucks the moisture out of the mud too fast—we call this ‘burning the joint.’ You end up with a powdery, crumbly mess that has no structural integrity.
Mastering the Strike: The Physics of Raking
Properly cleaning a joint for repointing requires a ‘Slicker’ or a jointer tool later, but the chisel work is the foundation. You start by using a plugging chisel to create a relief line in the center of the mortar joint. Never start by hammering against the brick edge. You want to collapse the mortar inward toward the void you’ve created. This protects the ‘arris,’ which is the sharp, clean edge of the brick. Once the bulk of the mortar is gone, you switch to a narrower cape chisel to clean the top and bottom of the joint. You are looking for a clean, square U-shape, not a V-shape. A V-shaped joint creates a thin point where the new mortar will inevitably crack. This is the same logic we apply to mortarless masonry systems, where precision is the only thing keeping the units in alignment. Whether you are buttering a soldier course or repairing a commercial facade, the cleanliness of the joint is 90% of the job. If there is leftover dust or old cement, the new mortar will ‘dry-joint,’ meaning it looks fine on the surface but isn’t actually bonded to the substrate. I’ve seen plenty of ‘handyman specials’ where they just smeared new mud over the old. We call that ‘lick-and-stick’ work, and it’s the hallmark of a hack. A real mason knows that the best tool in the bag is the one that removes the old mistakes before the new ones are made.