
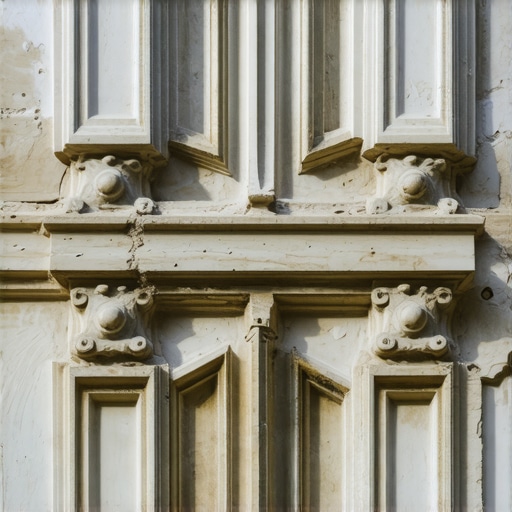
The Forensic Reality of Aging Masonry
My mentor, a man who spent sixty years with a hawk and trowel in his hands, used to tell me that a building breathes through its pores just like a human does. He’d take a piece of mortar from a 1920s row house, crumble it between his fingers, and know instantly if it was a high-calcium lime or if some ‘shortcut artist’ had spiked it with modern Portland cement. He once told me, ‘If you treat a 100-year-old brick like it’s a concrete block, you’ve already killed the building.’ That wisdom is the foundation of forensic masonry. When we talk about removing decades of grime, we aren’t just talking about aesthetics; we are talking about unblocking the lungs of a structure that has been suffocating under atmospheric pollutants, biological growth, and previous failed repairs.
Historic facades are delicate ecosystems. They are the result of a specific material science that peaked before the industrial obsession with high-strength, low-permeability materials. In the world of historic restoration, we live by a rule that most modern contractors hate: the mortar must always be softer and more permeable than the masonry units themselves. This is the ‘sacrificial principle.’ When a building shifts or when moisture enters the wall, it needs a path of least resistance to escape. If you use a hard, modern mortar against a soft, sand-struck historic brick, the moisture gets trapped, freezes, and pops the face of the brick right off. That’s not a repair; that’s vandalism.
“Water penetration is the single greatest threat to masonry durability. Proper drainage and the selection of compatible materials are essential for long-term performance.” – BIA Technical Note 7
The Chemistry of the Clean: More Than Just Water
Cleaning a historic facade is a delicate surgical procedure. Most homeowners and ‘handyman’ outfits see a dirty building and reach for the 4,000 PSI pressure washer. To a forensic mason, that’s the equivalent of using a chainsaw to do a skin graft. High-pressure water forces moisture deep into the core of the wall, saturating the interior wythes and inviting efflorescence—that white, salty crust that signals deep-seated moisture issues. We focus on the ‘Gentle Soak’ method, often using low-pressure mists over several days to soften the carbon crusts and ‘scud’ that have baked onto the surface since the era of coal-burning furnaces.
When the grime is particularly stubborn, we analyze the substrate. Is it a lime-heavy mortar or a Victorian-era pressed brick? This determines whether we use an alkaline-based cleaner or a highly diluted acidic wash. But beware: using the wrong chemical can cause metallic salts in the brick to react, turning a beautiful red facade into a splotchy, green mess. Once the surface is clean, we can truly see the damage. This is where tuck pointing services and historic pointing styles come into play. You can’t see the depth of a failing joint when it’s covered in eighty years of soot.
The Physics of the Joint: Pointing Styles and Structural Integrity
Once the ‘mud’ is cleared and the facade is stripped of its grime, we often find that the original joints have turned to dust. This is the time for flush pointing services or the more decorative tuck pointing services. Many people confuse the two. Tuckpointing is a highly specialized craft where we use a mortar that matches the brick color to create a ‘hidden’ joint, then apply a thin, contrasting ‘ribbon’ of white lime putty. It’s an optical illusion that makes old, irregular bricks look perfectly sharp and uniform. It’s not just about looks; it requires a level of ‘buttering’ and ‘slicker’ work that most modern masons haven’t practiced in years.
For those curved architectural features that define historic prestige, tuckpointing curved walls requires an even higher level of skill. You’re fighting gravity and geometry at the same time. If the mix isn’t right—if it doesn’t have the perfect ‘tooth’—it won’t stick. We look for a ‘plastic’ consistency that allows the material to be compressed into the joint without ‘honeycombing’ or leaving voids where water can hide. Without proper compaction, the joint is just a decorative sponge waiting to freeze and fail.
Beyond the Surface: Foundations and Reinforcement
Sometimes the grime hides more than just soft mortar; it hides structural trauma. If I see a stair-step crack that’s wide enough to slide a pencil into, we aren’t just talking about pointing anymore. We’re talking about foundation underpinning. Historic buildings often sit on rubble foundations or early concrete that wasn’t designed for the modern water table changes or heavy traffic vibrations. Underpinning involves digging beneath the existing footing to pour new, stable piers that transfer the building’s load to deeper, more competent soil. It is the most invasive and critical ‘cure’ for a sinking history.
Similarly, we often find that historic retaining walls—the ones holding up those beautiful terraced gardens—are screaming for help. In these cases, we look at retaining wall reinforcement and retaining wall geogrid installation. While geogrid is a more modern geotechnical solution, it can be integrated into the backfill of a historic restoration to provide the tensile strength that stone alone lacks. By layering these synthetic grids into the soil, we create a reinforced mass that prevents hydrostatic pressure from blowing the wall outward. It’s a marriage of ‘Old World’ aesthetics and modern soil physics.
“Mortar should be designed to be vapor-permeable and weaker than the masonry units to ensure the longevity of the structure.” – ASTM C270 Standards
Preserving the Details: Fountains and Sealants
The restoration doesn’t stop at the walls. Many historic estates feature ornate stonework that requires outdoor masonry fountain restoration. These structures are under constant hydraulic attack. We have to deal with the ‘capillary suction’ of the stone, where water is literally pulled into the mineral structure. To prevent this without ‘suffocating’ the stone, we utilize brickwork sealants application. But here is the forensic secret: never use a film-forming sealer like a ‘wet look’ acrylic on old stone. It’s like wrapping your house in saran wrap. You need a silane-siloxane penetrating sealer that allows vapor to escape while preventing liquid water from entering. If the sealer doesn’t ‘breathe,’ the first hard freeze will turn your fountain into a pile of gravel.
In cases where the structural floor of a masonry feature has settled, we might utilize self-leveling masonry lifts. This involves injecting high-density polymers or specialized grouts beneath a slab to gently ‘jack’ it back to its original elevation. It’s a precision operation that avoids the need for a total teardown, preserving the original patina that you just can’t buy at a big-box store.
The Final Strike: Doing it Once, Doing it Right
Restoring a historic facade isn’t about making it look brand new; it’s about making it look well-maintained for its age. It’s about respecting the labor of the men who hauled those bricks by hand. When we finish a job, the historic pointing styles should look as though they’ve always been there. The joints should be struck with a ‘slicker’ to provide a slight weather-shedding profile, and the material should be allowed to cure slowly. In hot climates, we constantly ‘fog’ the new work with water to prevent ‘flash setting,’ where the sun sucks the moisture out of the mud too fast, leaving it brittle and ‘burned.’
Caring for these buildings is a heavy responsibility. If you take shortcuts—if you use ‘handyman’ sealants or hard cement on soft brick—you aren’t just saving a buck; you’re destroying a piece of history that survived a century before you showed up. A true master mason knows that we don’t own these buildings; we’re just their temporary doctors. Do the forensic work, understand the physics of the soil and the chemistry of the lime, and that building will still be standing long after we’re all gone.
{“@context”:”https://schema.org”,”@type”:”HowTo”,”name”:”How to Restore a Historic Masonry Facade”,”step”:[{“@type”:”HowToStep”,”text”:”Conduct a gentle low-pressure water soak to remove surface carbon and grime without damaging the brick skin.”},{“@type”:”HowToStep”,”text”:”Identify the original mortar composition to ensure the new mix is softer and more vapor-permeable than the masonry units.”},{“@type”:”HowToStep”,”text”:”Rake out failing joints to a depth of at least 2.5 times the width of the joint to ensure proper mortar bond.”},{“@type”:”HowToStep”,”text”:”Apply tuckpointing or flush pointing using traditional lime-based mortars, compacting the layers to prevent voids.”},{“@type”:”HowToStep”,”text”:”Apply a breathable, penetrating siloxane sealer to protect against moisture ingress while allowing vapor to escape.”}]}