
The Ghost in the Wall: Why Post-Flood Masonry Is a Ticking Time Bomb
The water recedes, the mud is shoveled out, and the dehumidifiers are humming. To the untrained eye, the crisis is over. But to a third-generation mason, the real battle is just beginning. I’ve seen it a thousand times: a homeowner thinks they’ve ‘dried out’ their basement, only to have the entire foundation buckle two years later. You don’t just ‘fix’ a flooded brick wall; you perform a forensic intervention on a saturated, heavy, and chemically altered structure. When the river rises, it doesn’t just bring water; it brings hydrostatic pressure that can crush a concrete masonry unit (CMU) like an eggshell and chemical contaminants that eat the ‘mud’ from the inside out.
“Water penetration is the single greatest threat to masonry durability. In flooding scenarios, the saturation of the masonry assembly can lead to significant structural degradation if not addressed through proper drying and material replacement.” – BIA Technical Note 7
I remember a forensic scene on the banks of the Ohio River after a massive crest. The homeowner pointed to a tiny, vertical hairline crack in the corner. ‘It’s just a settlement crack from the weight of the water,’ he said. I put my borescope inside that crack. What I saw was a horror show. The internal structural steel—the rebar that was supposed to give that wall its tensile strength—had been submerged in stagnant, acidic water for three weeks. It wasn’t just rusted; it had expanded so much from the oxidation that it was literally jacking the brickwork apart from the inside. The ‘tooth’ of the mortar—that beautiful mechanical bond where the mud grips the pores of the brick—had vanished, turned into a sandy paste that you could scrape away with a fingernail.
The Physics of the Soak: Hydrostatic Pressure and Soil Heave
When the ground around your home becomes a marsh, the physics of your foundation change instantly. Normally, soil exerts a certain amount of lateral pressure. When that soil is saturated, it becomes a heavy, liquid mass. This creates hydrostatic pressure. For every foot of water depth, you’re looking at an additional 62.4 pounds of pressure per square foot. On an eight-foot basement wall, that is thousands of pounds of force pushing inward. This is where cracked brick wall repair becomes more than just an aesthetic fix. You aren’t just filling a gap; you’re dealing with a wall that has been pushed past its elastic limit.
If you have modular retaining walls on your property, they are often the first to go. These systems rely on gravity and friction. When the backfill becomes a soup of silt and water, the internal friction drops to near zero. I’ve seen failing retaining wall repair jobs where the entire wall shifted six inches because the ‘weep holes’ were clogged with river silt, trapping the water behind the blocks. You can’t just push those back. You have to excavate, clean the ‘toe’ of the wall, and reset the drainage layers with clean 57 stone, or you’re just waiting for the next rain to finish the job.
The Chemistry of Death: Efflorescence and Masonry Staining
Once the water is gone, the secondary enemy arrives: salt. Bricks are essentially hard sponges. They have a massive network of microscopic pores. As the water evaporates out of the wall, it carries dissolved minerals—calcium, potassium, and sodium—to the surface. This is masonry staining, commonly known as efflorescence. But don’t be fooled by the white powder. If that salt crystallizes *inside* the pore of the brick (sub-florescence), the expansion force can exceed 2,000 PSI. That’s enough to blow the face off a hard-fired brick, a process we call spalling.
This is why brickwork sealants application is a dangerous game for amateurs. If you slap a cheap, non-breathable acrylic sealer on a damp wall to ‘protect’ it, you’ve just built a tomb. You’re trapping that moisture and salt inside. The sun hits the wall, the water tries to turn to vapor, it can’t escape the sealer, and it destroys the brick from the inside out. In a post-flood scenario, you need a silane-siloxane penetrating sealer that allows for vapor transmission—letting the wall ‘breathe’ while keeping liquid water out.
The Restoration Process: Beyond the Surface
When we get into concrete masonry unit restoration, we’re often looking at the cores of the blocks. In many floods, silt and contaminated sludge fill the hollow cores of the CMU. If you don’t flush those out, they will hold moisture for decades, leading to mold and rot. We often have to drill ‘weep’ holes at the base of the wall to let the internal water drain out before we even think about structural reinforcement.
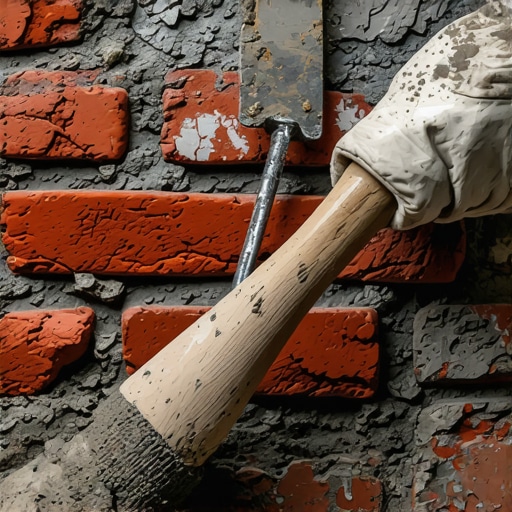
For the facade, flush pointing services are critical. After a flood, the old mortar often becomes ‘soft.’ We have to grind out the joints to a depth of at least 3/4 of an inch. When I’m on the hawk, mixing up a fresh batch of Type N ‘mud,’ I’m looking for that perfect ‘butter’ consistency. You want the mortar to be slightly softer than the brick itself—this is the sacrificial principle. If there’s movement, the mortar should crack, not the brick. We use a slicker to pack the mud into the joint, ensuring there are no air pockets or honeycombing that could trap future moisture.
“Mortar should be designed to be weaker than the masonry units it bonds, ensuring that any stress-induced cracking occurs in the mortar joints, which are easier to repair than the units themselves.” – ASTM C270 Standard Specification for Mortar
The Detail Work: Quoins, Soldiers, and Pavers
Flood damage often concentrates at the corners of a building. Brick quoin repair is a structural necessity because the quoins are the ‘teeth’ that lock the two planes of the wall together. If the corner has shifted, we often have to perform a ‘stitch’ repair, using stainless steel helical bars embedded in the mortar joints to tie the structure back together without a cold joint forming. We also pay close attention to the soldier course—those bricks standing on end often found above windows or at the water table. These are notorious for letting water in if the flashing behind them was compromised by the flood’s pressure.
And don’t forget the ground beneath your feet. Brick paver driveway repair after a flood is a lesson in compaction. The floodwater often washes away the ‘fines’—the tiny particles of sand that lock the pavers together. If you just spray them off and go, the driveway will soon look like a topographical map of the Himalayas. You have to pull up the affected areas, re-level the base, and use a vibrating plate compactor to reset the ‘interlock.’ While you’re at it, checking tile grouts on masonry porches or steps is vital. Standard tile grout is brittle; if the masonry underneath shifted even a fraction of an inch during the flood, that grout is blown, and water is now seeping into your sub-structure.
Do It Once, or Do It Twice
Modern ‘handyman’ fixes for flood damage usually involve a bucket of grey goop and a prayer. But masonry is about the long game. It’s about understanding that a brick wall is a living thing that needs to breathe, move, and shed water. If you try to ‘lick-and-stick’ a repair over a saturated foundation, you’re just hiding the rot. You have to respect the suction of the brick, the chemistry of the lime, and the sheer weight of the earth. In the masonry world, there are no shortcuts—only the slow, steady work of rebuilding what the water tried to take away. Do it once, or you’ll be paying me a lot more to do it twice.