
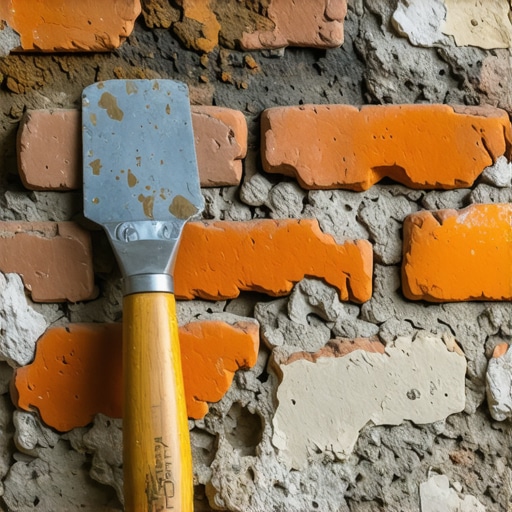
The Ghost in the Wall: Why Most Repointing Fails
I remember my uncle kneeling in the damp shadow of a 1880s textile mill, his hands calloused and permanently stained with the grey dust of a thousand jobs. He didn’t look at the brick; he looked at the dust eroding from the joints. He took a pinch, rubbed it between his thumb and forefinger with a look of intense concentration, and told me, ‘This isn’t just sand, kid. This is the pulverized mineral history of the local riverbed. You use modern bag-mix on this, and you’re a murderer.’ He was right. When you are performing structural repointing on a building that has stood since the era of gaslights, you aren’t just a mason; you’re a forensic chemist with a trowel. Most modern contractors treat mortar like glue, but in a 19th-century wall, mortar is the lungs of the building. It breathes. It moves. If you choke it with high-strength Portland cement, the brick will commit suicide to get away from it.
“Mortar should be weaker than the masonry units so that any cracks that occur will be in the mortar joints where they can be easily repaired rather than through the units themselves.” – BIA Technical Note 2
The Physics of the ‘Sacrificial’ Joint
To understand why cracked brick wall repair fails so often on historic structures, you have to look at the ‘tooth’ and the suction of the material. In the 19th century, bricks were fired in kilns that didn’t always reach uniform temperatures. This resulted in a ‘soft’ core. The mortar used was almost exclusively lime and sand, sometimes with a bit of crushed oyster shell or volcanic ash. This lime mortar is ‘sacrificial.’ When the earth shifts or the building settles, the soft mortar takes the stress and develops micro-cracks. Because lime is autogenous, it actually ‘self-heals’ to an extent when rainwater dissolves the calcium hydroxide and redeposits it into those cracks. If you ‘butter’ those joints with a modern Type S mortar—which is hard, brittle, and impermeable—you create a wall that is too rigid. When the wall tries to move, the hard mortar won’t give. Instead, the pressure is transferred into the face of the brick, causing it to spall and pop off. This is the primary cause of masonry water damage repair calls in the Northeast.
The Forensic Sieve: Finding the Right Aggregate
Matching the ‘mud’ starts with the sand. Modern masonry sand is often too ‘clean’ and uniform. Historic sand was ‘pit sand’ or ‘river sand,’ full of various sizes of aggregate, from fine silts to jagged pebbles. To truly match the texture, we perform a sieve analysis. We take a sample of the original, unweathered mortar from deep within the wall and dissolve the binder in a weak acid. What’s left is the aggregate. You’ll see the ‘grit’—the sharp, angular pieces of quartz, the rounder river-worn pebbles, and the natural iron oxides that provide that warm, earthy hue. If the original mason used a local quarry’s screenings, your modern ‘play sand’ from the big-box store will look like a bright white scar across the face of the building. For commercial smokestack repair or high-profile historic facades, we often have to custom-blend three or four different sand types to get the right ‘heave’ and visual depth.
Color Chemistry: Beyond the Pigment Bottle
Color matching is where most ‘handyman specials’ fall apart. They try to use liquid dyes to match weathered mortar. That’s a fool’s errand. The color of 19th-century mortar comes from two places: the lime itself and the natural minerals in the sand. Over a century, that mortar has been subjected to brick efflorescence removal (whether natural or forced), carbon soot from coal fires, and the slow carbonization of the lime. To match this, we look at the ‘wet test.’ We mix our lime putty and sand, then let a sample cure for 30 days. Why? Because lime mortar undergoes a chemical transition called carbonation. As it absorbs CO2 from the air, it turns from calcium hydroxide back into calcium carbonate. This changes the refractive index of the material. What looks like a perfect match on your hawk today will look like a disaster in six months if you haven’t accounted for this shift.
“Water penetration is the single greatest threat to masonry durability, and the use of incompatible materials is the most common cause of accelerated decay.” – ASTM C270 Standards
The Anatomy of the Joint: Striking and Slicking
Once the ‘mud’ is right, the application is everything. We don’t just ‘smear’ it in. We grind out the old, failing joints to a depth of at least twice the width of the joint, ensuring a clean ‘u’ shape for the new material to bite into. If you see a mason using a ‘v’ cut or a shallow scratch, fire them on the spot. That’s a ‘cold joint’ waiting to happen. We use a slicker or a jointing tool to compress the mortar into the gap. This compaction is critical. It forces the ‘mud’ into the pores of the brick, creating a mechanical bond. For 19th-century work, we often use a ‘beaded’ or ‘weather’ joint, depending on the original style. This isn’t just for looks; it’s about shedding water. Whether it’s stone coping installation or a standard chimney repair, the way you ‘strike’ that joint determines if water will sit on the ledge and freeze—expanding by 9% and shattering your work—or roll off safely to the ground.
Modern Failures: Tile Grouts and Chimney Caps
I’ve seen homeowners try to use tile grouts on masonry because they liked the color. It’s a death sentence for the wall. Grout is designed for non-porous ceramic, not porous, breathing clay. It traps moisture behind the surface, leading to deep structural rot. We see similar issues in chimney leak detection. A homeowner thinks they have a roof leak, but the reality is their chimney cap replacement was done with the wrong material, or the chimney damper repair failed to address the moisture wicking down the flue. The moisture gets into the masonry, and without the ‘breathability’ of lime mortar, it just sits there, eating the building from the inside out. True restoration requires understanding these interactions between moisture, mineralogy, and thermal expansion. You can’t just ‘lick-and-stick’ your way through history.