
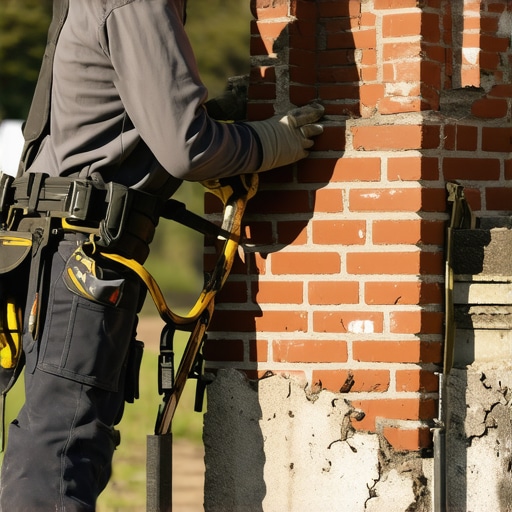
The Anatomy of a Dying Giant
I was standing on a steep pitch in the pouring rain, looking at a chimney that most folks would have called ‘charming.’ But to me, it looked like a ticking time bomb. The homeowner pointed to a hairline fracture running from the crown down to the roofline, thinking a bit of caulk would fix it. I didn’t reach for a tube of silicone; I reached for my borescope. When I fed that lens into the core of the triple-brick structure, I didn’t see solid masonry. I saw a void filled with ‘sugar’—mortar that had completely carbonated and turned back into dust, leaving three separate walls of brick standing like a house of cards. The structural steel straps were rusted to nothing, and the inner wythe was leaning into the flue. This wasn’t a cosmetic issue; it was a total systemic failure of the masonry mass.
A triple-brick chimney is a beast of the old world. You don’t see them built this way anymore because the labor costs would bankrupt a modern developer. We’re talking about three distinct layers of brickwork—the outer face, a middle ‘filling’ wythe, and the inner lining—all tied together with header courses. When you see a vertical crack in a structure this thick, the physics tell a dark story. It’s rarely about the ground moving; it’s about the chimney’s internal organs failing. Over eighty years of thermal cycling, the flue gases have permeated the porous clay, and the moisture has turned the lime mortar into a mushy paste. This is where the historic mortar analysis becomes your only roadmap to a real fix.
The Physics of the ‘Sacrificial’ Joint
In these historic restorations, the most common sin is the use of modern Portland cement. I see it every day: a ‘handyman’ sees a crack, buys a bag of high-strength Type S mortar, and ‘butters’ over the opening. He thinks he’s making it stronger. He’s actually signing the chimney’s death warrant. Old bricks—those fired in the early 1900s—are soft. They breathe. They expand. The mortar is supposed to be the sacrificial lamb in the equation. It must be softer than the brick so that when the chimney moves (and it will move), the mortar takes the stress and cracks, not the brick faces. This is the core principle of re-pointing services that actually last.
“Mortar should always be weaker than the masonry units it binds to ensure that any stress-induced cracking occurs in the mortar joints rather than the masonry units themselves.” – BIA Technical Note 2
When you use a hard, modern ‘mud’ on soft old bricks, the moisture gets trapped. During the freeze-thaw cycle, that water expands by 9% in volume. Since the hard cement won’t budge, the face of the brick literally explodes—a process we call spalling. If you want to fix a structural crack, you have to start by digging out the old, failed material to a depth of at least an inch, or until you hit sound mortar. We don’t use grinders here if we can help it; one slip and you’ve scarred a century-old brick. We use pneumatic chisels and a delicate hand to ensure we have a clean ‘tooth’ for the new material to bite into.
The Reconstruction: Beyond the Surface
If the crack is truly structural—meaning it goes through all three wythes—you aren’t just repointing. You are performing surgery. You have to remove the damaged bricks in a ‘stair-step’ pattern to tie the new masonry back into the old. This is where you encounter the ‘collar joint’—the vertical space between the wythes. In a healthy chimney, this should be filled with mortar, but in a failing one, it’s often a hollow chimney of air that allows water to pour down into the house. Re-establishing that bond requires a technique called ‘grouting,’ where we carefully pour a lime-rich slurry into the void to solidify the mass without creating a rigid, brittle core.
Before you even think about the brickwork, you have to address the chimney flue liner installation. Most structural cracks in the outer shell are actually caused by the heat from the fire expanding the inner clay tiles until they shove the bricks apart. Modern stainless steel liners are a godsend here. They provide a thermal break, allowing the heat to stay in the exhaust stream rather than soaking into the masonry mass. This reduces the thermal expansion stress on your new repairs.
[[IMAGE_PLACEHOLDER]]
The Chemistry of Suction and Hydration
When we mix our mud, we aren’t just tossing sand and lime in a bucket. We’re looking for a specific ‘suction’ rate. If the bricks are too dry, they’ll suck the water out of the mortar instantly, ‘burning’ the joint. The mortar won’t hydrate; it will just turn into a brittle crust that falls out in three years. We pre-wet the masonry, bringing it to a ‘saturated surface dry’ state. This ensures the sustainable masonry materials we use—like NHL 3.5 (Natural Hydraulic Lime)—can cure slowly over weeks, not hours. This slow carbonation is what gives historic masonry its 100-year lifespan. It’s not about speed; it’s about the slow chemical dance between the lime and the CO2 in the air.
“The selection of mortar for historic preservation should be based on the physical properties of the masonry units and the environmental exposure of the structure.” – ASTM C270 Standard Specification for Mortar
During the process, you might notice brick efflorescence removal is needed. Those white, salty stains aren’t just ugly; they’re the ‘blood’ of your masonry. They indicate that water is moving through the wall and leaching out minerals. If you don’t stop the water, you’ll never stop the salts. We treat this with a mild acetic acid wash, but only after the chimney flashing repair at the base is sealed tight. If the flashing is shot, your chimney is just a giant straw drinking rainwater.
Finishing the Joint: The Slicker’s Art
Once the ‘mud’ is in the joint and has reached a ‘thumbprint hard’ consistency, we use a slicker or a jointer tool to strike the joint. This isn’t just for looks. Compacting the mortar with the tool forces the lime binders to the surface, creating a weather-resistant ‘skin’ that sheds water. We avoid the ‘weathered’ or ‘struck’ joints if they don’t match the original profile. For a triple-brick monster, a flush joint or a slightly recessed ‘V’ joint is usually the ticket. This is the moment where the masonry staining might come into play if the new bricks don’t perfectly match the weathered patina of the originals. We use mineral-based stains that bond chemically with the clay, ensuring the repair is invisible to the naked eye.
We also have to look at the surrounding environment. If this chimney is part of a larger structure, we check for retaining wall drainage upgrade needs nearby. Often, hydrostatic pressure from poor soil drainage near the foundation can cause the entire house—and the chimney attached to it—to tilt, opening up those vertical cracks we’re trying to fix. You can’t fix the top of the chimney if the bottom is sitting in a swamp.
The Modern Trap: Stone Veneer and Mortarless Systems
I get asked all the time about putting stone veneer over brick to ‘hide’ the cracks. It’s the fastest way to rot a house I’ve ever seen. You’re essentially putting a plastic raincoat over a breathing organism. Moisture gets trapped behind the lick-and-stick stone, and because the brick can’t dry out to the atmosphere, it rots from the inside out. Similarly, mortarless masonry systems have their place in landscaping, but they have no business near a structural chimney. A chimney needs the monolithic strength of a fully bedded mortar joint to resist wind loads and thermal shock.
In the end, repairing a triple-brick chimney is a lesson in patience. You are working with materials that have their own heartbeat. If you treat it with respect—using the right lime, the right suction, and a deep understanding of the physics of heat—that chimney will stand for another century. If you try to ‘elevate’ it with modern chemicals and quick fixes, you’re just building a pile of rubble for the next generation of masons to clean up. Do it once, do it right, and use a hawk and trowel, not a caulk gun.