
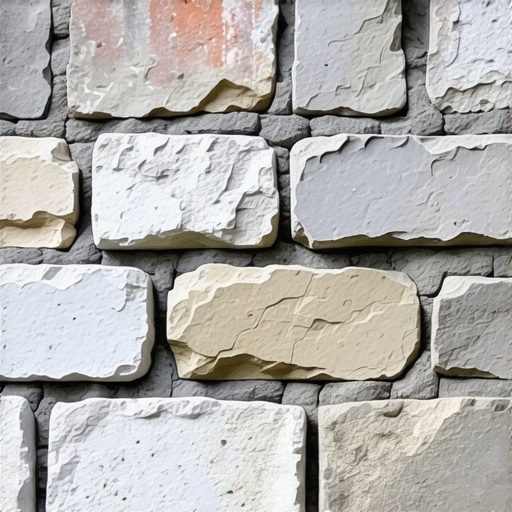
The homeowner thought it was just a hairline crack, a minor aesthetic blemish on a century-old facade. But when I put my scope inside that cavity, I saw a structural nightmare: the previous contractor had injected a modern, high-strength Portland cement into a wall built for lime. The structural steel was rusted to dust because the wall couldn’t breathe, and the original bricks were beginning to shiver into flakes. This is the forensic reality of masonry restoration. When you’re dealing with 100-year-old buildings, you aren’t just laying brick; you are managing a living, breathing respiratory system made of clay and lime. If you get the mortar match wrong, you aren’t fixing the building—you’re signing its death warrant.
The Sacrificial Principle: Why Modern ‘Mud’ Kills Old Brick
In the world of commercial masonry maintenance, the most dangerous tool isn’t a sledgehammer; it’s a bag of Type S mortar from a big-box store. To understand why, we have to micro-zoom into the material science of the early 20th century. Pre-1940s masonry was designed around the ‘sacrificial principle.’ The mortar was intended to be softer and more permeable than the brick itself.
“The mortar should always be weaker than the masonry units so that any stress is relieved in the mortar joints rather than the masonry units.” — BIA Technical Note 1
When moisture enters a wall—and it always does—it needs a path of least resistance to escape. In a lime-based system, the water migrates through the porous mortar. If you slap a hard, impermeable high-performance mortar mix over that, you trap the moisture. When the temperature drops and that water hits the freeze-thaw cycle, expanding by 9%, it won’t break the hard mortar. Instead, it will blow the face right off your historic brick. We call this spalling, and once it starts, your building is’s structural integrity begins a terminal slide.
Micro-Zooming into the Chemistry: Carbonation vs. Hydration
Modern concrete hardens through a chemical reaction called hydration. You add water to Portland cement, and it forms interlocking crystals almost instantly. It’s fast, it’s cheap, and it’s brittle. Historical lime mortar is a different animal entirely. It cures through carbonation—a slow, decades-long process where the lime absorbs carbon dioxide from the air to turn back into limestone. This creates a flexible, self-healing matrix. If a 100-year-old building shifts slightly, the lime mortar develops micro-cracks that eventually ‘reseal’ as rainwater dissolves a bit of the lime and redeposits it into the void. You won’t get that with a concrete block foundation repair using modern additives. You need a mix that respects the ‘tooth’ of the original stone.
Matching the Aggregate: The Secret is in the Sand
When I’m performing tuck pointing services, I don’t look at the color of the mortar first; I look at the aggregate. To get a perfect texture match, you have to perform a sieve analysis. Old-world masons didn’t use bagged, washed play sand. They used local bank-run sand, which contained various sizes of grit, small pebbles, and even bits of shell or charcoal. To replicate this, we often have to blend three or four types of sand to get the right ‘bloom’ on the joint. If you use a sand that’s too fine, the mortar will look like plastic. If it’s too coarse, you won’t get the ‘butter’ consistency needed for a clean soldier course. We look for the ‘suction’—the way the dry brick pulls the moisture out of the mud to create a physical bond that lasts a century.
The Forensic Process of Tuckpointing Weatherproofing
True tuckpointing weatherproofing is a surgical procedure. First, we never use a high-speed grinder on a historic joint; the risk of ‘overshooting’ and scarring the brick is too high. We use pneumatic chisels or hand tools to rake out the failing joints to a depth of at least one inch. Then comes the hydration. You have to soak the old masonry. If you put wet mud into a bone-dry historic wall, the brick will suck the water out of the mortar so fast it ‘flashes’—it won’t cure, it will just crumble. After we ‘butter’ the joints, we use a slicker or a jointer tool to strike the joint, but the timing is critical. You have to wait until it’s ‘thumb-print hard.’ If you strike it too wet, you bring the ‘fines’ to the surface and ruin the texture. If you wait too long, you’ll never get the right profile.
High-Tech Forensics: Drones and 3D Printing
While I respect the old ways, I’m not a Luddite. Today, we use drone chimney inspections to find structural failures 80 feet in the air without the cost of scaffolding. This allows us to spot chimney structural repair needs before a brick falls through a neighbor’s roof. We’re even seeing the advent of 3D printed masonry repairs for custom terra cotta ornaments that haven’t been manufactured since the Great Depression. However, even with a 3D-printed part, the way you tie it back into the building remains the same: you need a mortar that matches the thermal expansion coefficient of the surrounding material.
“Mortar for historic buildings must be compatible with the original mortar in terms of its physical and chemical properties.” — ASTM C270
Without that compatibility, the new tech will just pop out like a bad tooth in a few seasons.
Maintaining the System: Weep Holes and Drainage
A wall is only as good as its drainage. I’ve seen commercial masonry maintenance programs fail because they ignored the simple things, like retaining wall weep hole cleaning. If water can’t get out, the hydrostatic pressure will eventually push a 12-inch thick wall over. Whether it’s a chimney sweep and repair job or a full-scale facade restoration, you have to respect the physics of water. Modern ‘lick-and-stick’ stone veneer often omits drainage planes entirely, leading to rot and mold. In contrast, a properly maintained 100-year-old brick wall, with its soft mortar and open pores, can outlast any modern stick-frame box—if you treat it with the respect its age deserves.
Final Inspection: The Gritty Truth
At the end of the day, matching mortar is about more than aesthetics; it’s about forensic survival. You can tell a ‘handyman special’ from a mile away—it’s the one with the gray, smeary joints and the cracked brick faces. When you do it right, the repair is invisible to the eye but perfectly tuned to the building’s physics. It takes a hawk and a trowel, a lot of patience, and a deep understanding of the chemistry that happens inside a wet bucket of mud. Don’t let someone ‘modernize’ your history into a pile of rubble. Do it once, do it right, and let that brick ring like a bell for another hundred years.