
The Forensic Scene: When the Railing Whispers Secrets
The homeowner thought it was just a hairline crack, a minor cosmetic blemish on a century-old limestone rail. But when I inserted the borescope into the cavity between the baluster and the plinth, the reality was grim: the structural iron dowel, meant to provide stability, had oxidized into a jagged, swollen mass of rust. This phenomenon, known as ‘rust jacking,’ had exerted hundreds of pounds of internal pressure, literally detonating the stone from the inside out. To the untrained eye, it was a ‘crack’; to a forensic mason, it was a structural catastrophe in progress. If you are looking at a stone balustrade, you aren’t just looking at decoration; you are looking at a complex assembly of compression and tension. Identifying failure before a 300-pound stone rail ends up in the garden—or on a guest—is the difference between a simple restoration and a total collapse.
The Anatomy of Failure: Why Stone Moves
A stone balustrade fails for one of three reasons: moisture, movement, or metallurgy. Unlike modern ‘lick-and-stick’ veneers that peel off like cheap wallpaper, structural stone is a living, breathing entity. It has ‘suction’—a capillary pull that draws water deep into its pores. When that water meets the wrong material, the clock starts ticking. For those in freeze-thaw climates, water is the ultimate enemy. It expands by 9% when it turns to ice, acting as a microscopic hydraulic jack within the stone’s matrix.
“Water penetration is the single greatest threat to masonry durability. Without proper shedding at the coping level, the entire assembly is compromised.” – BIA Technical Note 7 (Adapted)
When I’m out on a site, I first look at the stone coping installation. The coping is the ‘umbrella’ of the balustrade. If the joints are open or if the stone lacks a proper ‘drip edge,’ water runs down the face of the balusters, saturating the stone and the mortar beds. This leads to spalling, where the face of the stone flakes off in thin layers because the internal moisture couldn’t escape before the first freeze of November hit.
The Critical Joints: Flush Pointing vs. Tuckpointing
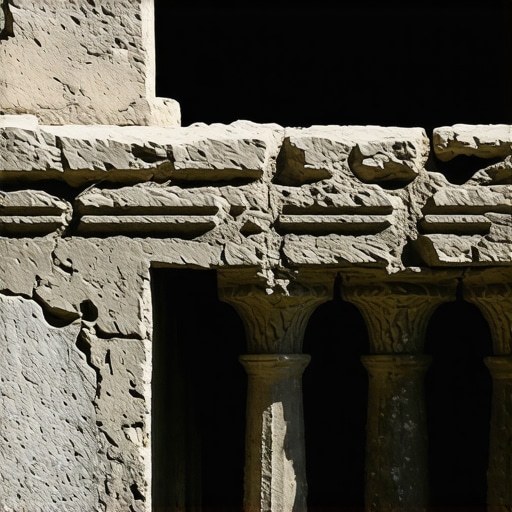
One of the biggest ‘handyman specials’ I see is the use of hard Portland cement to repair old lime-based stone joints. In historic restoration, the mortar must be the sacrificial lamb. It has to be softer than the stone. If you use a high-strength ‘mud’ on a soft limestone balustrade, the stone will shatter before the mortar gives way. I often recommend flush pointing services for these structures. Unlike the decorative lines of tuckpointing tools for DIY enthusiasts, flush pointing ensures water sheds away from the stone surface rather than pooling on a ledge.
[image_placeholder_1]
If the joints between your balusters and the top rail have crumbled, don’t just ‘butter’ the edges. You need to rake out the old material to a depth of at least one inch. If you find ‘honeycombing’—voids behind the mortar—you’re looking at internal erosion. This is where concrete pump masonry mixes can sometimes be adapted for grout injection in larger structural cavities, though for fine stone, we usually stick to gravity-fed lime grouts.
The Skeleton Under the Stone: Rust Jacking and Lintel Failures
The real structural integrity often relies on what you can’t see. Many historic balustrades are pinned with iron or mild steel. When water penetrates via a failed chimney crown repair or a cracked coping stone, it hits that steel. Steel expands up to ten times its original volume when it rusts. This is why you’ll see vertical cracks running right through the center of a baluster. It’s the stone’s way of screaming that its heart is swollen.
In cases where the balustrade is part of a larger masonry structure, you might also see brick lintel replacement needs nearby. If the lintels supporting the masonry below the balustrade fail, the entire balustrade will sag or ‘smile,’ creating wider gaps at the top and crushing the balusters at the bottom. This isn’t a stone problem; it’s a foundation and support problem.
The Hydrology of the Site: Retaining Walls and Drainage
If your balustrade sits atop a retaining wall, you have to look at the ‘hydrostatic pressure.’ I’ve seen 40-foot sections of stone railing tilt toward the lawn because the retaining wall weep hole cleaning was neglected. When those holes clog with silt and debris, the earth behind the wall becomes a heavy, liquid soup. No amount of stone is strong enough to hold back a mountain of wet mud without a retaining wall drainage upgrade.
“Stability in masonry assemblies is predicated on the management of gravity and the diversion of lateral hydraulic forces.” – ASTM C1197 (Structural Masonry Principles)
Similarly, a brick patio restoration often reveals that the balustrade’s base—the plinth—has been undermined by shifting pavers. If the ‘base’ isn’t compacted to 95% Proctor density, the stone rail will eventually follow the path of least resistance: down.
The Checklist: How to Spot a Failing Balustrade
- The ‘Ring’ Test: Tap the stone with a wooden mallet. A healthy stone rings. A ‘thud’ indicates internal delamination or a massive crack.
- Efflorescence: Look for white, salty crusts. This is a sign that water is migrating through the stone, carrying minerals with it.
- The Plumb Line: If the rail leans more than 1/4 inch over four feet, the structural pins have likely failed or the base has shifted.
- Cracked Brick Wall Repair: Check the supporting masonry below. If the brickwork is stair-stepping, the balustrade is just the tip of the iceberg.
The Fix: Preservation vs. Replacement
Don’t fall for the ‘lick-and-stick’ solution. If you have cracked brick wall repair needs or failing stone, you need to address the moisture source first. Whether it’s a stone coping installation error or a need for a chimney crown repair that’s leaking water onto the rail, the source is king. Use the right ‘slicker’ to strike your joints and ensure your tuckpointing tools for DIY are the right size for the job—too wide and you’ll ‘butter’ the stone face, creating a mess that traps moisture.
In the end, stone is patient. It will stand for 200 years if you let it breathe, or it will crumble in 20 if you choke it with the wrong mortar and trap water in its bones. Treat the ‘tooth’ of the stone with respect, and it’ll outlast us all.