
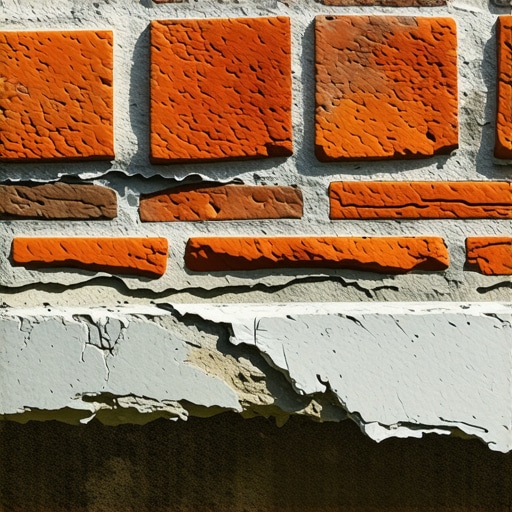
The Forensic Scene: When Walls Bleed from the Inside Out
I remember a commercial building I was called to inspect three years ago. The owner was convinced they had a roof leak because the interior drywall at the base of the third-floor windows was turning into a mushy, black-spotted mess. I didn’t go to the roof. Instead, I grabbed my hammer and a masonry chisel. I found a spot on the exterior brick veneer, just above the steel lintel, and popped a couple of bricks out. What I found was a textbook case of structural negligence: the flashing was there, but it was tucked *behind* the steel instead of being lapped over it, and the weep holes were clogged with hardened mortar droppings. The wall wasn’t leaking; it was drowning. The structural steel was so corroded it looked like flaky pastry. That owner was looking at a $200,000 remediation because someone didn’t understand the basic physics of water. Most people think a brick wall is a solid barrier. It isn’t. It is a reservoir. Brick is porous, and if you don’t give the water a clear, flashing-guided exit path, it will find its own way out—usually through your insulation and into your living room.
The Physics of the ‘Wet Wall’ and Capillary Action
To understand why through-wall flashing is the most critical component of your building envelope, you have to understand the ‘tooth’ of the material. Brick is essentially a hard sponge. Through a process called capillary suction, a brick can pull moisture deep into its core. In a heavy rain event, especially in Northern climates where we deal with the brutal freeze-thaw cycle, that moisture moves through the brick and hits the air space behind the veneer. This is where the physics of surface tension comes into play. Water droplets cling to the back of the brick or the face of the sheathing. Without a properly installed flashing system, that water sits. When the temperature drops, it expands by 9%. This expansion is what causes spalling—where the face of the brick literally pops off because the internal pressure has nowhere to go. This is also why foundation crack repair often starts with fixing the water management above the ground, not just patching the concrete below it.
“Water penetration is the single greatest threat to masonry durability. Proper flashing and weep holes are the primary defense against internal wall degradation.” – BIA Technical Note 7
The Anatomy of Correct Flashing: Beyond the Surface
Correct flashing isn’t just about sticking a piece of plastic in a joint. It is a system of ‘through-wall’ protection. First, the flashing must be installed at all points where the cavity is interrupted—this includes the base of the wall, above window and door openings (lintels), and at the roofline. In my years of commercial tuckpointing and forensic work, I’ve seen too many ‘handyman specials’ where they simply ‘butter’ the edge of the flashing and hope for the best. That’s a recipe for disaster. The flashing must extend from the inner wythe or the backup wall, across the cavity, and should ideally terminate with a stainless steel or copper drip edge that extends about 1/4 inch beyond the face of the brick. This prevents the water from being sucked back into the mortar joint via surface tension. If you are dealing with a chimney crown repair, the same logic applies. The crown must have a drip edge; otherwise, water will just run down the face of the chimney, leading to tuckpointing brick walls every five years instead of every fifty.
The Role of Weep Holes and Mortar Management
You can have the best flashing in the world, but if your tuckpointing machine services professional doesn’t leave weep holes, the system fails. Weep holes are the lungs of the brick veneer. They allow the cavity to breathe and the water to exit. I’m a fan of cellular vents over open head joints because they keep out the wasps and debris while still allowing maximum airflow. But there’s a hidden enemy here: mortar droppings. When a mason is ‘buttering’ bricks and laying them in a soldier course, excess ‘mud’ often falls behind the wall. If that mud piles up on the flashing, it blocks the weeps. This is where AI masonry assessment is becoming a game-changer; we can now use robotic scopes and thermal imaging to see these obstructions without tearing the wall apart. For historic brick salvage projects, managing this cavity is even more vital because the old lime-based mortars are much more ‘breathable’ and sensitive to moisture retention than modern Portland-based mixes.
Integrating Masonry with Green Technology
In modern construction, we are seeing more green roofing masonry integration. This presents a unique challenge for flashing. You have a living system that holds water sitting right against a masonry parapet. If the flashing doesn’t extend high enough up the back of the wall—at least 8 inches above the soil line—the hydrostatic pressure will push moisture through the masonry. This is a common point of failure I see in ‘modern’ designs. The transition between the roofing membrane and the through-wall flashing must be seamless. This is not the place for cheap ‘lick-and-stick’ membranes. You need a high-performance, rubberized asphalt or a 24-ounce copper flashing to withstand the constant moisture of a green roof environment. If this fails, you won’t just see a stain; you’ll see structural foundation crack repair needs appearing as the water migrates down through the building’s skeleton.
“Flashing should be designed to collect and redirect moisture that enters the wall system. Failure to provide a continuous path to the exterior will result in systemic failure of the masonry assembly.” – ASTM C1780
The Chemistry of Restoration: Mortar and Staining
When we perform commercial tuckpointing or tuckpointing brick walls, we have to match the ‘mud’ to the existing brick. If you use a mortar that is too hard (high Portland content) on old, soft bricks, you trap moisture. The mortar must be the sacrificial element. It is easier and cheaper to repoint a wall than to replace the bricks. Furthermore, if the wall has suffered from masonry staining due to years of water leaks, the cleaning process must be handled carefully. Using high-pressure water or the wrong acid can strip the ‘fire-skin’ off the brick, making it even more porous. A forensic approach involves testing the brick’s absorption rate before deciding on a cleaning or staining protocol. If you’re doing a chimney flue liner installation, you also need to ensure that the flashing at the roofline is integrated with the masonry so that the heat of the exhaust doesn’t cause differential expansion that cracks your new crown.
Advanced Diagnostics and Repair Strategies
For the homeowner or building manager facing a crumbling wall, the first step isn’t a trowel; it’s a diagnosis. AI masonry assessment tools are now helping us identify patterns of movement and moisture that the human eye might miss. We can track how a crack develops over seasons. If the crack is stair-stepping, we look at the foundation. If it’s horizontal and located at a floor line, we look at the flashing. For foundation crack repair, we often find that the soil has heaved due to poor drainage from the masonry above. Once the diagnosis is in, we move to the fix. Sometimes that means tuckpointing machine services to deeply grind out joints for a proper ‘repointing’ (not just a ‘tuckpoint’), or it might mean a full chimney crown repair to stop the water at the source. In extreme cases, where the internal steel has vanished, we have to perform a surgical ‘surgical removal’ and replacement of the flashing and the lintels, ensuring every piece of the new ‘mud’ is packed tight with a slicker to ensure no voids remain.
The Bottom Line: Do It Once, Do It Right
The trade is full of ‘handymen’ who will offer you a quick fix with a tube of caulk. Don’t listen to them. Masonry is a game of centuries, not seasons. Whether it’s historic brick salvage or a modern commercial tuckpointing job, the physics remains the same. You must respect the water. You must manage the cavity. You must ensure that every soldier course and every hawk full of mud is contributing to a system that breathes and drains. If you don’t flash it correctly today, you’ll be calling me for a forensic inspection tomorrow, and by then, the price of the repair will have an extra zero at the end. It’s about the ‘ring’ of the brick and the integrity of the hidden details. Don’t cut corners on the things you can’t see, or they will eventually be the only things you *can* see.{“@context”:”https://schema.org/”,”@type”:”HowTo”,”name”:”How to Flash a Brick Veneer Wall Correctly”,”description”:”A professional guide to installing through-wall flashing and weep holes in masonry construction to prevent structural damage and moisture intrusion.”,”step”:[{“@type”:”HowToStep”,”text”:”Install the base flashing on the inner wythe or backup wall, extending it across the cavity and through the brick veneer.”,”name”:”Base Flashing Installation”},{“@type”:”HowToStep”,”text”:”Ensure the flashing has an integrated drip edge that extends 1/4 inch beyond the face of the brick to break water surface tension.”,”name”:”Drip Edge Placement”},{“@type”:”HowToStep”,”text”:”Install weep holes or cellular vents in the head joints immediately above the flashing at 24-inch intervals.”,”name”:”Weep Hole Integration”},{“@type”:”HowToStep”,”text”:”Clear any mortar droppings from the cavity to prevent blockage of the weep holes and flashing surface.”,”name”:”Cavity Clearing”}],”totalTime”:”PT4H”}