
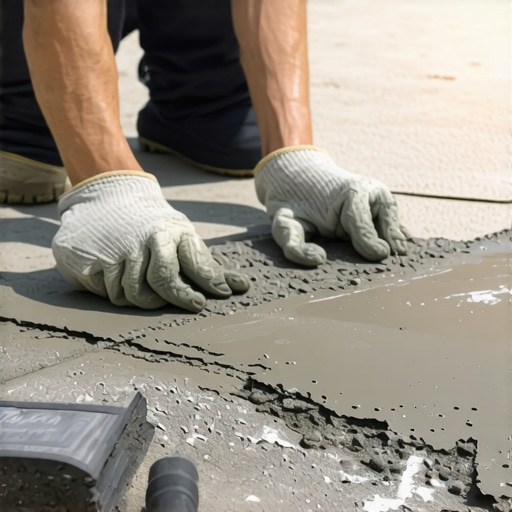
The Forensic Reality of the Failed Patch
The homeowner stood there, pointing at a jagged crater in his garage floor that looked like a lunar landscape. He’d spent three weekends and fifty dollars on various ‘miracle’ tubs of premixed patch from the big-box store. Every time, the result was the same: within two weeks of the first frost, the patch would delaminate, popping out like a loose tooth. When I knelt down and put my scope into the crack, I didn’t see a structural failure of the slab; I saw a failure of the installer. The edges were smooth, coated in a fine, white powder—laitance. The new mud never had a chance to bite. It was a classic cold joint created by laziness and a fundamental misunderstanding of concrete chemistry.
“Water penetration is the single greatest threat to masonry durability, leading to internal pressures that no superficial patch can withstand without a proper mechanical bond.” – BIA Technical Note 7
In my forty years of professional masonry restoration, I’ve seen this a thousand times. People treat concrete like play-dough. They think you can just butter a hole and it will stay. But concrete isn’t an adhesive; it’s a crystalline matrix. If you want a patch to stick, you have to understand the physics of suction, the chemistry of the hydration process, and the brutal reality of the freeze-thaw cycle.
The Physics of Failure: Why Most Patches Pop
In the North, we deal with the 9% expansion of water. When water gets trapped in the microscopic void between an old slab and a new patch, and that temperature drops, that water turns to ice and exerts thousands of pounds of pressure per square inch. If your patch doesn’t have ‘tooth’—a mechanical interlock—it will fail. Most ‘handyman’ repairs fail because they ignore masonry waterproofing solutions and fail to address the underlying moisture migration. This is especially true in chimney structural repair, where the verticality of the structure accelerates the entry of water through failed chimney flashing repair points.
Another silent killer is the ‘Water-to-Cement Ratio.’ A patch that is too wet will shrink as it cures. As it shrinks, it pulls away from the edges of the original concrete, creating a hairline gap. That gap is an invitation for the next rainstorm to get in and start the prying action. When I’m performing a forensic audit on chimney damper repair or structural brick ties replacement, I often find that the surrounding concrete or mortar was never properly saturated before the new material was applied. The old, thirsty masonry sucked the moisture right out of the new mud, ‘burning’ the mix before the crystals could knit together.
The Anatomy of a Permanent Patch: A Master’s Process
If you want a patch that outlives the house, you stop looking at the surface and start looking at the prep. You need to create a profile. I don’t use a brush; I use a chipping hammer or a diamond blade to undercut the edges. Never feather-edge a patch. A feather edge is a weak edge. You want a vertical wall or, better yet, an inverted ‘V’ so the patch is physically locked into the slab.
Next comes the mortar matching services mentality. You aren’t just matching color; you’re matching density and thermal expansion rates. If you put a high-strength, non-shrink grout into a soft, historic concrete, the patch will eventually crush the surrounding material. This is a common issue in professional masonry restoration where modern Portland-heavy mixes are forced into 1920s structures.
The “Slurry” Secret
Before you ever lay a trowel on that hawk, you need a bonding agent. I don’t trust most of the liquid ‘glues’ sold in jugs. I make a ‘scrub coat.’ This is a thin, creamy mixture of neat cement and water (or a specialized acrylic fortifier). You scrub this into the damp (but not puddled) surface with a stiff brush. This fills the honeycombing and pores of the old concrete, creating a bridge that the heavier repair mud can latch onto. You apply the patch while the scrub coat is still tacky. If it dries, you’ve just created a bond-breaker, and you’re back to square one.
“ASTM C928 governs the performance of very rapid-hardening cementitious materials for concrete repairs, emphasizing that bond strength is contingent upon surface preparation and moisture management.” – ASTM Standards for Concrete Repair
Advanced Structural Integration
For larger repairs, especially those involving foundation underpinning or complex BIM masonry projects, we don’t just rely on chemistry; we rely on steel. If the crack is structural, a patch is just a cosmetic bandage. You need to stitch the concrete back together. This involves drilling into the sound concrete and setting rebar pins or carbon fiber staples with epoxy. This is the difference between a ‘fix’ and a forensic restoration. When we handle masonry repair services for high-rise or historic landmarks, we model these stresses in BIM to ensure the patch isn’t the next point of failure.
Micro-Zoom: The Hydration Process
Concrete doesn’t ‘dry’—it cures through a chemical reaction called hydration. For the first 28 days, those silicate crystals are growing and interlocking. If you let a patch dry out too fast in the sun, the reaction stops. I’ve seen guys ‘burn’ a soldier course because they didn’t mist the brick. For a concrete patch, you need to keep it damp. Cover it with plastic or use a curing compound. This is the ‘Master Mason’s’ secret: patience. We treat the concrete like a living thing.
When a Patch Isn’t Enough
Sometimes, the forensic evidence points to a deeper issue. If you’re patching a chimney crown and you see the internal flue is cracked, a patch won’t save you from a house fire. You need chimney structural repair. If the concrete slab is tilting, no amount of slicker work will level it; you’re looking at foundation underpinning. Know your limits. A patch is for surface integrity; structural steel and soil stabilization are for safety.