
The Sound of Structural Failure
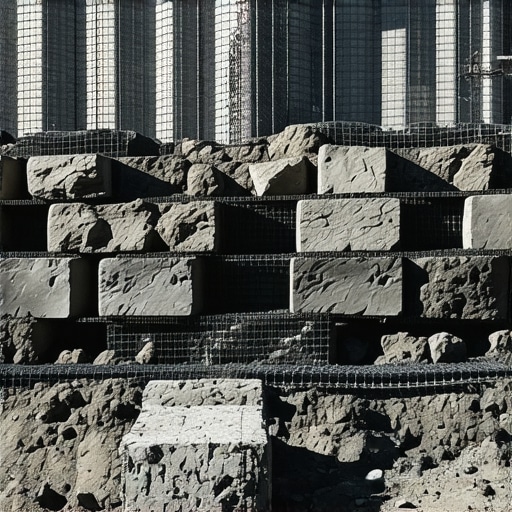
I stood on a hillside in the humid river valley of West Virginia, looking at a 15-foot tiered retaining wall system that had literally ‘walked’ three inches off its base in a single night. The homeowner was white-faced, staring at a $120,000 investment that now looked like a staircase for a giant. The contractor had used the right blocks and even the right geogrid, but he had committed the cardinal sin of the trade: he treated the grid like a suggestion rather than a structural component. When I pulled a few blocks from the top course, the grid wasn’t even taut; it was bunched up like a cheap rug. That wall didn’t fail because of the stone; it failed because of the physics of hydrostatic pressure and a fundamental misunderstanding of soil reinforcement. This isn’t just about ‘stacking rocks’; it is about engineering a mass that can withstand the thousands of pounds of lateral earth pressure pushing against it every second of every day.
The Physics of the ‘Reinforced Zone’
To understand why most retaining wall installations fail, you have to look at the soil as a fluid. On a microscopic level, soil particles want to slide past one another. The angle at which a pile of dirt remains stable is called the angle of repose. Once you cut a vertical face into that dirt and put a wall in front of it, you are fighting gravity and the weight of the world. Geogrid works by creating a ‘coherent mass’—it locks the soil particles into the grid apertures through a process called interlock. We call this the ‘tooth’ of the reinforcement. If you don’t have enough ‘tail’—the length of the grid extending into the hillside—the wall is just a heavy curtain.
“Internal stability is the ability of the reinforced soil mass to act as a coherent unit, preventing internal sliding or rotation.” – NCMA Design Manual for Segmental Retaining Walls
When we talk about retaining wall installation, the grid is the literal sinew of the structure. Without it, the wall is just a pile of bones.
Mistake #1: The ‘Inside-Out’ Grid Orientation
Most high-performance geogrids are uniaxial, meaning they have a ‘strong’ direction and a ‘weak’ direction. I’ve lost count of how many times I’ve seen a crew roll the grid out parallel to the wall because it was ‘easier to cut.’ That is a death sentence for the wall. The high-tenacity polyester yarns are designed to take the load perpendicular to the wall face. If you install it sideways, you might as well be using a fishing net. In my thirty years, I’ve had to write forensic reports that cost contractors their entire bond because they didn’t check the roll direction. When you butter the top of a block to set the next course, you better ensure that grid is pulled bone-tight and pinned. If there is even a half-inch of slack, the wall has to move—to crack—before the grid even starts working. That movement is where the honeycombing of the backfill starts, leading to eventual collapse.
Mistake #2: The ‘Short Tail’ and Embedment Failures
The length of the geogrid is determined by the height of the wall and the soil’s internal friction angle. A common ‘handyman’ mistake is only running the grid three or four feet back. For a tall wall, you might need twelve or fifteen feet. If the grid doesn’t extend past the ‘failure plane’ (the theoretical line where the soil wants to slide), it does absolutely nothing. It’s like trying to keep a boat from drifting by tying a rope to the water. We also see issues with ’embedment depth’—the amount of wall that is buried underground. If the toe of the wall kicks out, the grid can’t save you. This is why proper site forensic work is critical before you even mix your first batch of mud.
[IMAGE_PLACEHOLDER]
The Nightmare of Hydrostatic Pressure and Poor Drainage
In the North, where the freeze-thaw cycle is a brutal reality, water is the primary enemy. Water expands approximately 9% when it freezes. If your retaining wall doesn’t have a 12-inch chimney of 3/4-inch clean crushed stone directly behind it, that water gets trapped. It turns the soil into a heavy slurry and then freezes, punching the wall outward with thousands of pounds of force. This is often where we see the need for structural repointing or, in extreme cases, the total replacement of the face. For commercial projects, commercial parapet wall repair and wall stabilization often go hand-in-hand because the drainage from the roof is dumped right behind the wall.
“Water penetration is the single greatest threat to masonry durability and wall stability.” – BIA Technical Note 7
I’ve seen walls that were perfectly engineered but failed because a downspout was pointed in the wrong direction. You have to respect the path of the water.
The Connection: Where Grid Meets Block
The connection between the geogrid and the masonry unit is a high-stress zone. This is where many ‘low-bid’ contractors cut corners. They don’t sweep the top of the block before laying the grid. A single pebble can act like a knife, severing the grid fibers under the weight of the courses above. You need a clean, flat surface. When I’m inspecting a job, I look for the ‘slicker’—if the joints aren’t struck clean and the grid isn’t sandwiched perfectly between the units, you’re going to have issues. For older walls that are starting to show their age, mortar repointing services can sometimes buy you time, but if the grid connection is severed, no amount of ‘mud’ on a hawk is going to save that structure. It becomes a matter of when, not if, the wall fails.
Modern Forensic Tech: From Drones to 3D Printing
We are entering a new era of masonry. I’m now using drone chimney inspections to look at the top-side drainage of large-scale wall systems that are integrated into residential estates. We can see thermal signatures of water pockets trapped behind the stone before the wall even starts to bulge. We are also seeing 3D printed masonry repairs being used to create custom drainage outlets and decorative ‘weep holes’ that match historic aesthetics while providing modern performance. But even with all this tech, the basics don’t change. Whether you are doing a brick paver driveway repair or a 50-foot commercial wall, the base compaction and the grid tension are the laws of the land. If you’re looking for a tuckpointing cost estimation for the decorative facade of a wall, remember that the ‘pretty’ side is only as good as the ‘ugly’ side hidden in the dirt.
Common Pitfalls in Compaction
You can’t just dump dirt and hope for the best. You have to compact in ‘lifts’—usually 6 to 8 inches at a time. If you use a heavy vibratory roller directly on top of the grid, you can ‘burn’ or tear the material. You have to use a walk-behind plate compactor within three feet of the wall face. I’ve seen walls bow outward because a guy in a skid-steer got too close to the edge and pushed the blocks out of alignment. That creates a cold joint in the soil structure that never truly heals. You need 95% standard proctor density, or you’re just building on a sponge.
Maintenance and the Longevity of Masonry
Once the wall is up, the job isn’t over. You have to monitor for flush pointing services needs and ensure the vegetation isn’t sending roots into your geogrid. Large tree roots can tear through HDPE grid like it’s paper. If you have a chimney near the wall, ensure chimney flue liner installation is handled by a pro so that heat transfer doesn’t affect the soil moisture levels or the polymer grid. Everything on a property is connected. A failure in one area—like a sinking driveway—often points to a failure in the retaining wall below it. Do it once, or do it twice. In this business, doing it twice usually means you’re going broke. Respect the grit, respect the physics, and never trust a contractor who doesn’t own a tensioning tool for his grid.