
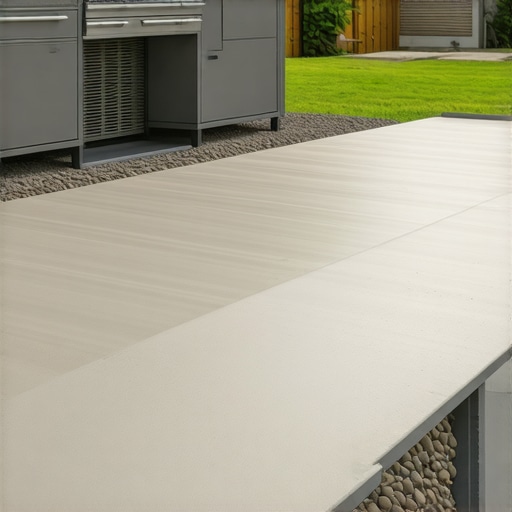
I once walked onto a job site where a $60,000 outdoor kitchen—complete with a professional-grade wood-fired pizza oven and custom granite slabs—looked like it had been hit by a localized earthquake. The granite was snapped clean through the sink cutout, and the stone veneer was popping off the sides like old scabs. The homeowner thought it was a material defect. It wasn’t. I stuck a probe into the ground and found the culprit: the contractor had poured a four-inch slab of unreinforced concrete over loose, uncompacted fill dirt. He built a monument on a marshmallow. This is the reality of masonry work; the prettiest soldier course or the most precise stone coping installation is utterly worthless if the ground beneath it decides to move. If you want a kitchen that stays level for fifty years, you have to stop thinking like a landscaper and start thinking like a forensic engineer.
The Geotechnical Reality: Why Slabs Fail
Most failed outdoor kitchens die because of a fundamental misunderstanding of soil physics. You aren’t just pouring concrete; you are creating a bridge over a dynamic, moving sea of earth. In northern climates where the freeze-thaw cycle is the primary antagonist, water in the soil expands by roughly 9% when it turns to ice. That expansion exerts thousands of pounds of hydrostatic pressure per square foot. If your base isn’t designed to handle that heave, it will crack, and your masonry water damage repair bills will start piling up. Even in warmer climates, soil shrinkage during dry spells can lead to differential settlement, where one side of your kitchen sinks while the other stays put. This is why a structural masonry inspection is often the first thing I do when I see a wavy countertop.
“The performance of any masonry structure is directly dependent upon the stability of its foundation and the adequacy of the subgrade preparation.” – BIA Technical Note 39
To prevent this, we have to talk about the subgrade. You cannot simply scrape away the grass and start throwing mud. You need to excavate down to undisturbed soil, often 8 to 12 inches below your finished grade, depending on the load. If you’re building a massive island with heavy stone, you might even need a true frost footer that goes below the local frost line. We use a plate compactor to hit a 95% Modified Proctor density. If the soil doesn’t ‘ring’ under the machine—if it feels spongy or ‘pumps’ like jelly—you have to keep digging until you find something with actual bearing capacity.
The Chemistry of the Pour: Beyond the Bagged Mix
When we talk about the ‘mud,’ we aren’t just talking about wet grey stuff. For an outdoor kitchen base, you want a 4,000 PSI mix with air-entrainment. Micro-zooming into the chemistry: air-entraining agents create billions of microscopic bubbles within the concrete. These bubbles act as expansion chambers for water when it freezes, preventing the internal pressure from shattering the C-S-H (Calcium Silicate Hydrate) bonds that give concrete its strength. Without those bubbles, the face of your concrete will suffer from spalling, eventually leading to a full structural failure of your brick patio restoration or kitchen island.
Reinforcement is where most ‘handyman specials’ fail. Rebar isn’t just for skyscrapers. Concrete is incredible in compression but pathetic in tension. As the earth moves, the bottom of your slab wants to pull apart. That’s where the steel comes in. I use #4 rebar (half-inch) on a 12-inch grid, suspended in the middle third of the slab using rebar chairs. If the steel is sitting on the dirt, it’s not doing a damn thing except rusting. I’ve seen historic brick salvage projects where the original masons didn’t have steel, but they had massive mass. Modern slabs don’t have the mass, so they need the ‘bones’ of steel. This is the same principle used in retaining wall reinforcement; we are fighting the lateral and vertical forces of the earth itself.
“Reinforcing steel shall be placed so as to ensure it remains in its intended position during the concrete placement process, typically within the middle or upper third of the slab thickness to resist tension caused by soil movement.” – ASTM A615 Standards
Execution: From Excavation to the Slicker
Once the hole is dug and the gravel base—ideally 6 inches of 3/4-inch crushed stone (clean, no fines for drainage)—is compacted, we set our forms. You want a slight pitch, maybe 1/8 inch per foot, to ensure water doesn’t pool under your cabinets. This is critical for preventing masonry water damage repair in the future. Then comes the pour. We don’t just ‘dump’ it. We place it. We use a screed to level it, then a bull float to push down the large aggregate and bring the ‘cream’ to the top. But don’t over-work it. If you over-trowel air-entrained concrete, you’ll drive the air out of the surface and cause it to peel later.
For the edges where you might eventually do a stone coping installation, you need a clean, consolidated edge. Use an edger tool to create a radius; this prevents the edge from chipping under the weight of the masonry. If you’re integrating a green roofing masonry integration nearby, the drainage from that system must be diverted far away from this slab to prevent soil saturation. If the ground stays wet, the concrete stays cold, and the freeze-thaw damage accelerates.
The Scams: How to Spot a Bad Mason
Beware the ‘leftover material’ scam. A contractor finishes a driveway nearby and offers you a ‘deal’ on a kitchen slab with the extra concrete. Concrete has a shelf life. From the moment the water hits the mix at the plant, the clock is ticking. If that truck has been sitting for two hours in the sun, the hydration process is too far along. They’ll add water to make it pourable, which kills the water-to-cement ratio and leaves you with a slab that has the structural integrity of a sugar cube. It might look fine for a month, but by the next season, you’ll be looking for someone to do a brick paver driveway repair or a total slab replacement. A real mason orders a fresh truck, specifically for your PSI and air-entrainment requirements.
Final Inspection and Long-Term Value
In my thirty years of doing forensic structural masonry inspection, I’ve never seen a well-built foundation fail. I’ve seen stone balustrade restoration projects on 100-year-old mansions where the stone was crumbling, but the foundation was still true. That’s the goal. When you build your outdoor kitchen base, you are setting the stage for everything else—the commercial masonry facade maintenance, the beautiful brickwork, the expensive appliances. If you cut corners on the ‘mud’ or the compaction, you aren’t saving money; you’re just financing a future demolition. Do it once, do it right, and let the next generation worry about the stone coping installation when they want to update the look. The base should outlive us all.
{ “@context”: “https://schema.org”, “@type”: “HowTo”, “name”: “Building a Stable Concrete Base for Outdoor Kitchens”, “description”: “A professional guide to constructing a reinforced concrete foundation that resists settlement and freeze-thaw damage.”, “step”: [ { “@type”: “HowToStep”, “text”: “Excavate the area to a depth of 12 inches, reaching undisturbed subgrade soil.” }, { “@type”: “HowToStep”, “text”: “Install 6 inches of 3/4-inch clean crushed stone and compact using a vibratory plate compactor to 95% Proctor density.” }, { “@type”: “HowToStep”, “text”: “Set forms with a 1/8-inch per foot pitch to ensure proper water drainage away from the structure.” }, { “@type”: “HowToStep”, “text”: “Install #4 rebar in a 12-inch grid pattern, elevated on rebar chairs to sit in the middle third of the slab.” }, { “@type”: “HowToStep”, “text”: “Pour 4,000 PSI air-entrained concrete, screed to level, and bull float the surface without over-working the cream.” } ] }