Avoid These 3 Historic Brickwork Repointing Errors in 2026
The Forensic Scene: Beneath the Surface of a Hairline Crack
The homeowner thought it was just a hairline crack. A simple cosmetic flaw in a century-old facade that had seen better days. But when I slid my fiber-optic scope into the void, the reality was a nightmare: the structural steel was rusted to dust, transformed into a swollen, flaky mess of iron oxide that was actively heaving the brickwork outward. This wasn’t just a crack; it was a symptom of a slow-motion explosion. This is the reality of forensic masonry. You see a wall; I see a living, breathing respiratory system that has been choked by decades of ‘handyman specials’ and the catastrophic misuse of modern materials on old bones.
The Theology of Breathability: Why Historic Masonry is Different
Before we pick up a hawk or a slicker, we have to understand the physics of a pre-1940s wall. Unlike modern rain-screen systems or brick veneer detachment repair scenarios where we rely on cavities and weep holes, historic mass-masonry functions as a reservoir. It absorbs moisture and then, through the miracle of capillary action, breathes it back out. The mortar is the lungs of this system. If you kill the lungs, you kill the building.
“Water penetration is the single greatest threat to masonry durability, and the selection of a mortar with a higher water vapor transmission rate than the masonry units is paramount.” – BIA Technical Note 7
Error 1: The Portland Poison (The Incompatibility Crisis)
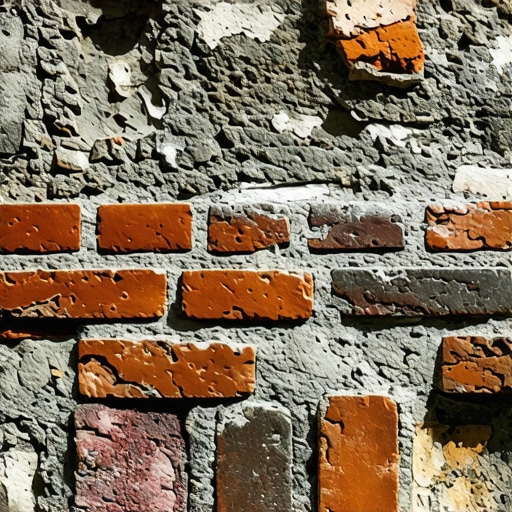
In 2026, we are still seeing contractors show up with bags of high-strength Portland cement to fix a soft-clay brick wall. This is a death sentence. Old bricks, especially those fired in the late 19th century, are soft. They have a high porosity and a low compressive strength. When you pack those joints with a modern, hard, impermeable Type S mortar, you create a rigid cage. When the sun hits that wall and the bricks try to expand, they hit a wall of cement that won’t budge. The result? The brick face loses the fight. It spalls. It pops off like a scab, leaving a raw, orange wound. This is the ‘sacrificial principle’ ignored. The mortar must always be softer than the brick. For commercial masonry facade maintenance, we must return to lime-based mortars (Type K, O, or pure lime putty) that allow for autogenous healing—the ability of the mortar to actually reseal micro-cracks through carbonation.
Error 2: Mechanical Butchery and the Death of the ‘Tooth’
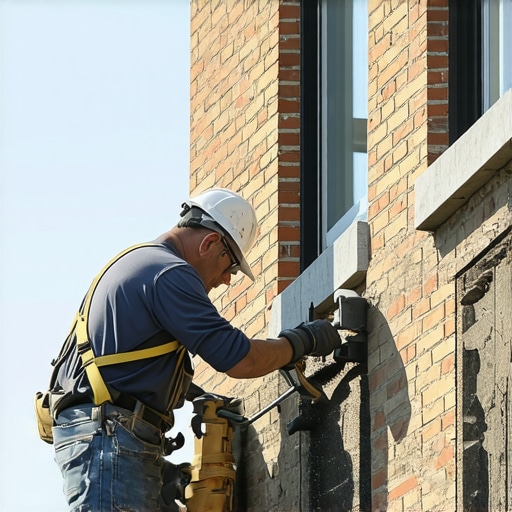
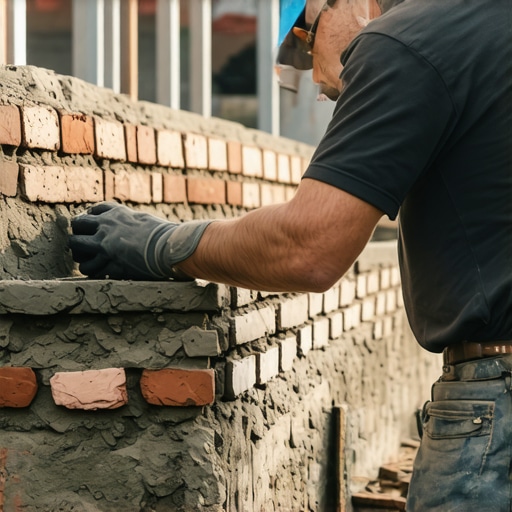
I see it every day: a laborer with a four-inch angle grinder screaming through a joint, nicking the top and bottom of every brick. They call it ‘cleaning the joint,’ but I call it a massacre. When you widen a joint with a power tool, you destroy the original arris of the brick, altering the building’s aesthetic and, more importantly, destroying the physical bond. To get the proper ‘tooth’ for the new mud to grab onto, the joint must be raked out to a depth of at least 2 to 2.5 times its height. We use small pneumatic chisels or hand tools to preserve the historic brick salvage value. If you don’t prep the bed properly, the new mortar just sits on the surface like a ‘lick-and-stick’ veneer, waiting for the first freeze-thaw cycle to shake it loose. During masonry joint sand repair, if the substrate isn’t damp, the dry brick will suck the water right out of your mortar before it can hydrate. We call that ‘burning’ the joint. It leaves the mud chalky and useless.
Error 3: Ignoring the Internal Skeleton (Chimneys and Quoins)
You can’t just slap a new face on a failing structure. In chimney repair services, the error is often focusing on the exterior while the flue is disintegrating. Without a chimney heat shield installation or a proper liner, acidic condensate eats the mortar from the inside out. Similarly, with brick quoin repair, these cornerstones often carry the brunt of a building’s shifting weight. If you’re just repointing the surface without addressing the concrete pump masonry mixes used in the foundation or the rusted lintels behind the soldier course, you’re just painting a corpse.
“The use of overly dense mortars in restoration projects is the primary cause of accelerated masonry decay.” – ASTM C270 Standards Commentary
The 2026 Tech Trap: 3D Printing and Modern Mixes
We are entering an era where 3D printed masonry repairs are becoming a buzzword. While the tech is impressive for replicating complex geometries, it often fails the chemical test. A 3D-printed patch has different thermal expansion coefficients than the surrounding 100-year-old masonry. If the ‘ink’ used in the printer is a polymer-modified concrete, it creates a ‘cold joint’ where water will inevitably park and freeze. This leads to brick veneer detachment repair needs within five years instead of fifty. True chimney rebuild services require a tactile understanding of how a stack moves in the wind, something a computer model often underestimates. Whether you’re dealing with commercial masonry facade maintenance or a residential hearth, the rule remains: if you don’t respect the chemistry of the past, the future will crumble in your hands. Do it once, or do it twice—the choice is usually made at the mixing board.
![Fix Cracking Joints: 5 Historic Brickwork Repointing Tactics [2026]](https://masonryrescue.com/wp-content/uploads/2026/02/Fix-Cracking-Joints-5-Historic-Brickwork-Repointing-Tactics-2026.jpeg)

This post really highlights the complexity and importance of understanding historic masonry techniques before jumping into repairs. I’ve seen firsthand how using modern Portland cement on old bricks can cause irreversible damage, especially since most older bricks are much softer and more porous than what our current standards assume. The emphasis on matching the mortar’s compatibility with the brick’s natural properties is crucial for longevity.
What I find challenging is balancing the preservation of authentic materials with modern safety codes. For example, addressing internal structural issues like rusted steel or disintegrating chimneys often gets overlooked when the focus is solely on cosmetic repairs. In your experience, what are the most effective ways to assess and prioritize such internal skeleton repairs without risking further damage during surface rebonding? Would love to hear how others approach this delicate process.
This post offers a crucial reminder about the importance of forensic analysis before initiating masonry repairs. The detail about rusted structural steel beneath a seemingly simple crack underscores how visual inspection can be deceptive. I’ve encountered similar situations where internal deterioration was far worse than surface appearances suggested. It’s fascinating how the building’s ‘lungs’—the mortar and internal skeleton—must be carefully maintained to ensure longevity.
Regarding the internal skeleton, I’ve found that non-destructive imaging techniques like ground-penetrating radar or infrared thermography are invaluable. They help assess issues behind the surface without risking further damage. Do others here have experience with these methods, or prefer more invasive approaches? Also, how do you balance the urgency of repairs with the need for thorough diagnosis? Sometimes the internal issues are critical, but the surface appears stable. I’d love to hear strategies from seasoned restorers for managing this delicate balance.