The tragedy of a ruined historic facade begins not with a cataclysm, but with a silent, dusty sigh. If you walk along the side of a pre-1940s home and run your finger across the mortar, only to have it fall away like brown sugar, you are looking at a system in crisis. This is the reality of soft or crumbling mortar joints. It is a critical warning sign that the masonry is losing its structural integrity, and the steps you take next will either preserve your building for another century or condemn it to systematic destruction.
My grandfather used to tap a brick with his trowel during our early restoration jobs. If it did not ‘ring’ like a clear, high-pitched bell, he threw it out immediately. He knew that a dull thud meant internal micro-fractures, usually caused by someone packing a soft, historic clay brick with modern, ultra-hard Portland cement. It is a lesson that has saved thousands of chimneys and historic arches from collapsing under their own weight, and it remains the bedrock of proper historic restoration.
“Water penetration is the single greatest threat to masonry durability.” – BIA Technical Note 7
When handling crumbling joints, the material science of historic preservation is non-negotiable. Modern Portland cement is incredibly hard and dense, which is fine for modern concrete blocks. But historic brickwork was built using lime putty or very soft Type O or Type N mortars. These soft mortars act as a sacrificial element. They are designed to absorb moisture and expand and contract under thermal stress. If you patch these old walls with high-compressive modern mortar, the brick itself becomes the softest point in the system. When thermal expansion or freeze-thaw cycles occur, the rigid modern mortar will refuse to budge, forcing the historic brick to crack, spall, and blow its own face off.
This material logic is especially true when performing delicate masonry repair services. For instance, when executing a brick arch restoration or working on complex tuckpointing curved walls, the stresses are distributed unevenly across geometric planes. If the mortar lacks the high plasticity and low compressive strength of lime-based formulas, the entire structural arch can pinch, shear, and fail. The goal is always to keep the mortar softer than the surrounding brick to ensure the wall can breathe and move.
“Mortar should always be weaker than the masonry units so that any movement is accommodated in the joints rather than through the bricks themselves.” – ASTM C270 Standard Specification for Mortar for Unit Masonry
To repair these crumbling joints, you must understand the difference between tuckpointing and repointing. While the terms are often conflated by modern handymen, true repointing is the physical removal of damaged mortar and the packing of new mortar into the cleaned joint. Tuckpointing, on the other hand, is a highly decorative method where a contrasting line of fine lime putty (usually white) is laid over a base mortar that matches the brick color to create the illusion of razor-sharp, ultra-thin joints. This is particularly difficult when dealing with curved surfaces, where tuckpointing curved walls requires specialized hand-eye coordination and custom-bent slicker tools.
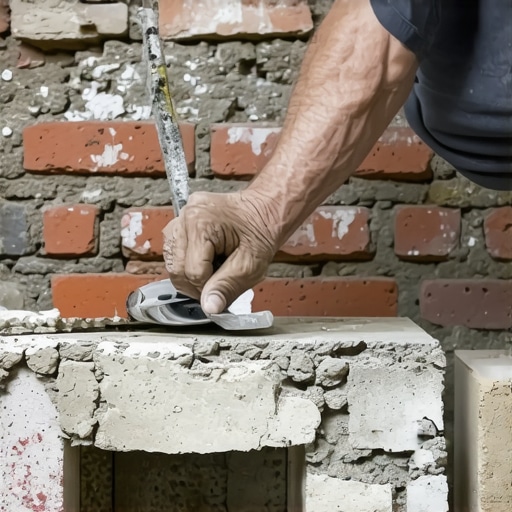
The process of remediation begins by removing the crumbling mortar. You must rake out the joints to a depth of at least twice the width of the joint, or until you hit solid, sound mortar. Never use aggressive circular grinders on historic bricks, as they will inevitably slice the edges of the brick, permanently ruining the aesthetic. Instead, use hand chisels or oscilating pneumatic chisels that respect the boundaries of the brick. Once the joint is cleaned, wash it thoroughly to remove all dust. If you butter a dry joint, the thirsty historic brick will instantly suck all the moisture out of your fresh mud, causing it to flash set, burn, and crumble into powder within weeks.
When mixing your restoration mud, strive for a damp-sand consistency that clumps in your fist but doesn’t smear. Load your hawk, pick up your trowel, and push the mortar deep into the joints in layers no thicker than a quarter-inch at a time, packing each layer firmly to eliminate voids. Once the final layer is thumbprint hard, use a slicker to strike the joint to match the historical profile, whether it is a weathered, v-joint, or concave finish.
Finally, once the physical joints are restored, you must protect them from the elements. This is where advanced tuckpointing weatherproofing and brickwork sealants application come into play. A breathable silane-siloxane sealer should be used to shed liquid water while still allowing water vapor trapped inside the wall to escape. Do not use cheap acrylic coatings that seal the surface like plastic wrap; doing so will trap rising damp behind the brick face, resulting in devastating winter spalling. For horizontal surfaces, such as after a stone coping installation or a retaining wall capstone replacement, ensuring a perfect wash angle and water-shedding seal is paramount to preventing water from migrating down into the core of the wall.