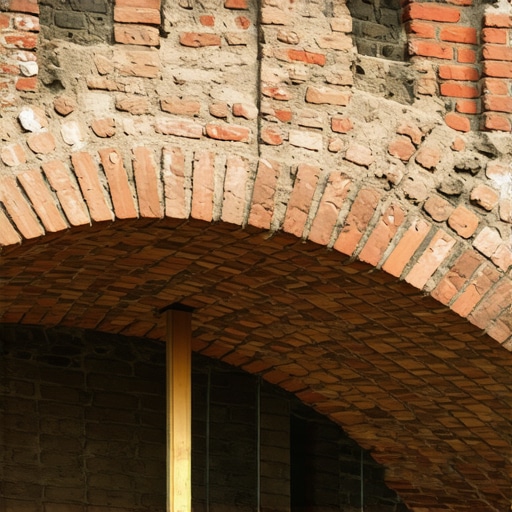
An arch is a beautiful machine of pure gravity and compression. When designed correctly, every wedge-shaped unit pushes against its neighbor, sending loads outward and down to the abutments. But when those abutments move even a fraction of an inch, or when moisture rots the core, that elegant machine becomes a ticking clock. As a forensic inspector, I see this regularly: a structural curve that has lost its key compression, threatening to drop hundreds of pounds of solid clay onto whatever lies below. Understanding how to stabilize a weak brick arch is not about slathering modern epoxy over the cracks; it is about diagnosing why the geometry is failing and restoring its natural, load-bearing equilibrium.
My grandfather used to tap a brick with his trowel. If it did not ring like a high-pitched bell, he would toss it aside into the scrap pile without a second thought. He knew that a dull thud meant internal micro-cracks, high moisture saturation, or a hidden air pocket that would inevitably crumble under the ruthless freeze-thaw cycles of our northern climate. That simple ringing test was the original acoustic emission testing, a hard-earned lesson in structural integrity that modern builders too often ignore in favor of cheap, fast production. When we look at a sagging arch today, we must bring that same uncompromising standard of diagnosis to the table.
“Water penetration is the single greatest threat to masonry durability.” – BIA Technical Note 7
When working on historic brick arches in cold, northern zones, we are fighting a relentless enemy: water expansion. Water increases by approximately 9% in volume when it freezes. If an arch has been previously repaired with hard Portland cement instead of a traditional, breathable lime-sand mix, that water gets trapped. Instead of escaping through the breathable mortar joints, the moisture stays locked inside the soft, antique clay brick. When the temperature drops, the water freezes, expands, and pops the entire front face off the brick in a destructive process called spalling. To prevent this catastrophe, understanding brick spalling prevention is paramount before you even think about structural stabilization.
The first step in any masonry rescue after disaster or long-term neglect is to identify the precise failure mechanism of the arch. Is it a failure of the foundation, causing the abutments to spread? Or is it a failure of the masonry units themselves? If the abutments have pushed outward, the arch loses its springline compression, causing the crown to drop and the haunches to kick outward. Before touching a single mortar joint, you must erect a heavy-duty wooden centering cradle—essentially a temporary timber skeleton shaped to the exact curve of the arch—to take the load. This timber centering must be wedged tightly into place using wooden shims, gently transferring the gravity load away from the failing brickwork and back down to stable ground.
Once the arch is safely supported, we can address the crumbling joints. This is where we talk about the tactile reality of the material: the “tooth” of the historic stone and the “suction” of a dry, thirsty brick. You cannot just slap new mortar into a dry joint. If you do, the dry brick will instantly suck all the moisture out of your fresh mix, a disaster we call “burning” the mortar. The mix dries out before it can chemically hydrate, leaving you with a weak, powdery mess that rubs off on your fingers. To prevent this, you must thoroughly dampen the joints with a low-pressure mist before applying your new “mud.”
“The use of mortar mixes with high compressive strength where softer materials are required accelerates the deterioration of the masonry units.” – ASTM C270 Standard Specification for Mortar for Unit Masonry
Using a hawk and a trowel, the artisan must “butter” the units with a historically compatible, low-strength lime mortar—typically a Type O or a custom lime putty mix that is softer than the surrounding brick. This ensures that the mortar remains the sacrificial element of the structure, absorbing the natural movements and thermal expansions of the building without cracking the irreplaceable historic bricks. For deep structural voids where a simple repointing will not suffice, a full brick lintel replacement or targeted rebuilding of the voussoirs (the wedge-shaped arch bricks) is required. During this process, using sustainable block cutting techniques keeps dust to a minimum and preserves the integrity of the remaining structural units.
After the structural masonry is stabilized and the joints are carefully packed, the final step is striking the joints to match the historical aesthetic. Selecting the correct brickwork pointing styles—whether it is a weather joint, a struck joint, or a traditional flush joint—is not just about looks; it is about shed water. A poorly struck joint creates tiny ledges that collect water, feeding the freeze-thaw cycle all over again. Once the new mortar has cured slowly under damp burlap for several days, the timber centering can be slowly eased down, allowing the arch to re-engage its natural compression, locked safely back into its timeless geometric stance.