The Forensic Scene: A Tale of Sheared Brick and Shattered Stone
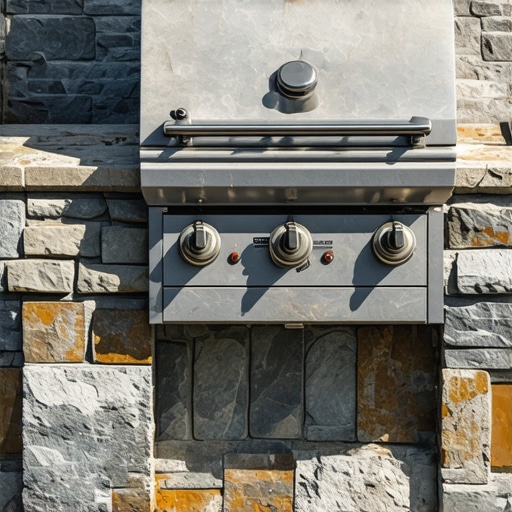
I remember a forensic call-out to a high-end property where a massive, custom-built granite grill station had literally sheared the face off a brick pier. The homeowner initially dismissed the widening gaps as common settling cracks, but when I inserted my bore scope into the void, I found a disaster. The installers had used standard plastic sleeve anchors into a soft-fired brick. Over three seasons of use, the vibration and dead weight of the grill had ground the brick’s internal structure into a fine powder. The entire 500-pound assembly was hanging by a single rusted lag bolt and the grace of God. This is the reality of masonry work; if you don’t respect the physics of the load and the chemistry of the substrate, the mountain will always find its way back to the ground.
The Physics of the Base: Beyond Simple Footings
When you are planning to anchor a heavy stone grill, you aren’t just looking at a piece of equipment; you are managing a structural load that interacts with the earth itself. Most amateurs think a standard 4-inch concrete pad is sufficient. It isn’t. For a heavy masonry base, you need to consider the geotechnical stability of the soil. If you have expansive clay or loose silt, your base will shift, leading to the need for foundation slab jacking later. We look for a compacted sub-base of at least 6 to 8 inches of crushed aggregate, mechanically compacted to prevent the ‘wavy’ effect seen in amateur brick paver driveway repair jobs.
“Anchor embedment depth and edge distance are the primary determinants of load capacity in masonry substrates, requiring rigorous adherence to torque specifications to prevent substrate failure.” – ASTM E488 Standard
The base must be a monolithic pour or a reinforced masonry unit (RMU) assembly. If you are building a brick column repair or a new pier to support this weight, you must ensure there is no honeycombing in the concrete core. Honeycombing occurs when the aggregate isn’t vibrated properly, leaving air pockets that act as fracture points under the stress of a heavy anchor. When we talk about the ‘mud’—the mortar—it isn’t just glue. It’s a bearing material. For heavy stone, I use a Type S mortar with high compressive strength, but I never ‘butter’ the edges only. I ensure full head and bed joints to prevent water from pooling behind the stone veneer.
The Freeze-Thaw War: Northern Masonry Logic
In the North, we deal with the most violent force in masonry: the 9% expansion of freezing water. If you drill a hole for an anchor and don’t seal it perfectly, water will find its way into that ‘stress cone.’ When that water freezes, it exerts upwards of 4,000 psi. This is how spalling happens—the face of your expensive stone or brick simply pops off, leaving a raw, ugly wound. This is a common sight during chimney structural repair where anchors for flashing or caps were improperly set.
“Moisture trapped within masonry units during freeze-thaw cycles can exert pressures exceeding 4,000 psi, compromising the bond of any mechanical fastener and leading to catastrophic structural failure.” – BIA Technical Note 27
To combat this, the anchoring process must be forensic. We don’t just ‘drill a hole.’ We use a carbide-tipped bit to ensure a clean ‘tooth’ in the masonry. Then, we use a blow-out bulb and a nylon brush to remove every microscopic particle of dust. If you leave dust in the hole, your epoxy anchor isn’t bonding to the stone; it’s bonding to the dust, which acts like a dry lubricant. This leads to ‘creep,’ where the anchor slowly pulls out over time under the constant pull of gravity.
Selecting the Anchor: Chemical vs. Mechanical
For a heavy stone grill, I have no time for mechanical wedge anchors. Mechanical anchors rely on expansion pressure against the side of the hole. In old masonry or historic brickwork repointing scenarios, this expansion pressure can actually crack the brick you are trying to anchor to. Instead, I advocate for chemical anchoring systems. We are talking about two-part vinyl ester or epoxy resins that fill the pores of the masonry.
When you ‘butter’ the anchor with epoxy and slide it into a clean hole, the resin undergoes a cross-linking polymerization. It becomes part of the masonry. It doesn’t exert outward pressure; it creates a unified structural bond. This is the same principle we use in brick wall restoration when we have to tie a facade back to a structural backup. It’s about integration, not just friction.
The Step-by-Step Execution: Professional Grade
1. **Layout and Soldier Course Alignment**: Mark your anchor points. If you are working with a brick veneer installation, ensure your anchors are hitting the structural studs or the solid masonry backup, not just the thin veneer. I like to align my anchors within the soldier course for maximum vertical stability.
2. **Drilling**: Use a SDS-plus rotary hammer. Do not force it. Let the tool do the work. If you hit a void, you need to use a screen tube to contain the epoxy.
3. **Masonry Cleaning**: Before setting the anchors, perform a light masonry cleaning around the area. Removing efflorescence and carbon crust ensures the grill’s mounting plate sits flush against the stone. Any gap here creates a lever arm that increases the shear force on your bolts.
4. **The Curing Phase**: This is where the ‘handyman specials’ fail. They tighten the bolts too soon. Depending on the ambient temperature, an epoxy anchor might need 45 minutes to 24 hours to reach full structural capacity. If you stress the anchor during the ‘gel’ phase, you destroy the bond.
5. **The Slicker and the Seal**: Once the grill is mounted, use a slicker or a jointer tool to apply a high-grade silicone or specialized masonry sealant around the anchor head. This is your first line of defense against water infiltration.
Maintenance and Long-Term Integrity
Even the best anchoring job requires maintenance. Every year, you should inspect the area for ‘star cracks’ radiating from the anchor point. These are early warning signs of thermal expansion stress. If you see them, a concrete patch won’t fix it; you need to probe deeper. Just as you would perform a chimney crown repair to protect the stack below, you must ensure the top of your masonry base remains shed-water capable. If water sits on top of the base, it will eventually migrate down the anchor shafts and begin the slow work of destruction. Do it once, do it right, or you’ll be calling someone like me to pick up the pieces of your outdoor kitchen.