
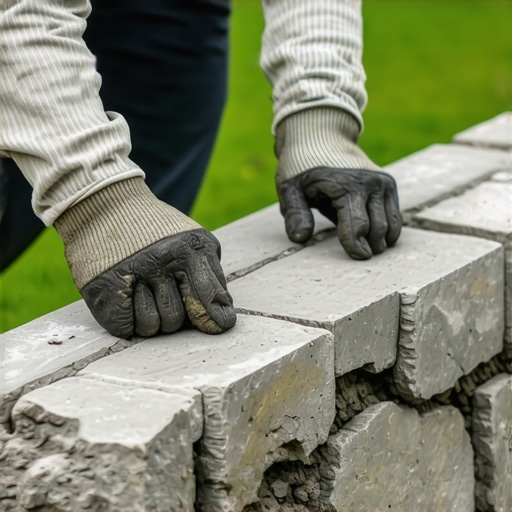
The homeowner called me out for what they described as a simple cosmetic chip on their garden wall. To the untrained eye, it was just a piece of limestone that had lost its corner. But when I ran my fingers along the bed joint and felt the gritty, saturated sludge of a failing binder, I knew the story was different. I pulled out my digital scope, slid it into the gap where the mortar had turned to mush, and saw exactly what I feared: the internal structural steel was already shedding layers of rust like an old snake skin. What looked like a hairline crack in the cap was actually the final gasp of a wall being choked by hydrostatic pressure from within. This wasn’t a masonry repair; it was a forensic autopsy.
The Physics of Failure: Why Caps Shatter
In the trade, we call the retaining wall cap the ‘first line of defense.’ It is the umbrella for your masonry. When a cap fails, it is rarely because of a physical impact. It is usually the result of the relentless expansion and contraction cycle found in the North. Water is a patient killer. It finds its way into the micro-fissures of a poor mortar matching service job, and once it is trapped, the physics take over. Water expands by roughly 9% when it turns to ice. That 9% doesn’t sound like much until you realize it exerts upwards of 30,000 PSI of internal pressure. No stone, not even granite, can survive that kind of tension if there is nowhere for the moisture to escape.
“Water penetration is the single greatest threat to masonry durability. Properly designed caps and flashing are essential to divert water away from the wall’s interior.” – BIA Technical Note 7
When you see a cap that has popped off or cracked, you are looking at the result of a ‘cold joint’ or poor retaining wall reinforcement. If the cap wasn’t pitched correctly, water sits on the surface, finds a way into the core, and then the freeze-thaw cycle begins its slow-motion explosion. This is why we are seeing a shift toward BIM masonry projects and digital twin masonry projects to simulate these stressors before the first stone is even buttered. We can now map exactly where the stress concentrations will occur, but even the best software can’t replace the hand of a master who knows how to ‘ring’ a stone.
The Forensic Approach to Replacement
You don’t just ‘glue’ a new cap on. That is how handymen create a repeating revenue stream for themselves. To do it right, you have to treat the wall like a living organism. First, you must evaluate the ‘tooth’ of the remaining structure. If the foundation wall bowing repair wasn’t handled years ago, your new cap will be under shear stress the moment the mud dries. We start by removing the damaged unit and grinding out the old, dead mortar until we hit solid material. This isn’t just about aesthetics; it’s about facade cleaning and surface preparation. You want the new mortar to have a physical bond—a mechanical key—into the substrate.
Micro-zooming into the chemistry of the bond, we have to talk about the ‘suction’ of the stone. A dry, porous cap will suck the moisture out of your mortar (the mud) instantly. This ‘burns’ the mortar, preventing the hydration of the cement and leaving you with a brittle, sandy mess that will fail in two seasons. I always dampen my stones before I butter them. This ensures the mortar cures slowly, allowing the calcium silicate hydrate crystals to interlock deeply into the pores of both the wall and the cap. This is the same principle we use in historic brickwork repointing: the mortar must be the sacrificial lamb, softer than the stone but strong enough to hold the weight.
Selecting the Right Mud and Technique
For a retaining wall cap, I never use straight Portland cement. It’s too hard, too brittle. I prefer a Type S or a modified Type N with a specific lime content to allow for a slight bit of flexibility. We aren’t building a bunker; we are building a wall that needs to breathe. If the wall is part of a larger stone veneer over brick assembly, you have to be even more careful about the moisture path. Without a proper drip edge—a small groove cut into the underside of the cap—water will simply run off the top and suck back under the stone via surface tension, leading to honeycombing in the joints below.
“A masonry wall must be designed to manage water, not just resist it. The use of through-wall flashing and proper termination of caps is non-negotiable for structural longevity.” – ASTM C1364 Standard for Architectural Cast Stone
When I’m setting the new piece, I use a slicker to strike the joints. I don’t just wipe them; I pack them. I want that mortar compressed. This increases the density and reduces the permeability of the joint. If the project is high-end or historic, we might look into mortarless masonry systems for the internal drainage, but for a traditional cap, it’s all about the bed. I want a full bed of mud, no voids, and a slight pitch toward the front of the wall to shed water. If you leave a void, you’ve created a reservoir for the next winter to use as a crowbar.
The Final Polish: Beyond the Cap
Once the cap is set, the job isn’t done. A true forensic mason looks at the whole system. Are the weep holes clear? Is the full repointing services schedule up to date? Often, a broken cap is just a symptom of a larger drainage issue behind the wall. If the soil is heaving due to poor compaction or lack of gravel backfill, the wall will tilt, and the caps will be the first things to pop under the tension. We use mortar matching services to ensure the new repair doesn’t look like a patch job, but matches the weathered patina of the existing structure. It takes years of experience to know how to mix pigments and sands to match thirty-year-old lime mortar.
Don’t fall for the ‘lick-and-stick’ method where someone just slaps some construction adhesive on a stone and calls it a day. That stone will be on the ground within three years. Do it once, do it right, and respect the physics of the material. If you treat the masonry with the respect its chemistry demands, it will outlive you. If you treat it like a ‘handyman special,’ you’ll be calling me back to fix the pile of rubble that used to be your landscape.