
The Forensic Scene: A Vertical Landslide in Waiting
The homeowner thought it was just a hairline crack, a minor blemish on the face of a stately three-story colonial. But when I put my borescope inside the cavity through a drilled pilot hole, I saw the structural steel ties were rusted to dust. They didn’t just fail; they had vanished into an orange ghost of iron oxide. This wasn’t a cosmetic issue; it was a forensic nightmare. The entire brick wythe was standing by gravity and habit alone, disconnected from the backup wall. In the world of high-stakes masonry, we call this a ‘belly’—a bulge that signals the impending collapse of the veneer. This is the reality of brick veneer detachment repair in climates where the freeze-thaw cycle treats steel like a snack.
“Corrosion of metal ties and anchors can lead to the collapse of the masonry wythe, especially in high-wind or seismic events.” – BIA Technical Note 28B
The Physics of Disconnect: Why Ties Fail
In a standard cavity wall, the masonry tie is the unsung hero. It bridges the gap between the structural stud (or CMU) and the aesthetic brick veneer. Over forty years, moisture laden with chlorides migrates through the porous brick. When this moisture hits the tie, an electrochemical reaction begins. If the ties were ‘lick-and-stick’ galvanized rather than hot-dipped, the zinc sacrificial layer vanishes in a decade. Once the raw steel is exposed, rust jacking occurs. Rust occupies up to ten times the volume of the original metal, exerting incredible pressure inside the mortar joint before eventually snapping the tie. This is often seen in commercial parapet wall repair, where the exposure to elements is 360 degrees. Without these ties, the veneer loses its lateral stability. It’s no longer a structural unit; it’s just a stack of heavy rocks waiting for a gust of wind.
The Outside Fix: Helical Anchors and Surgical Precision
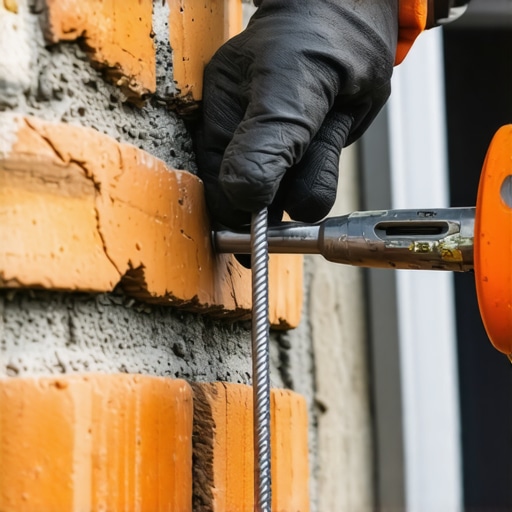
We don’t tear down the wall anymore. That’s a rookie move that costs the client six figures. Instead, we use structural repointing and external tie reinforcement. The tool of choice is the stainless steel helical anchor. These aren’t your hardware store screws. They are finned shafts that we drive through the brick and into the substrate—be it wood, concrete, or CMU. The ‘tooth’ of the anchor bites into the backup material while the fins lock into the mortar of the veneer. We use a proprietary setting tool that ensures the anchor is recessed, leaving room for a color-matched historic pointing styles finish. This is where the ‘mud’ meets the road. If your mortar is too hard, you’ll trap moisture and blow the face off the brick next winter. You need a lime-heavy mix that breathes.
Digital Twins and Modern Forensics
Before we even pick up a hammer, we’re looking at digital twin masonry projects. By creating a 3D model of the building’s exterior, we can map every ‘belly’ and crack. In BIM masonry projects, we track the exact location of every installed tie. This isn’t just about sticking a screw in a wall; it’s about structural data. We can calculate the exact load-bearing requirements for a commercial smokestack repair or a high-rise facade. This data-driven approach allows us to determine if we need a standard pattern or a high-density grid of ties to combat the specific wind loads of the site.
The Process: Buttering the Joints and Striking the Finish
The actual installation is a dance of physics. We drill a pilot hole, usually 1/4 inch, through the mortar joint—never the brick face if we can help it. We then drive the helical tie home using a rotary hammer on non-impact mode. You feel the ‘suction’ when the tie hits the stud. If you miss, you know it instantly; the resistance disappears. Once the tie is set, we use a slicker to pack the hole with a high-performance, low-modulus mortar. This isn’t the time for ‘handyman specials.’ We’re matching the historic pointing styles of the 1920s, ensuring the new work is invisible to the naked eye. For retaining wall batter correction, the logic is similar but the scale is larger. We aren’t just tying a veneer; we’re fighting hydrostatic pressure. In those cases, we might look at mortarless masonry systems for drainage, but for a facade, it’s all about managing the cavity air-flow.
“All fasteners used in masonry construction shall be of a non-corrosive material or be coated with a non-corrosive finish.” – ASTM A153/A153M
The Chimney and Parapet Problem
Where I see the most detachment is at the top of the building. Chimney flue liner installation often reveals that the outer masonry skin has pulled away from the inner brickwork because of the intense thermal expansion. The chimney expands like a lung every time the furnace kicks on. Without flexible, stainless ties, the corners blow out. Similarly, in commercial parapet wall repair, the lack of proper coping allows water to saturate the wall from the top down, accelerating tie rot by 300%. We use the same helical tie system here, but we often couple it with a new copper flashing or a high-grade cap to stop the bleeding at the source.
Conclusion: The Value of the Third Eye
Don’t let a contractor tell you that a bulging wall just needs ‘a little tuckpointing.’ Pointing is cosmetic; tying is structural. If you see a crack that follows a stair-step pattern or a wall that looks like it’s holding its breath, get a forensic inspection. Whether it’s a brick veneer detachment repair on a residential home or a massive commercial smokestack repair, the physics of gravity and rust don’t change. You fix it right once, or you watch it crumble twice. Keep your mud wet, your ties stainless, and your drainage clear. That’s the only way to build something that lasts another hundred years.