
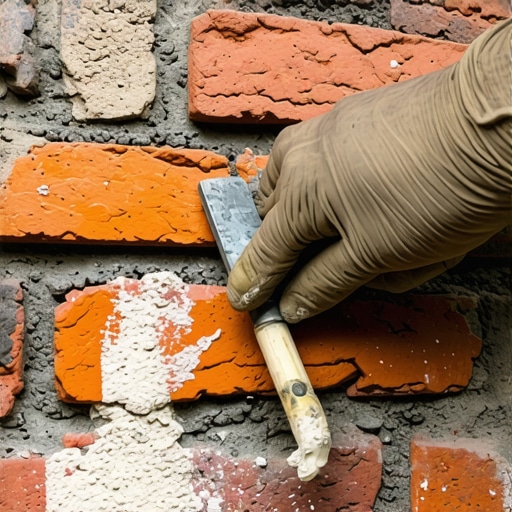
The Ghost of Mortar Past: Why Matching Matters
My Uncle Elias didn’t just look at a wall; he smelled the dampness in the lime and listened to the ‘ring’ of the masonry. He used to say that a brick is like a lung—it needs to breathe, and if you choke it with modern Portland cement, you’re signing its death warrant. I once watched him spend three days just sifting river sand through a fine silk screen because the local quarry didn’t have the ‘sharp’ edge he needed for the ‘tooth’ of the mix. He knew that the secret to a seamless restoration wasn’t in a bottle of liquid pigment; it was in the geological DNA of the sand and the slow, silent chemistry of carbonation. This isn’t just about aesthetics; it’s about the structural survival of your home. When you see a building with ‘ghosting’—where the new joints stand out like neon signs—you aren’t just looking at a bad color match; you’re looking at a mismatch in physics that will eventually lead to stone facade restoration needs or, worse, foundation crack repair as the building’s envelope fails.
“The selection of mortar for historic masonry is based on the need to match the original mortar in terms of physical properties and appearance.” – BIA Technical Note 1
The Micro-Physics of the ‘Mud’: Beyond the Surface
To the uninitiated, mortar is just ‘mud.’ But to those of us who have spent decades with a hawk and trowel, it’s a complex suspension of aggregates and binders. When we talk about high-performance mortar mixes, we are navigating the delicate balance of the ‘Sacrificial Principle.’ In historic brickwork repointing, the mortar must be softer than the brick. Why? Because moisture will always find a way in. If the mortar is soft and breathable (like a Type O or K lime mix), the moisture evaporates through the joints. If you ‘butter’ those joints with a hard, high-Portland mix, the moisture gets trapped behind the brick face. When the freeze-thaw cycle hits, that trapped water expands by 9%, and the face of your historic brick pops off in a process called spalling. You’ve just turned a $2,000 repointing job into a $20,000 facade replacement. To match color correctly, you have to match the mineralogy of the sand. Most of the color in old mortar doesn’t come from dyes; it comes from the silt and iron oxides present in the local sand used a century ago. If you use white masonry sand from a plastic bag, you’ll never achieve that deep, earthy ochre of a 1920s bungalow. You need to ‘micro-zoom’ into the aggregate. Is it rounded river sand or crushed quarry stone? The shape of the sand grain affects how light hits the joint—the ‘spectral reflectance’—which is why your sample might look right in the shade but wrong in the sun.
The Chemistry of Pigmentation and Carbonation
When performing a chimney cap replacement or a chimney heat shield installation, the thermal stresses are immense. The mortar color must remain stable under extreme UV exposure and heat. Modern pigments are usually synthetic iron oxides. They are powerful, but a little goes a long way. If you over-pigment your mix, you weaken the bond, leading to ‘carbonation’ issues where the lime cannot properly crystallize. Speaking of lime, the hydration process is where the magic happens. Unlike modern concrete which sets through a rapid chemical reaction, historic lime mortar cures by absorbing CO2 from the air. This takes months, even years. As it carbonates, the color shifts. This is the ‘curing curve.’ A wet mix always looks three shades darker than the finished, cured joint. I’ve seen ‘handyman specials’ where they tried to match the wet mud to the dry wall; three weeks later, the joints looked like white chalk against red brick. It was a disaster that required masonry joint sand repair just to hide the shame.
The Forensic Process: Step-by-Step Color Matching
First, you have to ‘read’ the wall. Take a small chunk of the original mortar—not from the surface, which is stained by 100 years of soot and acid rain, but from deep within the joint. Crack it open. That interior color is your target. Next, we use an acid digestion test. Drop that sample into a diluted hydrochloric acid solution. The acid will dissolve the binder (the lime or cement), leaving only the sand. Once you have the clean sand, you can see its true color and graduation. Are there black flecks of coal? Red shards of crushed brick? This is your recipe. For a patio stone realignment or a stone facade restoration, the process is the same. You must find an aggregate that matches that profile. When mixing, we use the ‘dry-pot’ method. We mix our sand, lime, and pigments dry and keep a record of the ratios. We ‘slick’ a small amount onto a board and let it dry completely—sometimes using a hair dryer to speed up the ‘flash dry’ for a quick look, though nothing beats a 72-hour natural cure. This is where we check for metallic masonry finishes or other unique additives that were sometimes used in high-end historic work. If the house has a self-healing concrete foundation, we ensure our repair mortars are compatible with the crystalline technology already in place.
“Mortar should be weaker than the masonry units it binds to ensure that any stress-induced cracking occurs in the mortar joints rather than the masonry units.” – ASTM C270
The ‘Tuck’ in Tuckpointing: A Cosmetic Illusion
Most people say ‘tuckpointing’ when they mean ‘repointing.’ True tuckpointing is an art form designed to make irregular, cheap bricks look like expensive, perfectly gauged bricks. You lay a base mortar that matches the brick color exactly, then you ‘butter’ on a very thin, contrasting ‘tuck’ line of white lime putty using a specialized tool called a ‘slicker.’ This creates the illusion of perfectly straight, thin joints. If your base mortar color is off by even a fraction, the illusion is shattered. It requires a master’s eye to match that base ‘mud’ to the fired clay of the brick. We often use ‘soldier courses’ as a testing ground for these color matches because they provide a vertical plane that catches the light differently. If you can hide a repair in a soldier course, you can hide it anywhere.
Avoiding the ‘Cold Joint’ and Other Failures
One of the biggest mistakes in foundation crack repair or repointing is the ‘cold joint.’ This happens when you apply new mortar to a dry, thirsty brick. The brick sucks the water out of the mortar instantly, preventing proper hydration. The result is a ‘honeycombing’ effect where the mortar is brittle and the color is blotchy. You have to pre-hydrate the wall. You soak it until it’s ‘Saturated Surface Dry’ (SSD). This ensures the mortar cures from the inside out, allowing the pigments to distribute evenly. It’s the difference between a repair that lasts five years and one that lasts fifty. Whether you are dealing with a chimney cap replacement or simple masonry joint sand repair, the physics of suction and hydration are your masters. Respect them, or the wall will reject your work.