
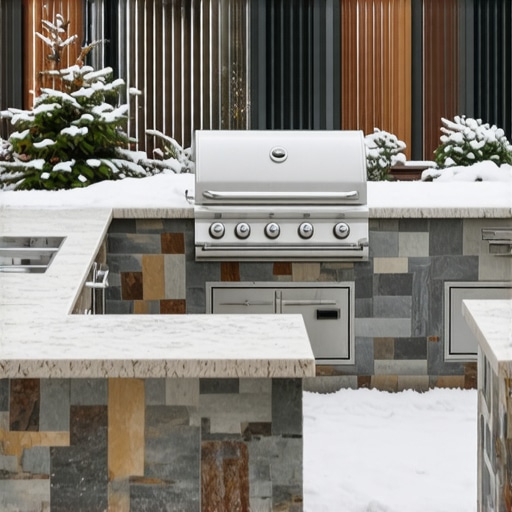
The Silence of the Shattered Slab
I stood looking at a $50,000 outdoor kitchen that lay in a pile of rubble because the contractor forgot one thing: drainage. It was a crisp October morning when the homeowner called me, but by February, that high-end pizza oven had a fissure wide enough to swallow a trowel. The granite countertop was snapped like a dry cracker. This wasn’t bad luck; it was physics. Most contractors treat an outdoor kitchen like a kitchen island that just happens to be outside. That is a recipe for a catastrophic structural failure. When you are building with stone, brick, and mortar in a climate where the mercury drops, you aren’t just a builder—you are a combatant in a war against the freeze-thaw cycle.
The Physics of the Heave
To understand why your masonry fails, you have to look at the molecular level. Water is one of the few substances on earth that expands when it transitions from a liquid to a solid. It grows by approximately 9% in volume. In a confined space—like the microscopic pores of a concrete patch or the crumbling mortar joint repair you did last spring—that expansion exerts thousands of pounds of pressure per square inch. If that water is trapped behind a stone balustrade restoration or inside a masonry core, something has to give. Usually, it is the face of your expensive Belgian brick. This is what we call spalling.
“Water penetration is the single greatest threat to masonry durability. Proper detailing to shed water is the first line of defense against the destructive forces of freezing and thawing.” – BIA Technical Note 7
The Foundation: More Than Just a Slab
Most DIYers and “handyman specials” think a four-inch pour of bag-mix concrete is enough for an outdoor kitchen. It isn’t. You need to account for the frost line. If your footings don’t reach below the frost line, the earth will heave, lifting your entire kitchen and dropping it unevenly when the thaw comes. This movement creates a cold joint where the new pour meets the old, leading to masonry water damage repair bills that would make a banker weep. For heavy outdoor masonry, I always recommend concrete pump masonry mixes that include air-entraining agents. These microscopic bubbles act as tiny pressure relief valves, giving the freezing water a place to expand without shattering the concrete matrix.
The Anatomy of a Winter-Proof Kitchen
When you start buttering your first course of block, you need to think about foundation waterproofing. I don’t care if it’s an island or a retaining wall; the back side of that masonry—the side touching the soil or the interior void—needs a bituminous coating or a crystalline waterproof membrane. Without it, the masonry will pull moisture from the ground via capillary action. You’ll see it as efflorescence first—that white, salty crust—but soon it will lead to the need for mortar repointing services as the binder loses its integrity.
Why Capstones are Your Best Friend
The top of your masonry wall is its most vulnerable point. If you leave the top of a stone wall exposed, rain and snow sit on it, soak in, and then freeze. This is why retaining wall capstone replacement is such a common job for me. A proper capstone should have a “drip edge”—a small groove cut into the underside that breaks the surface tension of the water, forcing it to drop to the ground rather than running down the face of your masonry. When I’m installing a stone balustrade restoration or a kitchen wall, I ensure the capstone has at least a one-inch overhang.
The Chimney and Heat Shield Logic
If your outdoor kitchen includes a wood-fired oven or a fireplace, you’re dealing with extreme thermal gradients. The inside of the firebox hits 800 degrees while the outside is 20 degrees. This thermal shock will shred standard mortar. You must use refractory mortar and consider a chimney heat shield installation to protect the surrounding structure. Without it, the expansion of the inner flue will push against the outer masonry shell, causing those classic diagonal stair-step cracks that signal a failing structure. If you already see these, you’re looking at a freeze-thaw damage restoration project before the next season starts.
“The use of lime-rich mortars allows for autogenous healing, where the carbonation of free lime can seal hairline cracks before they become avenues for water ingress.” – ASTM C270 Standards
The Art of the Mud and the Slicker
When it comes to the mortar repointing services required to maintain these structures, the choice of “mud” is everything. Using a modern, high-strength Portland cement on old, soft brick is a death sentence. The mortar must be the sacrificial lamb. It should be softer than the masonry units so that when the wall moves—and it will move—the mortar takes the stress. If the mortar is too hard, the brick will snap. I use my hawk and slicker to pack the joints tight, ensuring no voids are left for water to hide. If you see honeycombing in your concrete or gaps in your soldier course, you’re looking at a future concrete patch job.
Summary of the Build Process
Building an outdoor kitchen is a marathon, not a sprint. You start with a deep footing, use air-entrained concrete pump masonry mixes, apply foundation waterproofing, and finish with a properly sloped capstone. Don’t let a “lick-and-stick” contractor tell you that thin-set stone veneer is just as good as a full-bed stone. It isn’t. Thin-set stone often traps water behind the veneer, leading to massive failure after a single hard winter. Do it once, or do it twice—the choice is yours, but the ice won’t wait for you to decide.